Adobe ProjectMake a New BinTitle the bin "Export to Resolve"  |
|
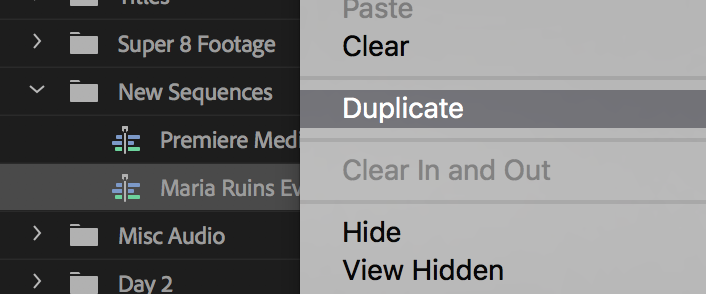
Duplicate the Final Pic lock sequence |
|
| Rename it so it is obviously your final timeline Ex: Export to Resolve - Final 04_10_18 Dates are helpful here!! |
|
| Move the timeline into the newly created Export Bin you just made |
|
If you were using Proxies Reconnect to the 4K media, uncheck the "Enable proxies" under the "Premiere Pro CC > Settings > Media..." menu check box Click OK |
|
To check that the files are being referenced properly to the 4K media you can "right click" on the file in the Project Window and choose "Reveal in Finder" Will now show you that the files are linked to the XDROOT folder using the 4K native data that you backed up off the Sony F5 SXS card Now you can color correct and export at 4K resolution |  |
| Right click the timeline and duplicate it again!! Yes do this because we are going to delete the audio tracks next. |  |
| Title this one the same but put "No Audio" |
|
| Load the copied timeline by double clicking it. It'll load into the Sequence Window |
|
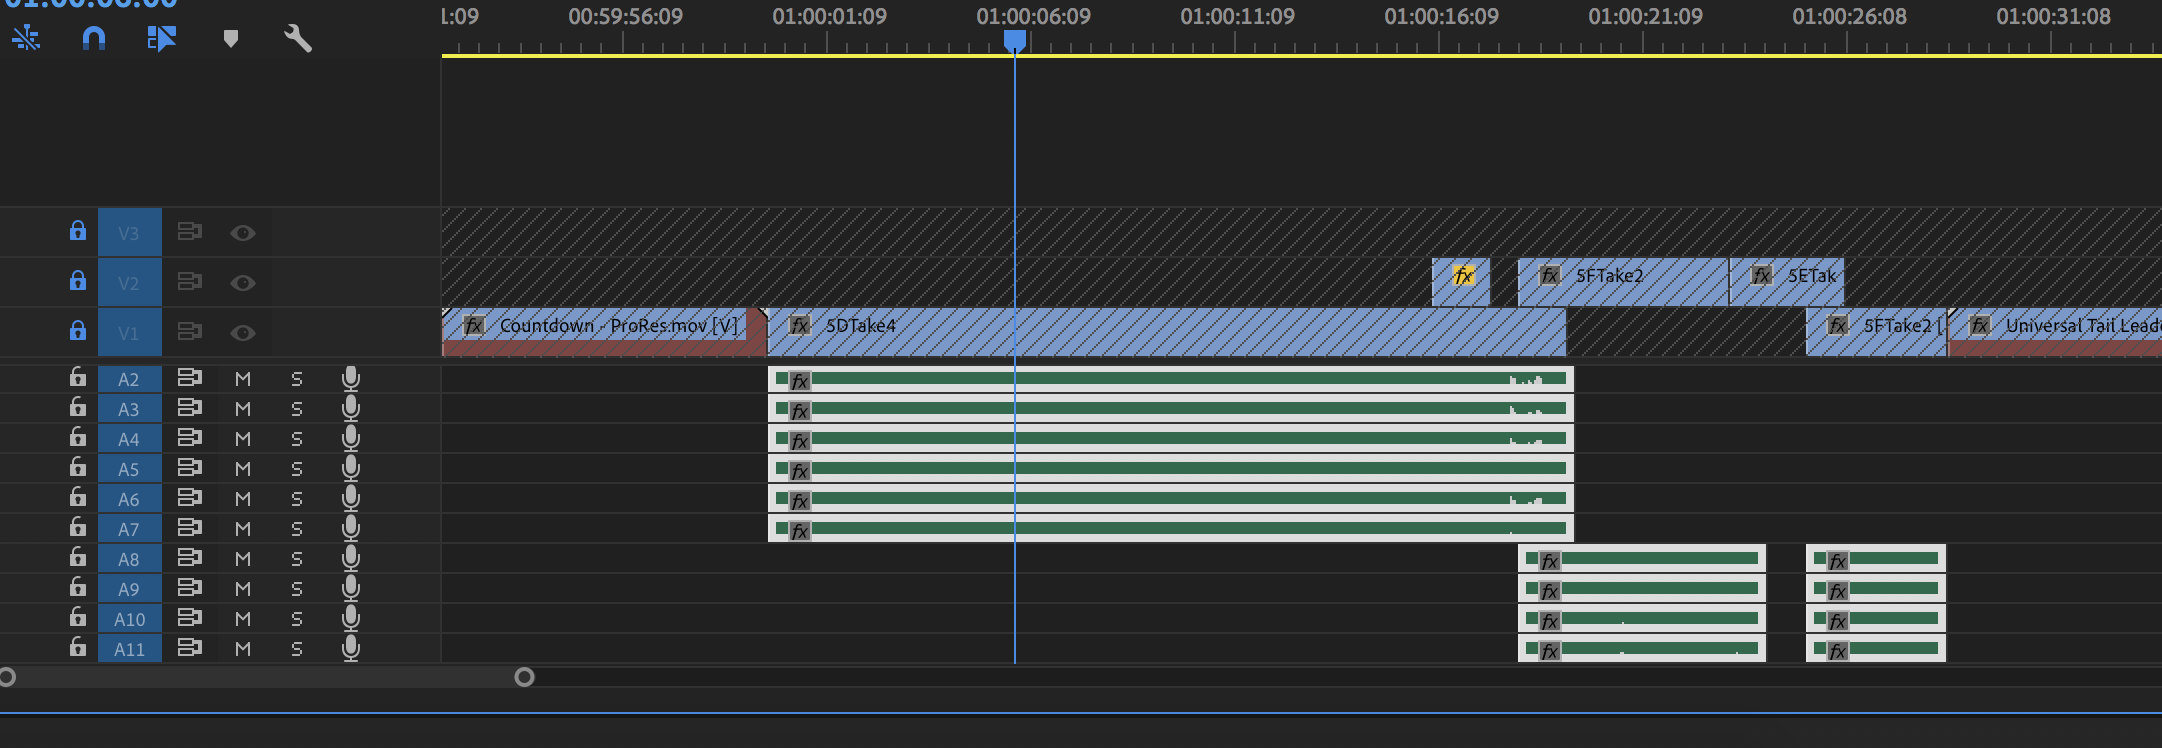
Get all your video tracks down to 2 tracks if possible. 3 at the most. NOTE you do not need subtitles for color correction so remove those Lock all your video tracks |
|
Select all the audio in the timeline "click on command a" all audio tracks will be selected and delete them Select all your audio tracks in the timeline. Click on the "Delete" key this will remove all of the audio clips from the timeline |
|
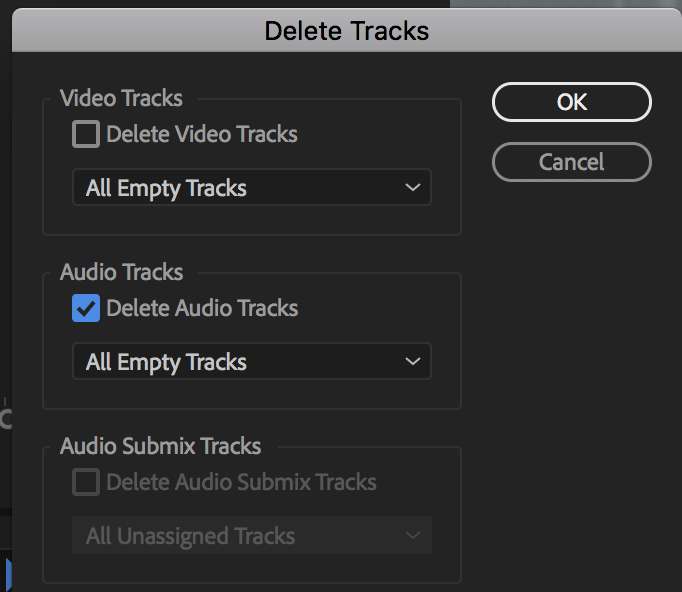
| Then go to >Sequence > and choose Delete Tracks |
|
| Choose Audio Tracks > Check Delete Audio Tracks >All Empty Tracks >OK |
|
Next get the video tracks down to two video tracks Move all the video clips down from V3, V4 and etc. to V1 and V2 |
|
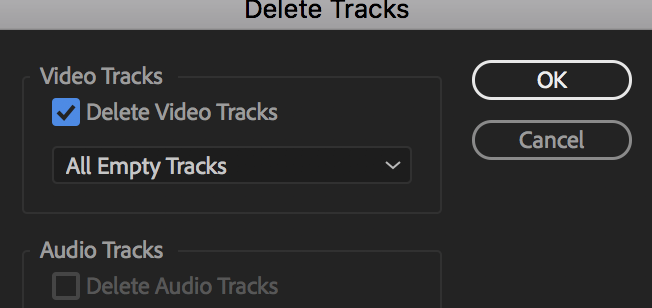
| Then go to >Sequence > and choose Delete Tracks |
|
| Choose Video Tracks > Check Delete Video Tracks >All Empty Tracks >OK |
|
If you were using Multicam select the sequence and then flatten it (right click on the selected video track and select Multicam->Flatten) | |
VERY IMPORTANT BAKE IN YOUR motion effects Flips and flops and splitscreens THESE EFFECTS will not transition over to resolve. Best to bake them into the timeline as high quality clips before you export. | |
Next select the sequence and choose >File>Export>Final Cut Pro XML. . . |
|
Choose a location to save the file click on "Save" |
|
| Click OK here don't worry about this. |
|
| Choose File > Export > Media... |
|
| Choose Format QuickTime |
|
Preset Settings won't work we will have to make a custom setting.But in the meantime choose GoPro or whichever so we can modify it |
|
Click on the Video tab and choose the Video Codec as a DNxHR/DNxHD |
|
Resolution 1080p DNxHD LB 8-bit If you don't have this choice from the drop down then you need to download the codecs from here and install them. Close Adobe Premiere before you install. Then Re-Open Premiere |
|
Go to Video>Basic Video Settings Change to 1920 x 1080 23.976 Field Order - Progressive Aspect - Square Pixels If the fields are greyed out, make sure to uncheck the boxes so you can adjust them to the right settings |
|
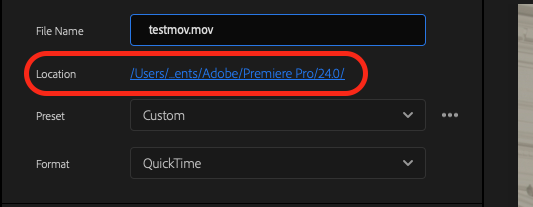
Navigate to your hard drive by clicking on Location and title the file Click Save |
|
Check to make sure that the Source Range is set to Entire Sequence |
|
| Last step is to Click Export to begin exporting the file. |
|
These are the two files you will need!! 1 .mov1 .xmlQuit Adobe Premiere - Save Your Project See this wiki for importing XML into Resolve |
|


Overview
Content Tools