Using the Installed Room System
1. Control Panel
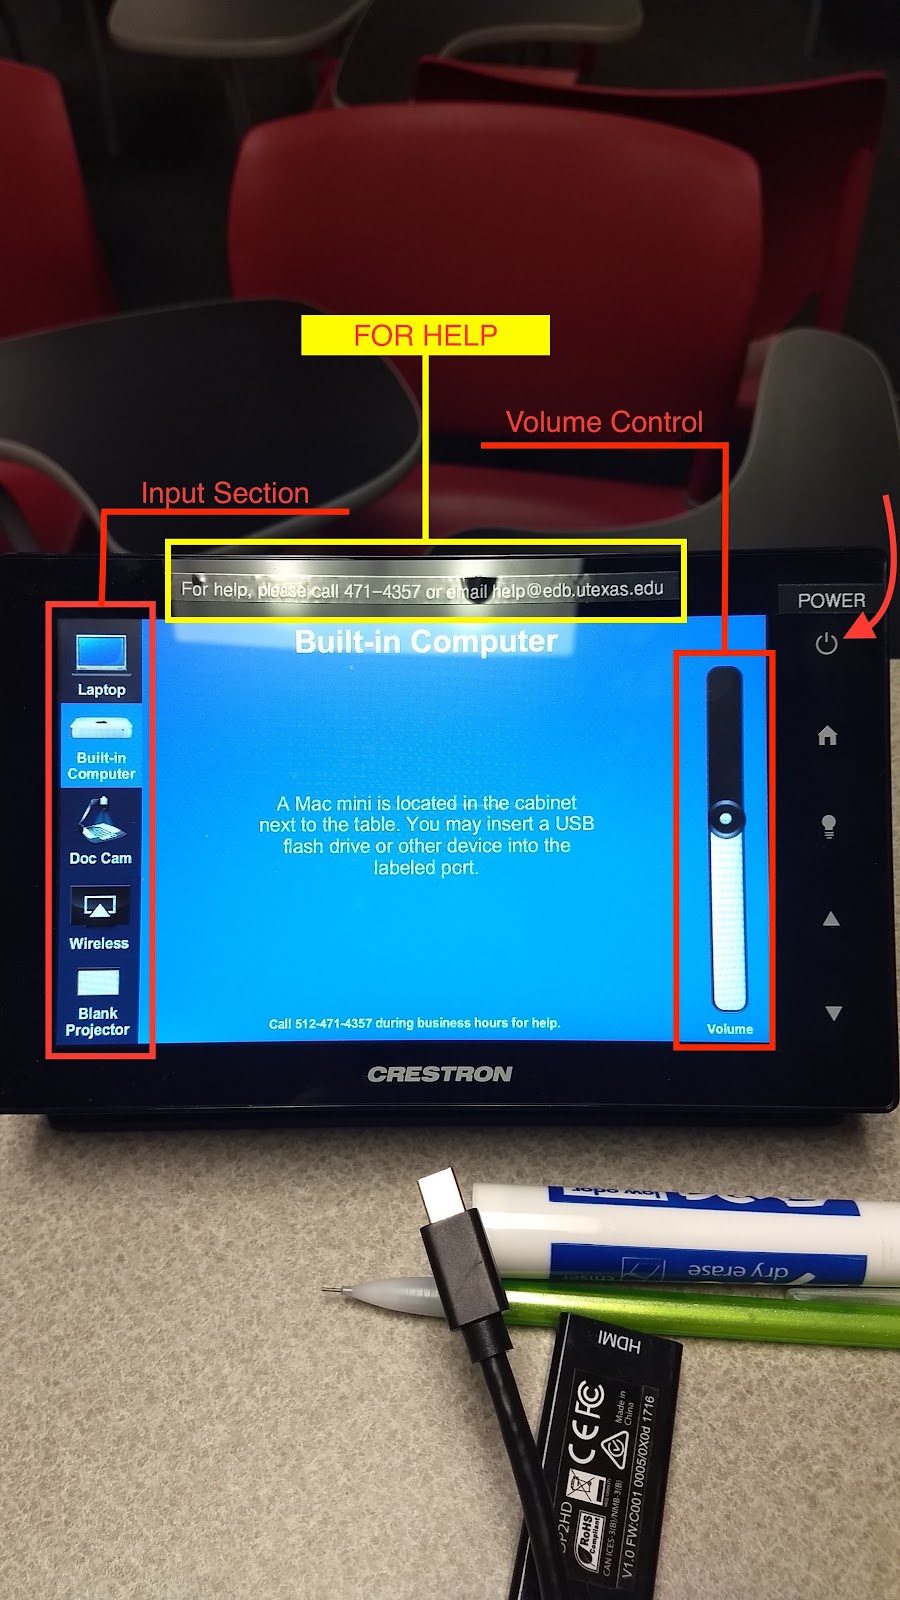
On the control panel, you have a power button, input selection, and volume control.
The power button is located at the top right. Please be sure to power on the system when you need to use it, and to power off the system you are finished.
Please determine which control panel is in the room by viewing the pictures provided here, and read the appropriate information for that panel.
→ Input Selection (e.g. Laptop, Built-In, Doc Cam)
On the Touch Panel to the right, we have it programmed so you can simply press which input you would like to use.
On this Touch Panel to the right, we have it programmed to where you have the drag and drop feature. You will need to press and hold the icon of whichever input you would like to use and drag it to the display that you want the input to be on. Release the icon.
If you are having connectivity issues when connecting with a laptop (screen flickering, discoloration, audio coming and going), there may be an issue with the adapter/dongle connecting to the laptop. Try a different adapter/dongle or output on the laptop and see if the issue is resolved. If the issue continues, contact us at 471-4357.
→ Volume Control
On both programmed Touch Panels, there is a slider located on the right side of the screen to adjust the volume of the selected input. On the drag and drop programmed Touch Panel, you will need to select which input you would like to have playing.
Once you have selected the input, the speaker will illuminate blue to let you know that is the audio that you have selected. The non-selected audio input will not be illuminated.
If all of the steps above have been completed and there is still an issue with your image or audio, please proceed to the next troubleshooting tips.


2. Processor
If you are still having issues with the image deploying or audio, it is recommended that the system be reset. To do this, you will need to press the HW-R button. This process may take a couple minutes to re-initialize.
On the processors, there is a HW-R button. On this DMPS-100-C, it is located on the left of the processor.
You will need something small to press the HW-R button to reset the hardware.


There is a sticker at the top of the touch panel with contact information; if you need help after you have tried all of the steps that we have provided please call us at 512-471-4357
Using the Logitech Videoconferencing Equipment
To use the Logitech Video Conferencing equipment installed in the room you will need to do the following steps below.
These rooms have a Video Conferencing kit installed in the spaces.
- BEL 325
- BEL 404A
- BEL 602A
- BEL 628B
- BEL 858
- BEL 962
- BEL 1005
- You will need to sign in and launch your Zoom meeting to complete the following steps. The Logitech Group Camera setup can be used without using Zoom but for these instructions they will be used with Zoom. You can use this kit like a web cam.
- -Connect the USB cable labelled WEB CAM to the device you are using.
- Using the built-in mac mini for the room system the USB cable will plug into the USB port in the front of the cabinet next to the instructor console.
- Using your laptop connect it to your USB port.
- If your laptop doesn’t have a USB port for the connection use the proper adaptor to connect the USB cable labelled WEB CAM.
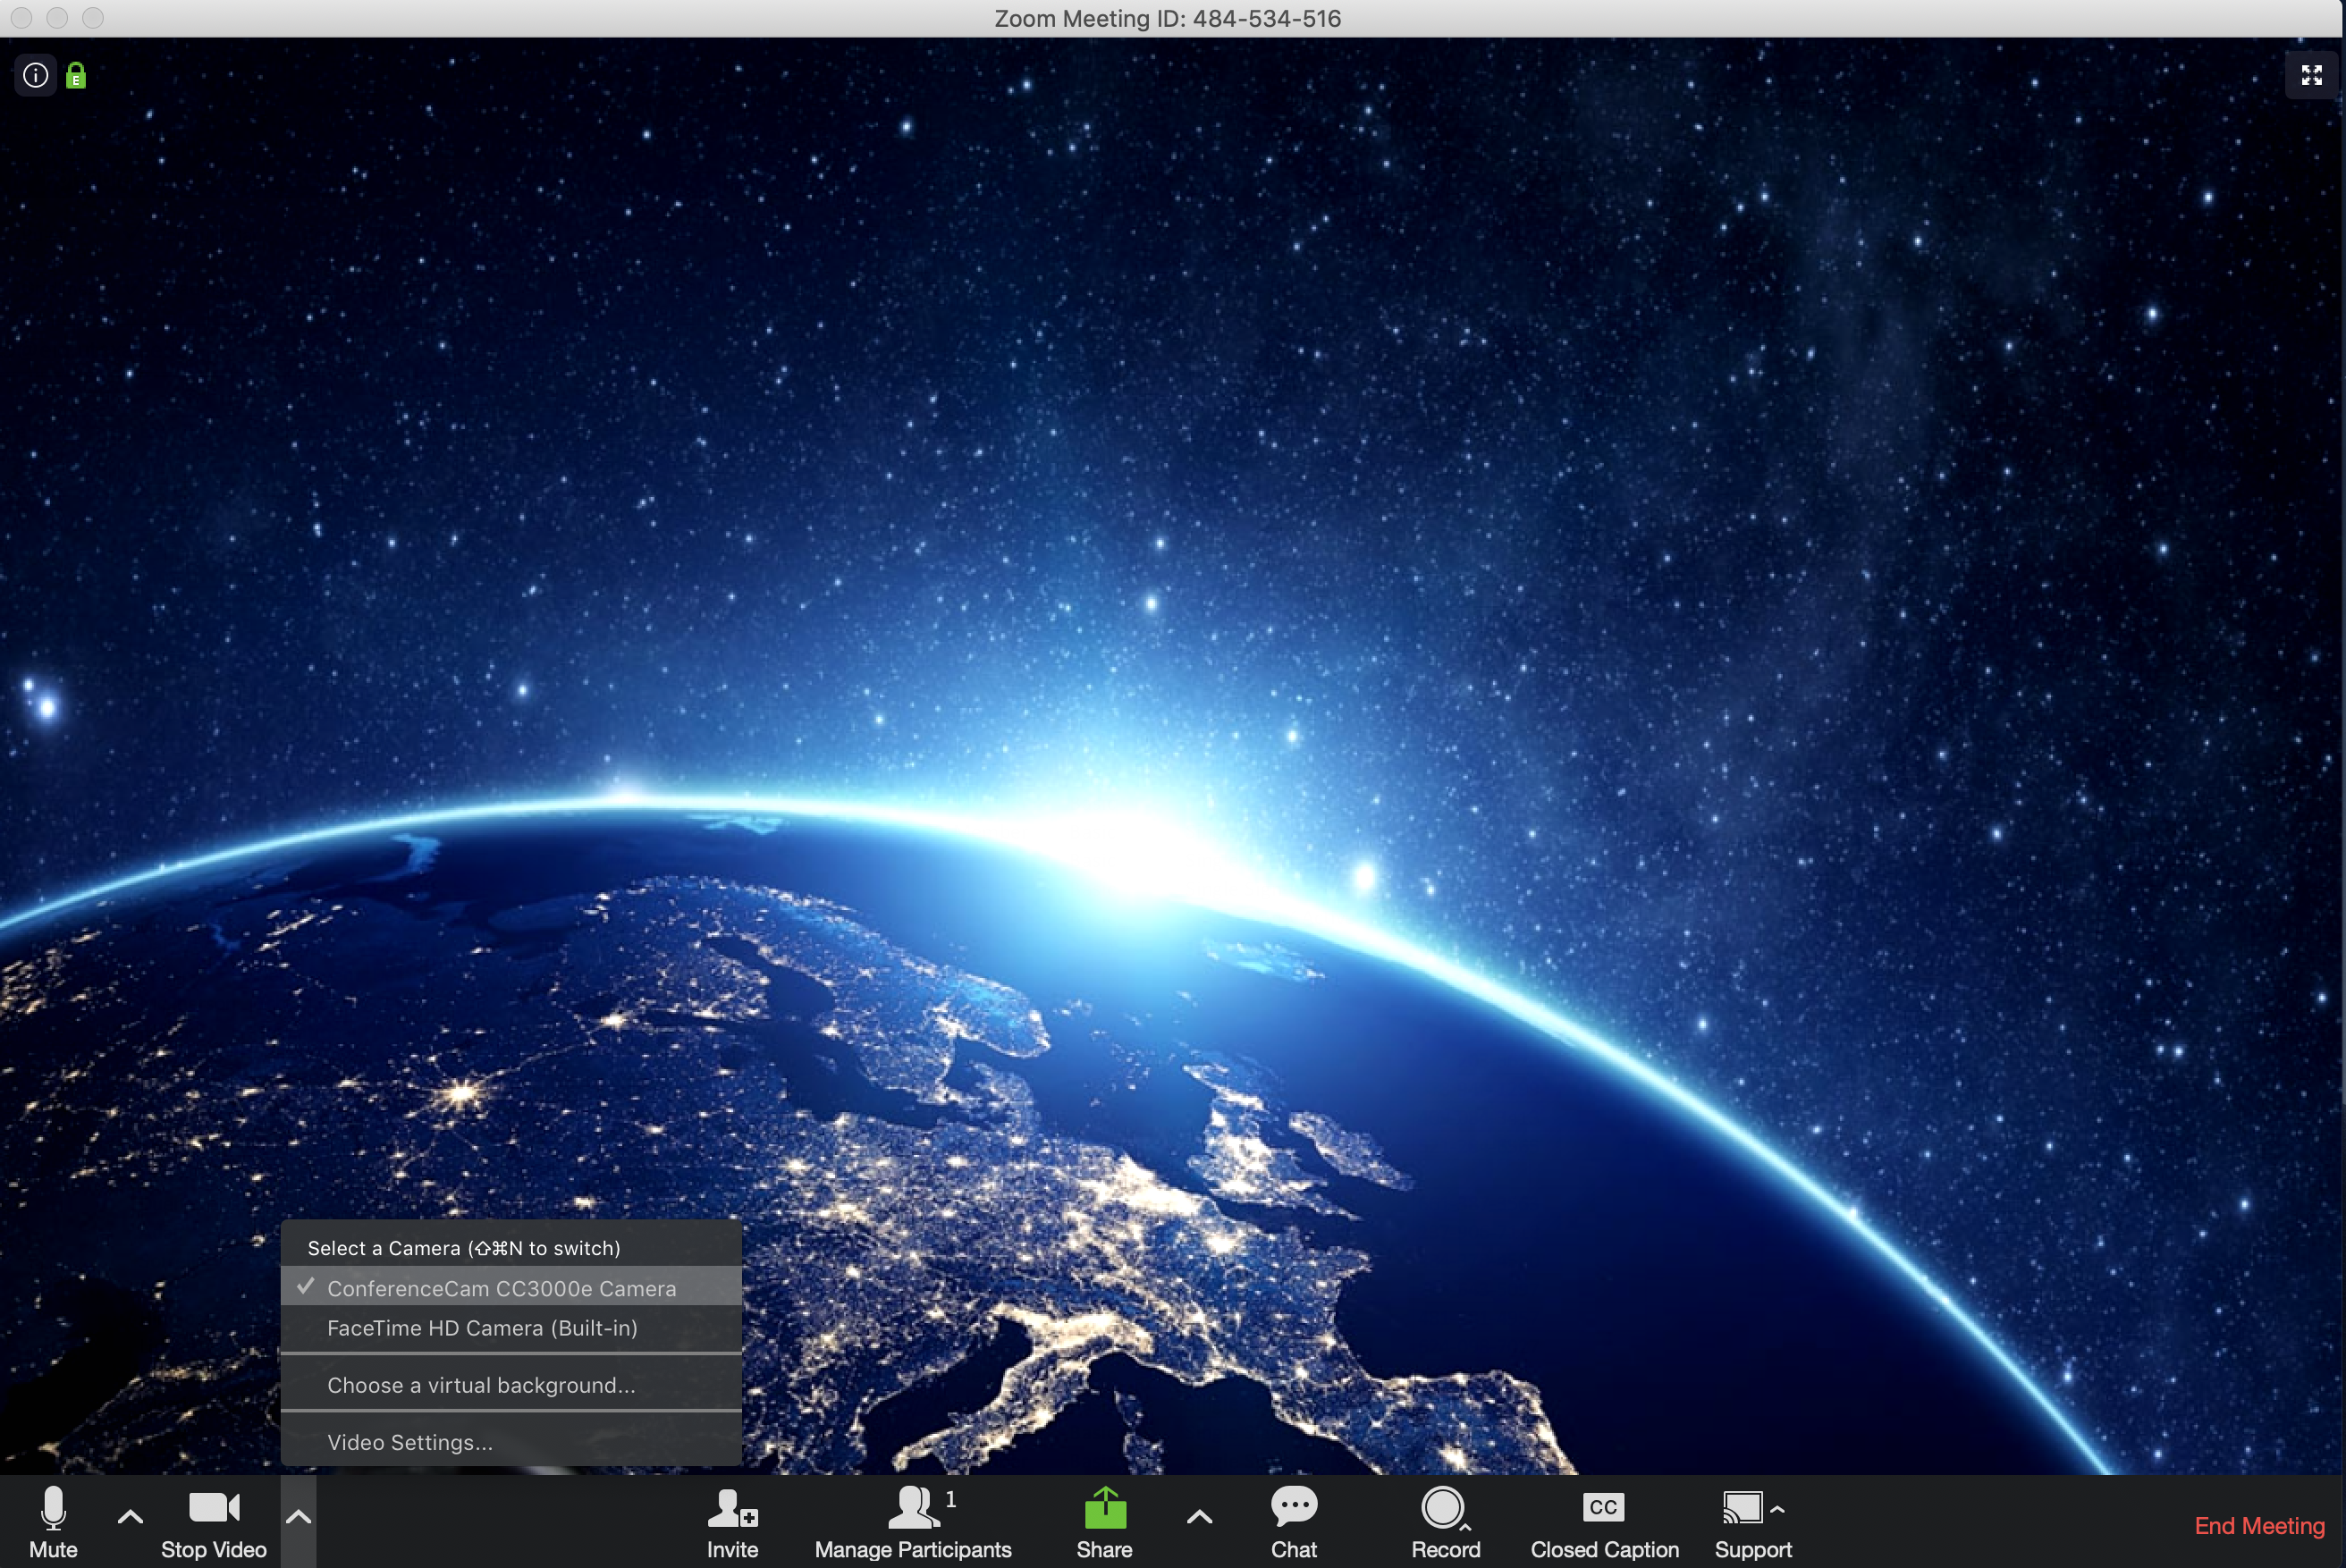
You can check to see if the Camera and speakerphone are connected by clicking on the ^ (carat) to open a selection menu in the lower left by the microphone icon and the camera icon. As shown below.
Microphone and Speakerphone should say Logi Group Speakerphone.
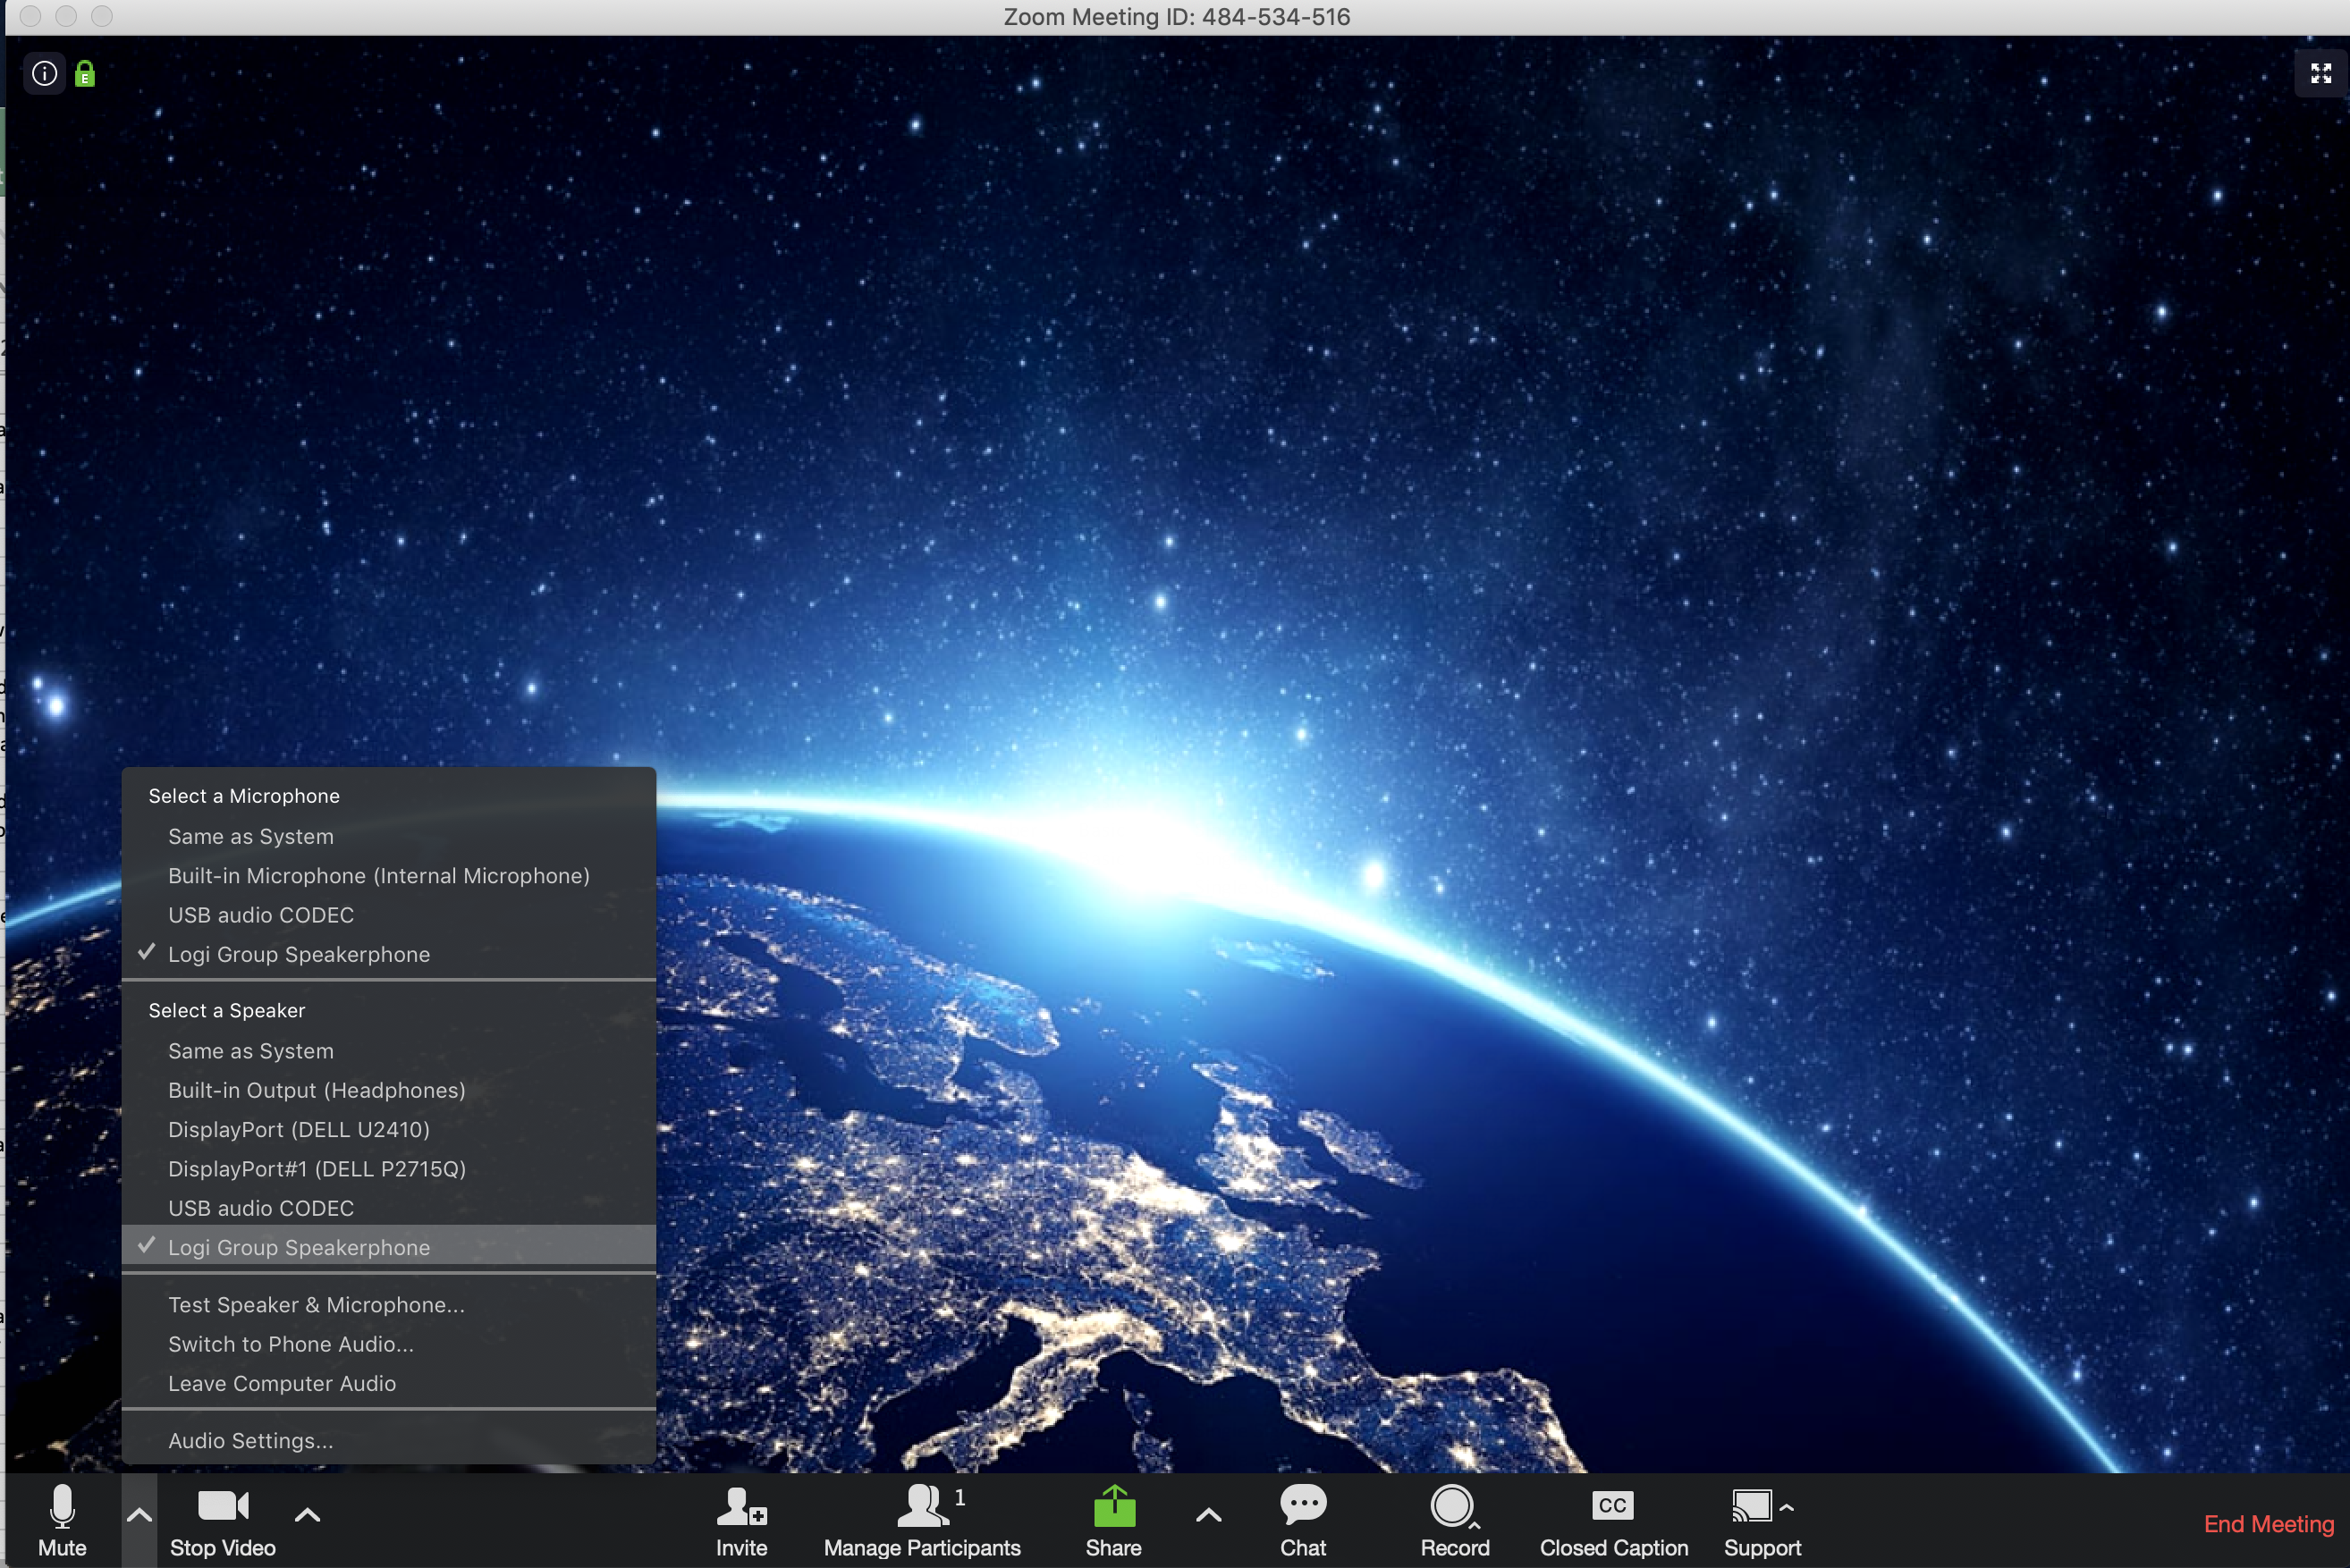
The Camera should be the ConferenceCam or Logi Group Cam.
You will be able to adjust the camera by using the arrow buttons and magnifying icons on the speakerphone or remote. There are 3 presets for the room that you may select that could suite your needs.

There is a sticker at the top of the touch panel with contact information; if you need help after you have tried all of the steps that we have provided please call us at 512-471-4357
Overview
Content Tools