Page History
| Open Avid or Premiere |  |  |
Start a New Project -In AVID, make sure the project frame rate matches your footage frame rate -In Premiere, it doesn't matter that much | 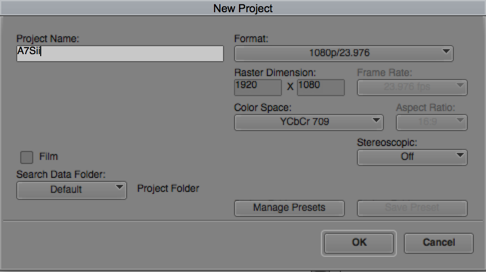 |  |
Use the Browsers to find the footage -In Avid it's called the "Source Browser" -In Premiere it's called the "Media Browser" | 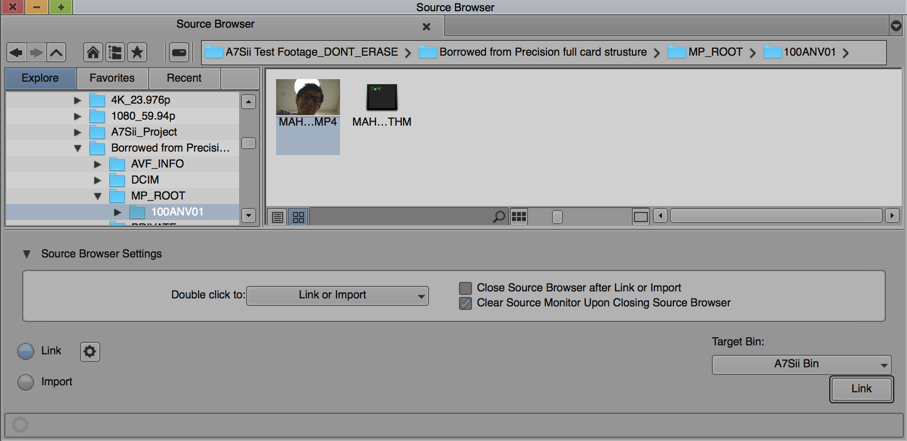 |  |
Import your footage -In Avid click the Link button -In Premiere right click and choose Import |  | 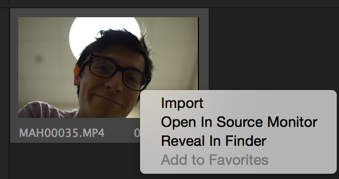 |
You're done, just edit like you would normally. Unless you need better performance... ...If so, proceed. | ||
At this point -Avid is linked to the native file. You can tell because under the video column it says H.264. -Premiere is also linked to the native file. You can tell because under the Video Codec column it also says H.264. | 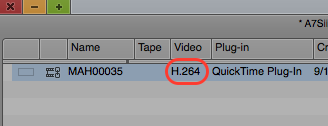 | 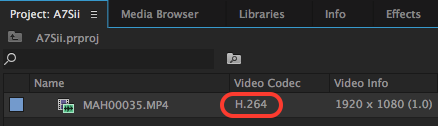 |
In Avid, before turning the clip into a more edit friendly codec, you need to create some bread crumbs so Avid can relink to the original footage when your finished with your timeline. To do this, select the clips in the bin and choose Clip>Modify>Modify Clip...
In Premiere, you'll skip down a few rows on this help sheet until you see pics in the far right column again. | 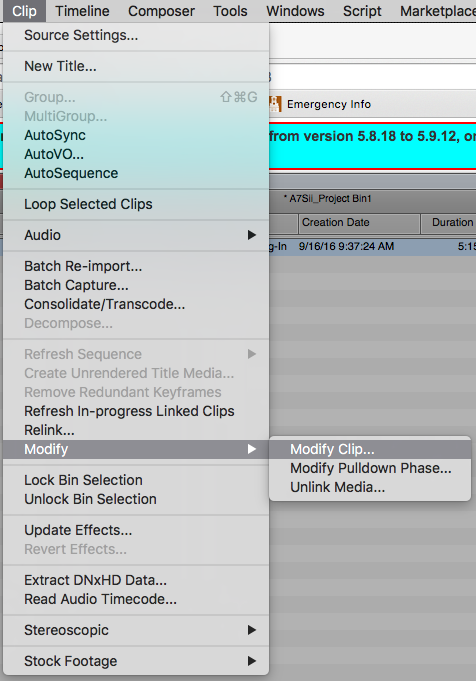 | |
| Choose Set Source from the dropdown options |  | |
| Click New | 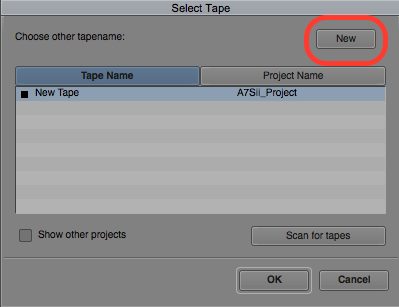 | |
Type an 8 character or less identifier I recommend date shot and camera id... EX: If you shot on this card on 9/10/16 with camera A then use 091016A |  | |
Click the black square next to the identifier you just typed this will get you out of name editing mode. | 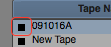 | |
| Then click OK in the Select Tape window | 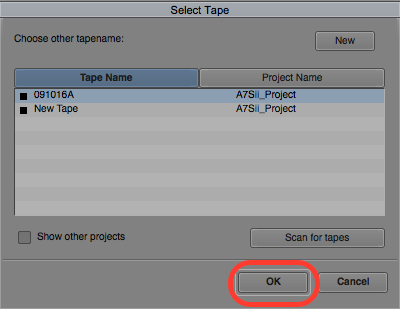 | |
| Click OK in the Modify window | 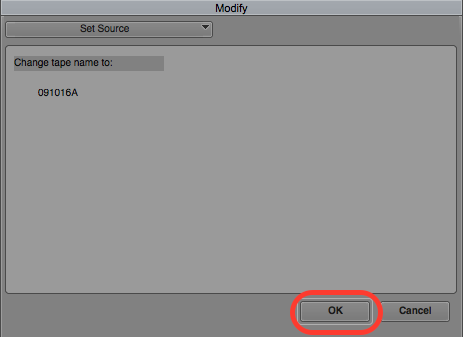 | |
| Click OK when it says this | 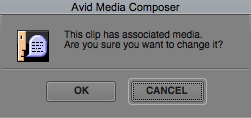 | |
| Click OK when it says this | 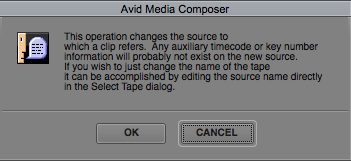 | |
If you receive this error, you will need to create an Avid Project with the correct frame rate, like we mentioned in the second step of this help sheet. This means if you have multiple frame rate clips...each frame rate must have it's own Avid project. | 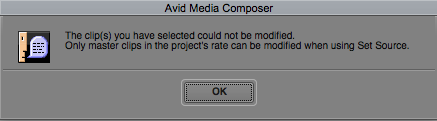 | |
If you see the name you gave your "TAPE" under the Tape column, then you've succeeded. What we're doing here is making avid think that this media came from a Tape with a specific name. This helps because tape name is the default setting that avid uses for relinking media...it makes things much easier and more reliable down the road. | 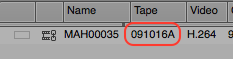 | |
| If the tape name area is blank, it didn't work and you will probably have a REALLY HARD TIME reconnecting/relinking your footage. | 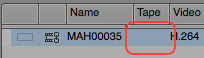 | |
| Now select you clip in the bin and choose Clip>Consolidate/Transcode | 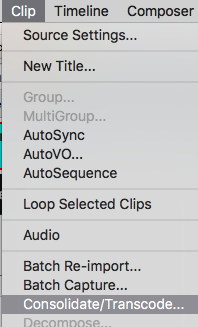 | |
Choose Transcode Choose a drive Choose a video resolution Convert the audio (it's always a good idea to do this even if the audio has the same bit depth and sample rate because it forces avid to recreate MXF audio files in it's own format.) | 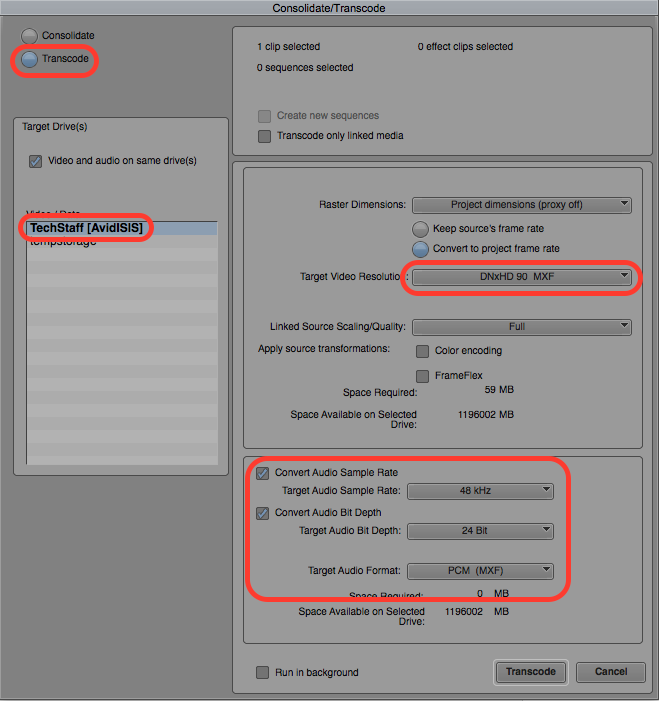 | |
| Now you'll have a "NEW" clip or clips in your bin that are very Avid friendly. Edit with these clips. Maybe even move them into their own set of bins. The edit friendly clips are denoted with a ".new.01" or other number if you've done this more than once. | 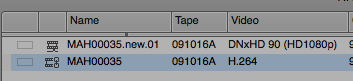 | |
| In Premiere, you'll want to right click on your clip and choose Proxy>Create Proxies... |  | |
Change the format to Quicktime (since H.264 is what got us into this mess) Change the preset to something appropriate (Prores something usually works) Or Add you own Ingest preset Notice that you can put proxies where ever you want, or let them live next to the original media BUT in a proxy folder. | 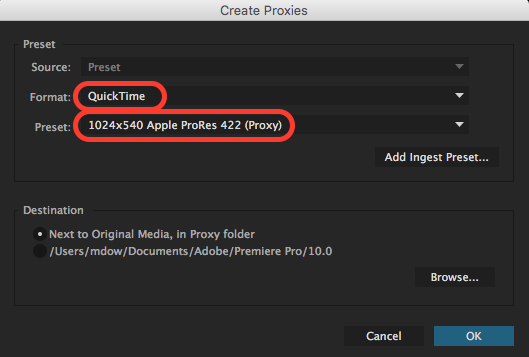 | |
| When you click OK, Media Encoder will pop up in the back ground and get to work making your proxies. |  | |
To start editing with those proxies you'll need to dig through some convoluted menus. Choose Premiere Pro CC>Preferences>Media... | 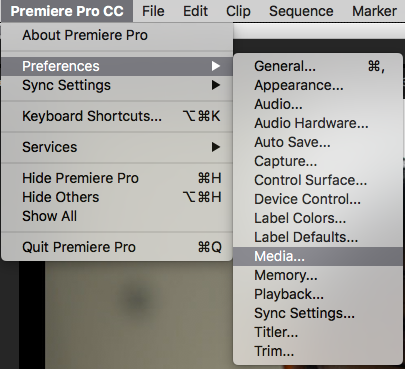 | |
Click the check box next to Proxies...
...I know, right? | 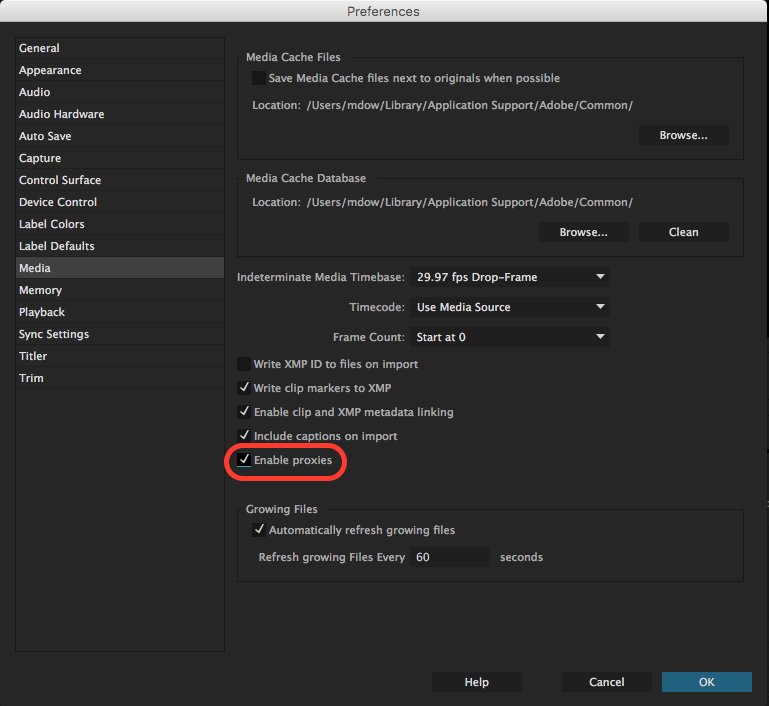 | |
| To connect back to the original footage (like when your done editing or want to check for critical focus), uncheck the Enable Proxies box. | 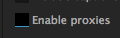 | |
I find this check box is in a ridiculous place. So mapping a keyboard shortcut may be something you'd want to do to toggle this setting back in fourth. Choose Premiere Pro CC>Keyboard Shortcuts... | 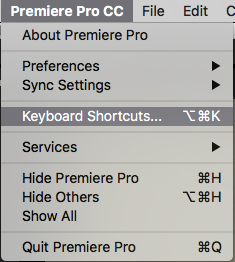 | |
| Type "proxies" into the search bar |  | |
| Select Toggle Proxies |  | |
| Click the space under Shortcut |  | |
Hold down something like command+option+P Then click OK | 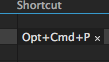 | |
| I've noticed that toggling between proxies and originals using the built in proxy settings adds black pillar box bars to the sides of the image. If this bugs you feel free to make your own Ingest Preset in the Create Proxies window. |  |
Overview
Content Tools