Page History
If your mixer did not give you "One" file that contains 6 channel but instead gave you 6 separate .wav files then use this workflow
AVID - How to Make a 1920 x 1080 HD - 5.1 QuickTime Using 6 separate files Left, Right, Center, Lfe, Ls, Rs
| Open your AVID Project |
| |||
| Make a New Bin to import your surround sound mix files | |||
| Title the bin how you wish | |||
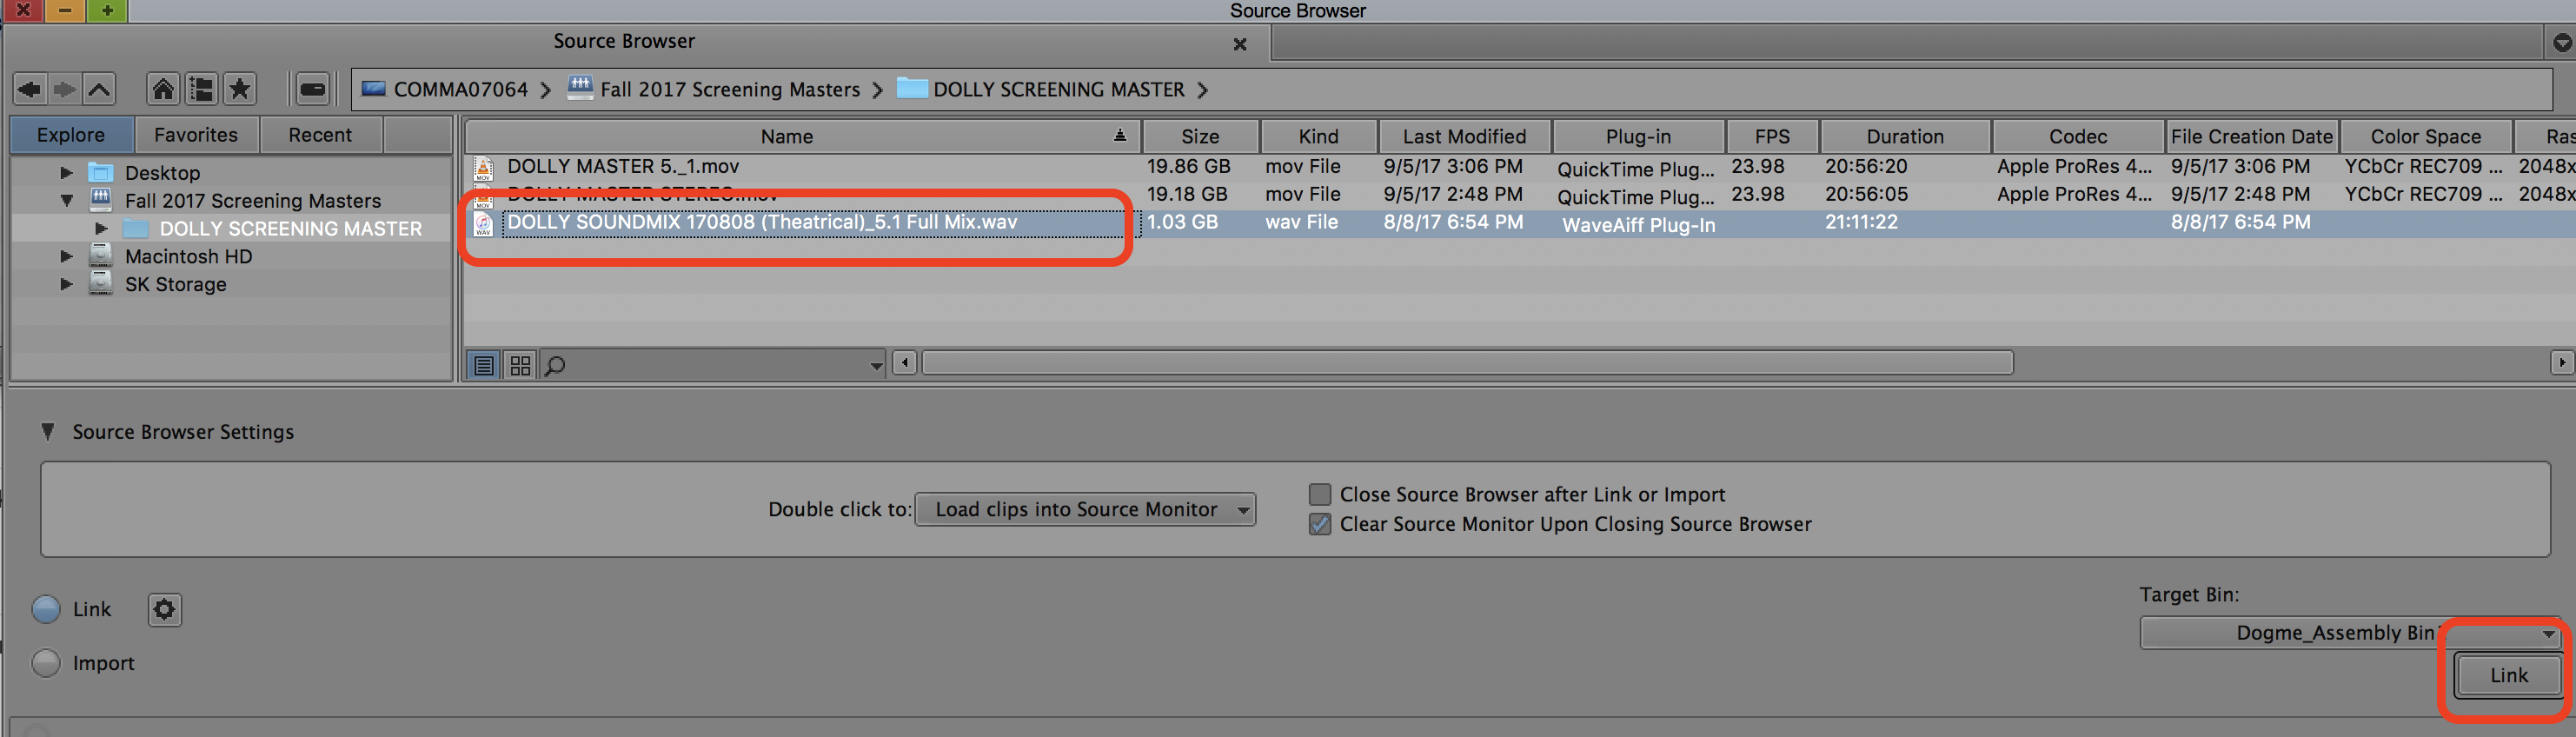
Link to the Surround Interleaved file that you received from the mixer Go to >Tools>Source Browser> |
| |||
The file will be a 5.1 Full Mix.wav file Click on Link |
| |||
| The file will appear in the bin |
| |||
| Right click on that linked file in the bin and choose Modify > Modify Clip... |  | |||
| Choose Set Multichannel Audio from the drop down |  | |||
| Choose 5.1 SMPTE: L R C Lfe Ls Rs |  | |||
When you load it into the source window the file will have a 5.1 icon on it shown here |
| |||
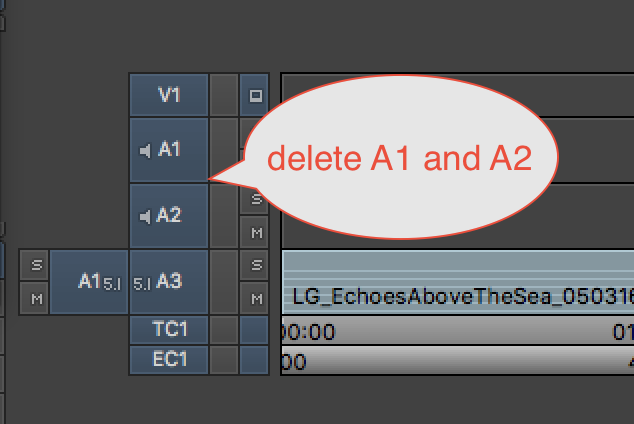
| Create a new sequence and edit the 5.1 audio into the new timeline and then delete the other audio tracks that are automatically generated in the timeline |
| |||
| delete the other audio tracks that are automatically generated in the timeline |
| |||
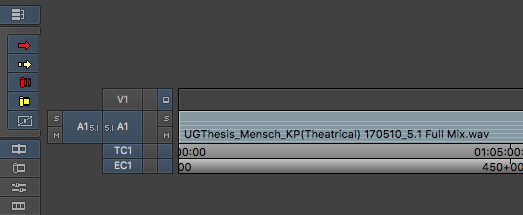
| Edit the 5.1 audio file into this new timeline |
| |||
Next need to make your video file to overwrite the 5.1 audio file Select your final color corrected timeline in the bin and double click it to load it into the timeline interfacee  |  | |||
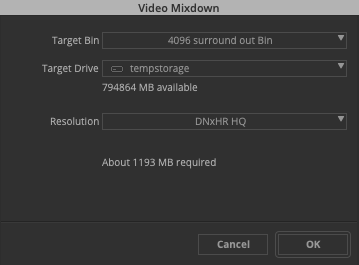
| Next choose Timeline>Mixdown>Video |
| |||
Choose the bin in AVID you want to save the file Choose where the .MXF will be saved (your hard drive) Resolution DNxHR HQ MXFHQ |
| |||
| You will end up with a file titled Video Mixdown after the title of your timelin |
| |||
Load that video mixdown clip into the source browser and edit that on to the newly created 5.1 timeline that contains the 5.1 audio. |
| |||
Check the Sync of the entire movie before exporting Remove the 2POP from the timeline at the head and tail. |  | |||
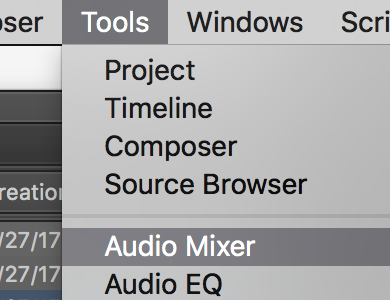
| Next go to >Tools Audio Mixer |
| |||
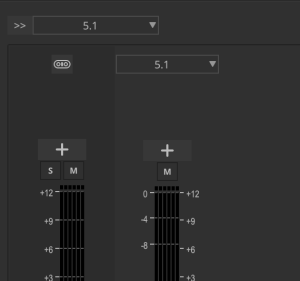
Change these audio mixer settings for the source and record side Set the "Monitor Mix Format" to 5.1 SMPTE: L R C Lfe Ls and Rs |  | |||
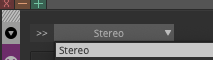
| Note if you are on a laptop or a computer w/o surround sound hardware connected you won't be able to set the "Monitor Mix Mode" to surround you will just leave it stereo |
| |||
| Set the "Sequence Mix Mode" side to 5.1 as shown here |
| |||
Make sure that both say 5.1 Close the Audio Mixer |
|
| ||
Export the timeline Select the Sequence to export that has the video mixdown with the 5.1 audio |
|
| Select the Sequence |
|
| Go to >File>Output>Export to File |
| |||
| Click on Options |
Note the Preset for DCP is either Scope or Flat. If your film is 1:85 (no wide screen letter boxing) choose Flat If your film is 2:39 (with the wide screen look and bars on top and bottom) choose scope |
| ||
Choose MXF OP1a Video Compression DNxHD HQ Mix is 5.1 Make sure Interleaved is checked |
| |||
Choose |
| Perform the export choose a place to save the file choose And Choose Save
|
|


Overview
Content Tools