Page History
To export to resolve |
| ||||||
Go to format and deactivate 3d to off |
| ||||||
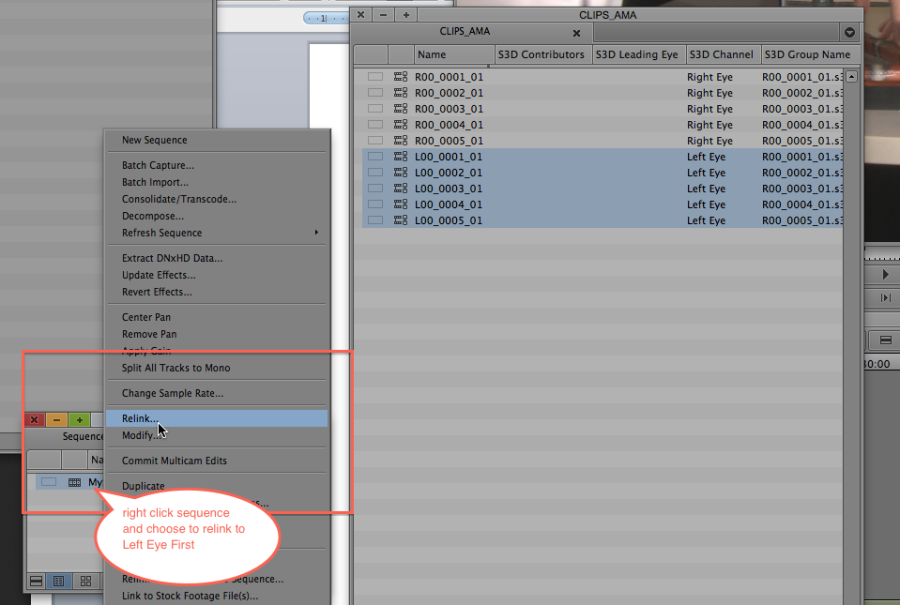
Go to the original AMA linked clips and make sure that all the left eye and the right eye are in the |
| ||||||
Select all the "Left" AMA linked clips and right click the sequence and choose Relink |
| ||||||
Choose selected items in all open bins |
| ||||||
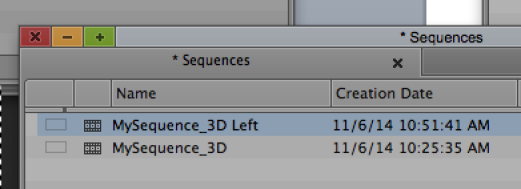
Name the new sequence with Left |
| ||||||
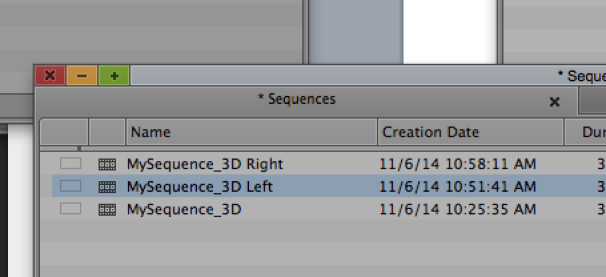
Select all the AMA Right Eye clips and right click the "Left" reconneced new sequence and choose relink |
| ||||||
Choose to relink to selected items in open bins by S3D group name that you can select by choosing "More">S3D Group Name |
| ||||||
Rename this new sequence "Right" |
| ||||||
Make sure that you are matching back to the AMA linked files on the new Left and Right Timeline |
| ||||||
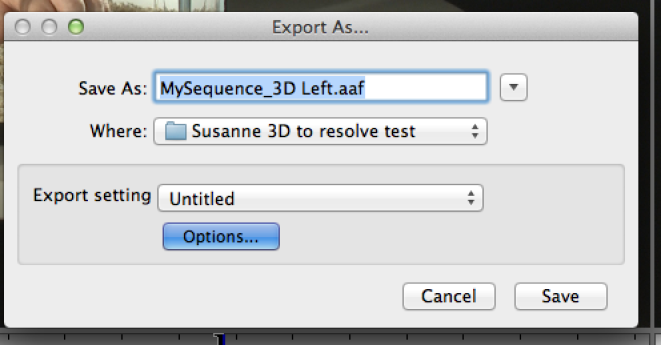
Export .AAf from each Left and Right Timeline |
| ||||||
Choose >File Export |
| ||||||
Choose Options |
| ||||||
Choose the following export settings |
| ||||||
Make a folder for the consolidated files for the left and right eye exports |
| ||||||
Here is an example of how the files should have been saved after export to .aaf |
|


To Bring into Resolve |
|
NOTE before opening Resolve - Make a folder on the destination hard drive to store the user database |
|
To Bring into Resolve – Launch Resolve Application |
|
For a new user you will have to set up your account |
|
Click the "+" icon in the lower right to add a new user |
|
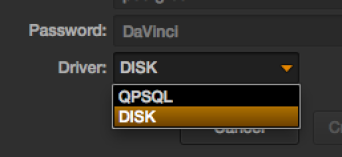
Choose "Disk" as the Driver |
|
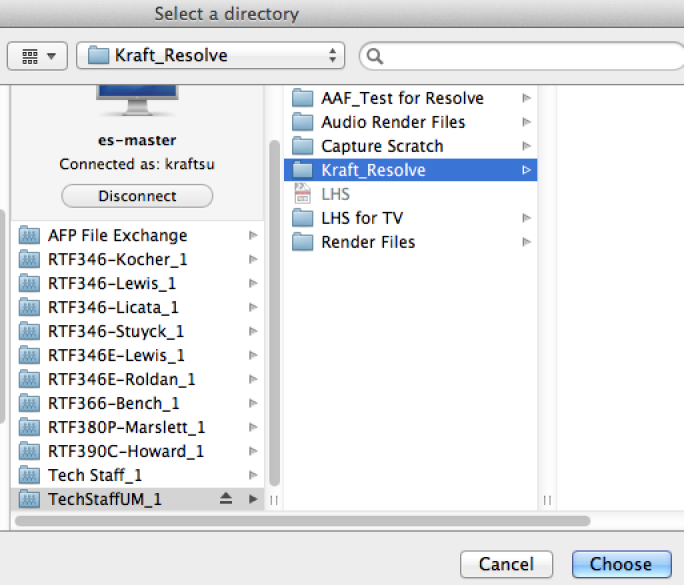
Click on "Host" to select a directory to store your settings. |
|
NOTE before opening Resolve - Make a folder on the destination hard drive to store the user database |
|
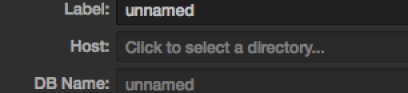
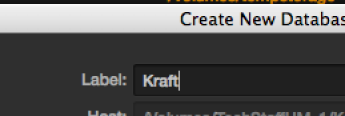
Label your User Database |
|
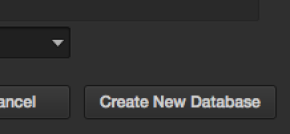
Choose to create new database |
|
Database creation successful. Next Double Click on the new database you just made. Example here in "Yellow Font" double click on that to load it. |
|
Close the window |
|
Next create a "New USER" |
|
Enter in Username |
|
Log in |
|
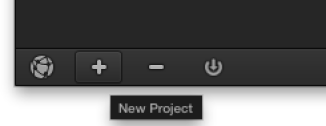
Click the "+" button in the lower left corner to create a new project |
|
Title the project – click Create |
|
Double click the project to load it |
|
Set up some preferences. Click on the Preferences Icon in the lower left of the screen |
|
Go to "Autosave" and turn it on saving every 10 min |
|
Also can choose some decoding presets – If you are using footage from a Red – Arri – Sony etc choose the correct decoder. |
|
Monitor playback settings chosen here. Choose HD 1080PsF 23.976 generally |
|
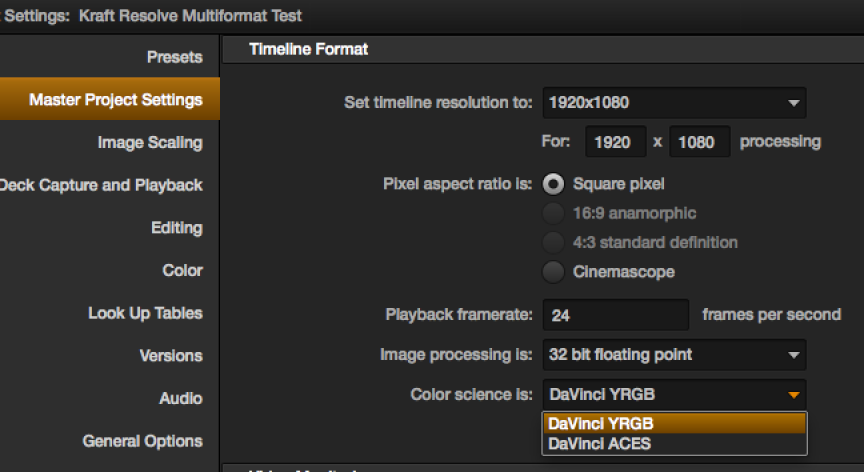
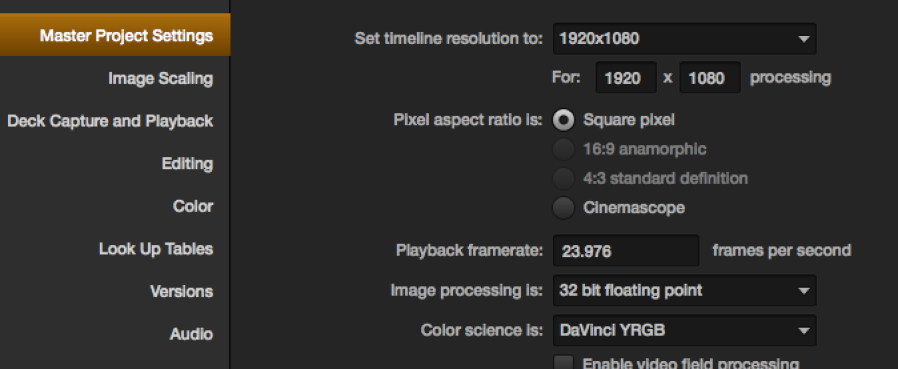
Master Project Settings generally will want 1920 x 1080 but if you have 2K footage and want to scale up then choose 2048 x 1080 or 2048 x 1024 |
|
Change the playback framerate to 23.976 |
|
Click "Apply" to apply the settings |
|
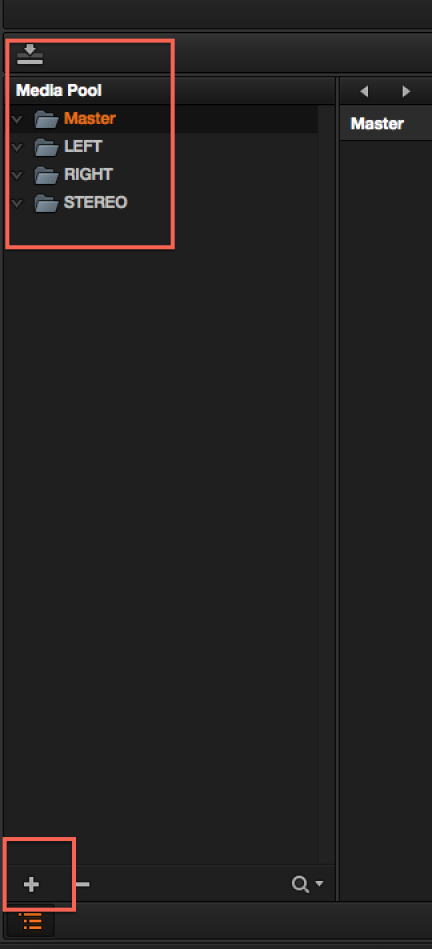
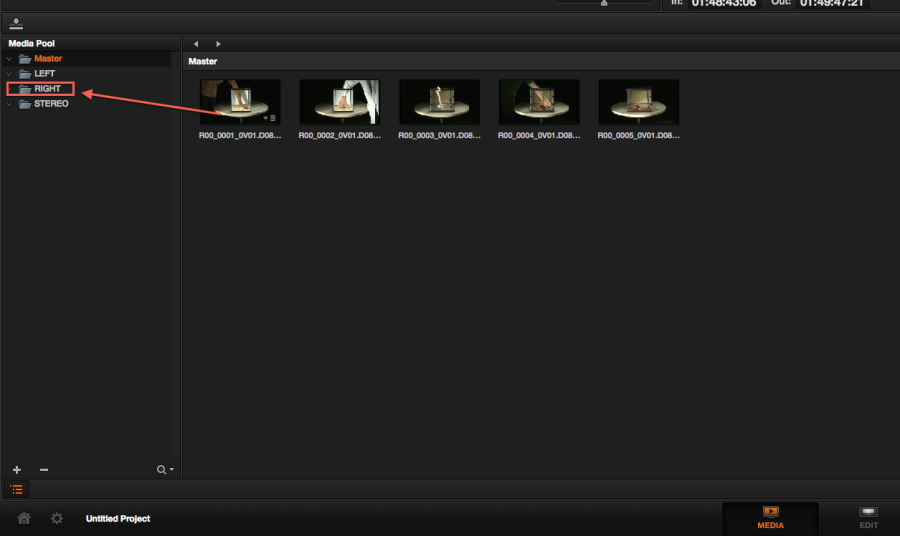
In resolve make 3 bins in your media pool |
|
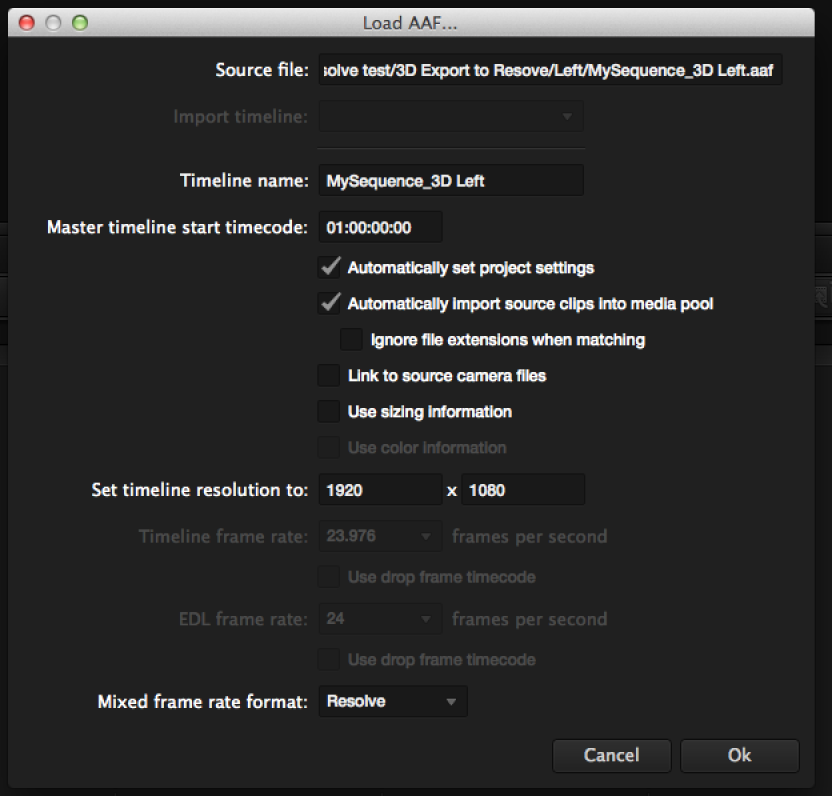
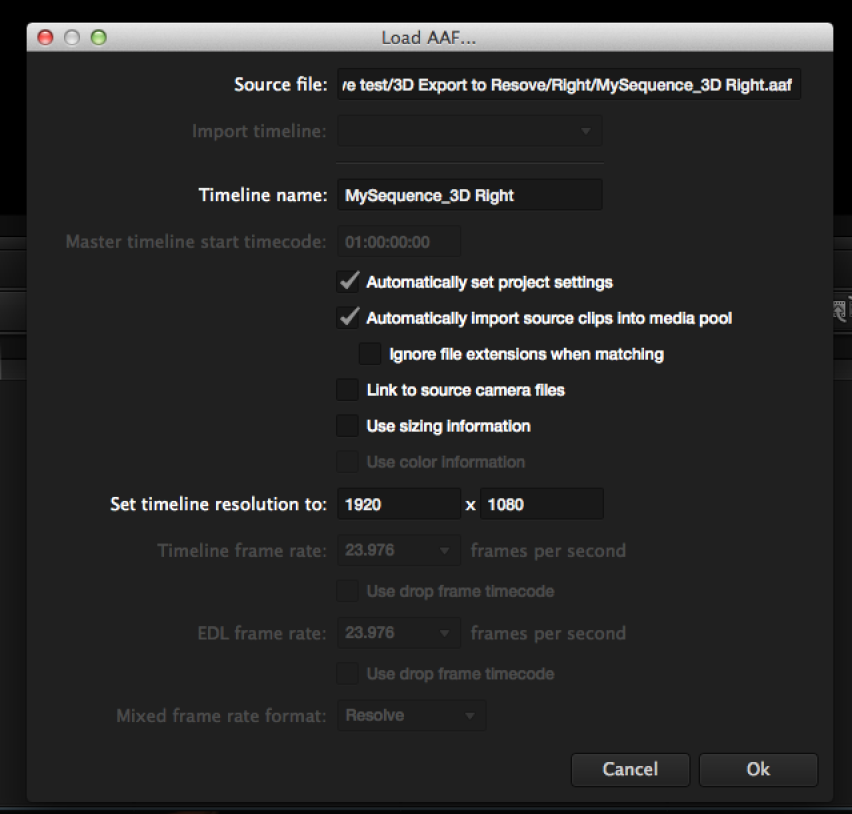
Go to "Edit" tab and choose to Import AAF |
|
Choose import |
|
Choose the Left First |
|
Default settings are good |
|
Click on Media tab and drag the Left Media to the Left Bin |
|
Go back to the Edit Tab |
|
File>Import AAF |
|
Navigate to the Right eye .aff |
|
Default settings are fine |
|
Click on Media tab and drag the Right eye Media to the Right Bin |
|
Click on Master folder and choose> |
|
Choose Stereo 3D Sync |
|
Chose the Browse button and navigate to the left and right eye folders |
|
Choose Right for the Right Eye Folder |
|
Output folder will be Stereo |
|
The done dialog will appear |
|
Stereo folder will only have media Left and Right will be empty |
|
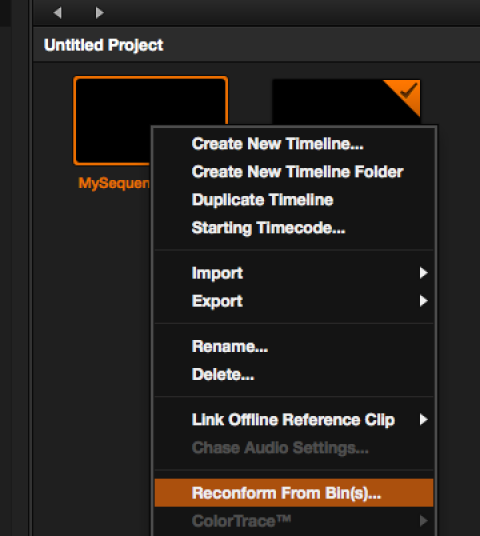
Go back to Edit tab |
|
Media offline is normal |
|
Click on the Left timeline and chose to reconform from bins |
|
Choose only the Stereo folder and click OK |
|
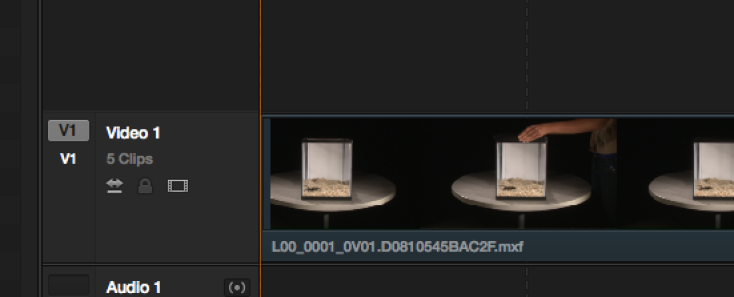
Timeline reconnects |
|
Click on Color tab this is the time to do all the color correction work |
|
Click on 3D tab |
|


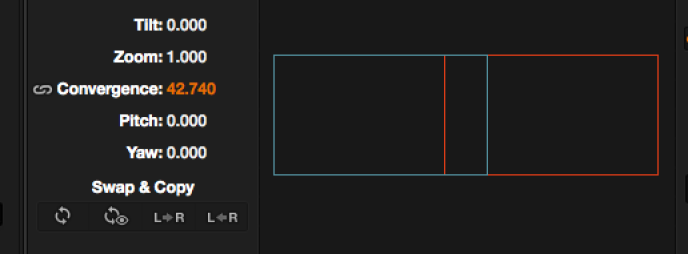
There is a convergence tool
Go to the deliver tab for export

Render Settings>
Choose Single Clip>Quicktime>AppleProRes 422 HQ 1920 x 1080 or whatever aspect ratio you are wanting to export.

Choose audio off


To Sync with Mix - AMA link or fast import into AVID 1920x1080 23.98 project and make a new stereoscopic clip. Import the audio mix into same project and check sync. Export that for screenings or DCP.
Overview
Content Tools