Page History
...
Tools for sync-ing double-system audio with picture.
AutoSync is the function in AVID that links your sound clips to your video clips and makes new "Synced SubClips" that you use for editing. | |
After you have transcoded your video files and IMPORTED your audio files into your AVID Project
NAME and Organize the files by >Scene and Take numbers
Example here the labeling is "Scene/Take" "Scene 14A/Take 1" or 14A/1 Make sense?
Do this for all your image and sound files so they'll be easy to identify during syncing process |
|
|
|
|
|
|
|
Make sure you didn't move the clps you just made a copy
|
|
Load the Video Clip into the source monitor
Go frame by frame till you get to the point where the clapper strikes and mark and "In Point" |
|
Load the sound file into the source window
You won't see any waveforms but it is really helpful if you could!!
Well you can't the most we can do is see the waveforms in the timeline. . . . . |
|
To see Audio Waveforms in the timeline click on this button and turn it GREEN
|
|
Then turn on waveforms in the timeline
Click on the timeline "hamburger menu" then >Audio Data>Waveform |
|
You will see the audio waveforms in the timeline now!!
To enlarge the timeline use the following combo of keys "command L" to enlarge "command K" to make smaller |
|
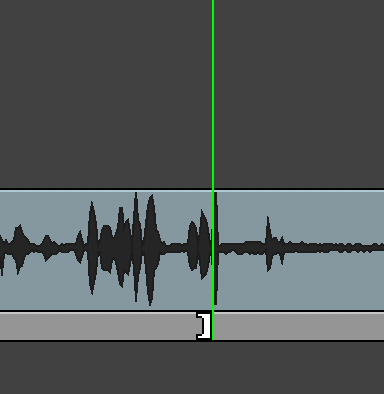
Turn on "Caps Lock" to scrub audio but you will see the slate strike in the timeline
scrub your timeline indicator till you hear it click loudly using your arrow keys |
|
| Mark and "In Point" on the audio file |
|
Select both clips in the SYNC TEMP bin, and right click. Select “AutoSync”. |
|
Choose "Inpoints"
You can choose to keep audio on clips with video up to 16 tracks
Same choices for audio only clips you can choose what tracks you wanna include up to 16 tracks
Select "OK". This will create a new subclip with synced video and sound.
|
|
| You can rename it and put it in a new bin make copies and etc. . . . |
|
Create a new bin called "SYNCED CLIPS" at the same level as your VIDEO and AUDIO bins. Click and drag your new subclip from the “SYNC TEMP” bin to the new “SYNCED CLIPS” bin or whatever you want. . . Delete the remaining clips from the “SYNC TEMP” bin. Repeat this process until you have synced all of your clips |


Originally Published Thu, Aug 07, 2003 Modified Thu, Aug 07, 2003 


Overview
Content Tools