Page History
1. Launch DVD Studio Pro.
2. Go To DVD Studio Pro > Preferences

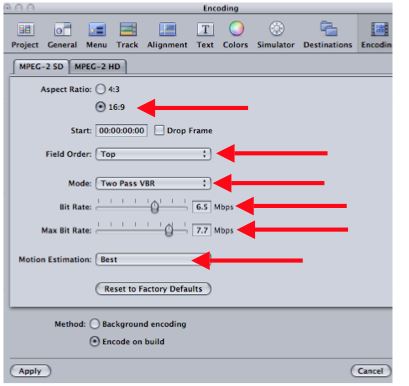
3. Go to the Encoding tab and change the Aspect Ratio to 16:9 HD OR 4:3 SD for non wide screen DVDs
4. Change the Field Order to “Top” for HD source material or “Bottom” for SD source material. Mode should be Two Pass VBR
5. Bit Rate 6.5 and Max Bit Rate 7.7 6. Motion Estimation should be set to Best
7. Make a new project
8. Go to Window>Configuration>Extended to change DVD Studio interface

9. Import the MPEG 2 video files so that they appear in the assets window. 
10. Drag all the videos in sequence into the Track Timeline.

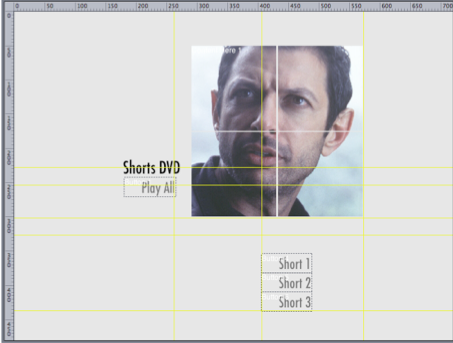
11. Create a menu with a Play All button and then a button for each individual film.
Right Click on the Play All Button and select Track 1 in the Tracks and Stories Menu. 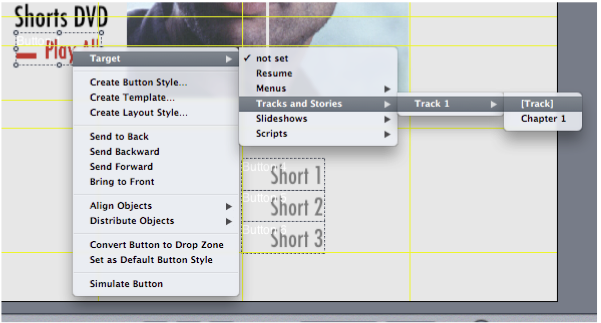
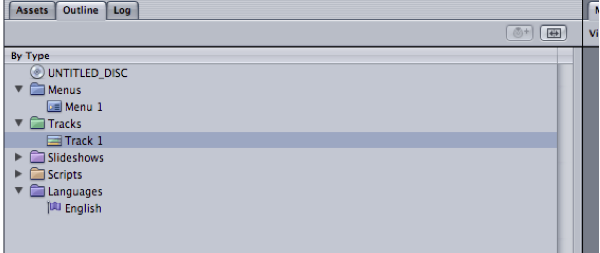
In the Outline tab select Track 1.
Set the End Jump for Track 1 to Menu 1.

Look in the Graphical Tab and you will see the Menu now goes to Track 1 and when it finishes it will return to the menu. 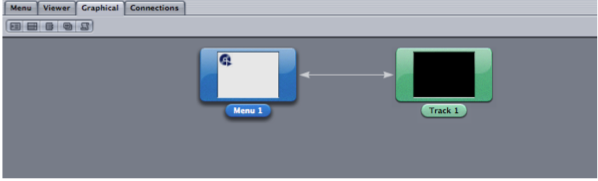
Create Chapter Markers before each film in the Track Timeline by clicking in the grey area above the timecode. 
12. Title each new Chapter Marker the title of the Video that is following it.

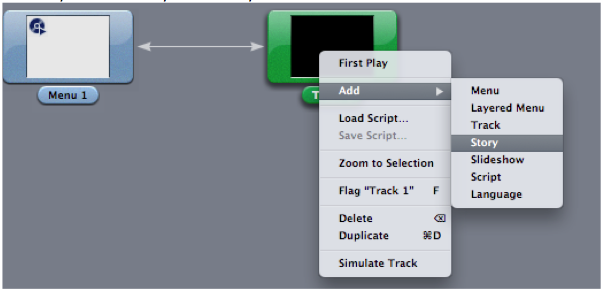
13. In the Graphical Tab, right?click on the Track 1 and go to Add ?> Story. Repeat this step until you have as many “Stories” as you do individual films.
14. Title each story to correspond with the individual films on the dvd

Once you do have all your stories created your Graphical Tab should look similar to this. 

17. drag the corresponding chapter marker over to the story marker side 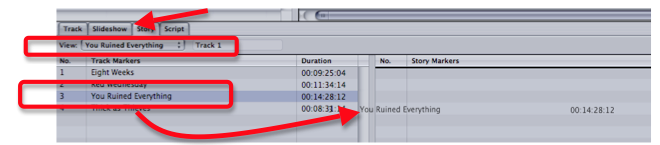
18. You can switch between stories by using the View drop down menu. Repeat until each chapter has been added to its corresponding Story. 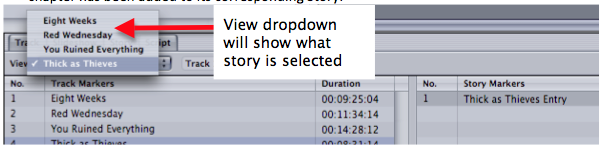
19. In Graphical View Select the Story and make sure the End Jump is set to “Same as Track” 
20. In the Menu tab, right?click on each Button you created and assign it to the corresponding story in the Tracks and Stories submenu.

21. Your DVD should now be working. Clicking on the Play All button will play each short film back to back and selecting the individual shorts will cause each short to play and then return to the main menu. You can press the Simulate button to test the DVD. 
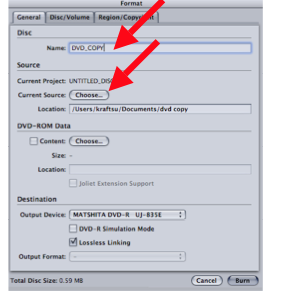
23. Once the DVD is built choose Format to burn the DVD 2
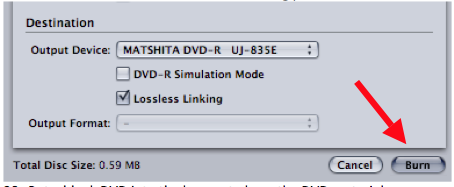
4. Name the DVD Disc
25. Click “Choose” to chose the “Current Source” for the DVD
26. Navigate to the location that the DVD VIDEO_TS AND AUDIO_TS folders are stored and click “Choose”

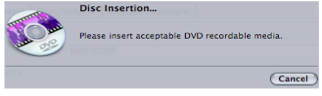
27. Then click “Burn” to start the DVD burning process
28. Put a blank DVD into the burner to burn the DVD material
Overview
Content Tools