Page History
By: Susanne Kraft susanne.kraft@austin.utexas.edu
Place the .aaf file and the QuickTime on to one of the |
|
Navigate to the .omf or .aaf file, select it and click open. |
|
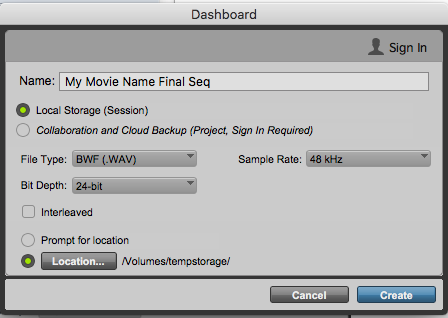
Choose the following SessionParameters Type: Session Location > Navigate to where you want to save the session Click on "Create" |


| |
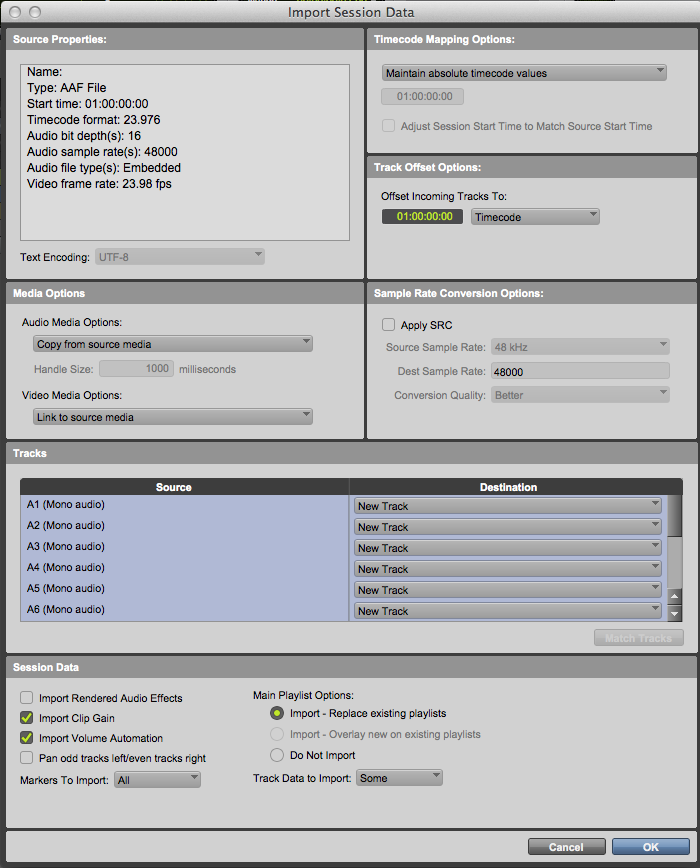
In the next window make sure all tracks are selected for import and check import clip gain and import automation and “Uncheck” (pan odd tracks left and even tracks right) Settings look like this: |
|
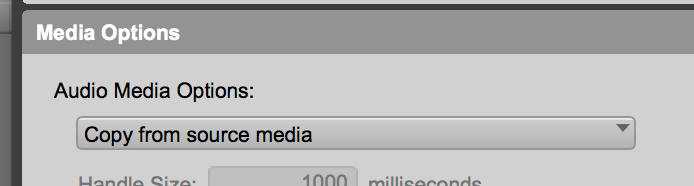
ALSO WHEN OPENING AN .aaf or .omf MAKE SURE that “Copy from source media” is selected in Audio Media Options. |
|
On the next screen choose not to save a report. (if that dialog appears) |
|
Now click on >Setup>Session and make sure the frame rate is |
|
Sample Rate 48 Bit Depth 24 Clock Source Sync HD (if in an HD suite) TimeCode 23.976 all settings |  |
|


Go to >File>Import>Video and navigate to the QuickTime file saved on the storage drive and select it. |
|
Navigate to the QuickTime Movie that you made using this workflow AVID - Prep and Export .AAF and QuickTime Movie to ProTools Advanced Version |

 | |
The dialog will ask you where to put the newly imported Video track. Select “New Track” and click OK |
Choose to Import the audio from the QuickTime so you can check sync |
|
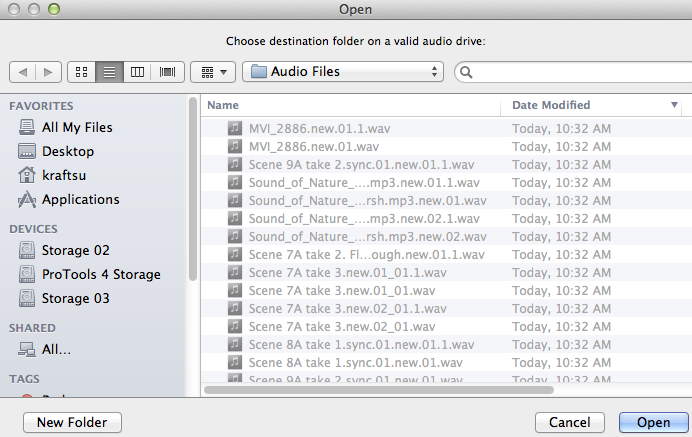
Choose the default location of where to save the audio files. It will always choose the current session's audio files folder. |

Click Open |
|
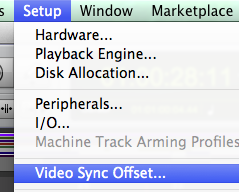
12. Check to make sure that the session is in sync with the video. |
You can add quarter frames to the Video Sync Offset but usually not necessary to sync up image and sound. This was common with DV-NTSC but no longer necessary when using HD QuickTimes |
|
Overview
Content Tools