Page History
...
| Open your sequence and go to the beginning of your timeline. Once there, mark an in point (default key is "i") |
| ||
Go to the end of your timeline or wherever the end of your edit is Mark an out point (default key is "o") |
| ||
Go to Sequence > Render Effects In to Out (default key is "enter / return") |
| ||
The sequence will render any effects that have been applied |
| ||
Choose File > Export > Media (default key is "Ctrl + m") |
| ||
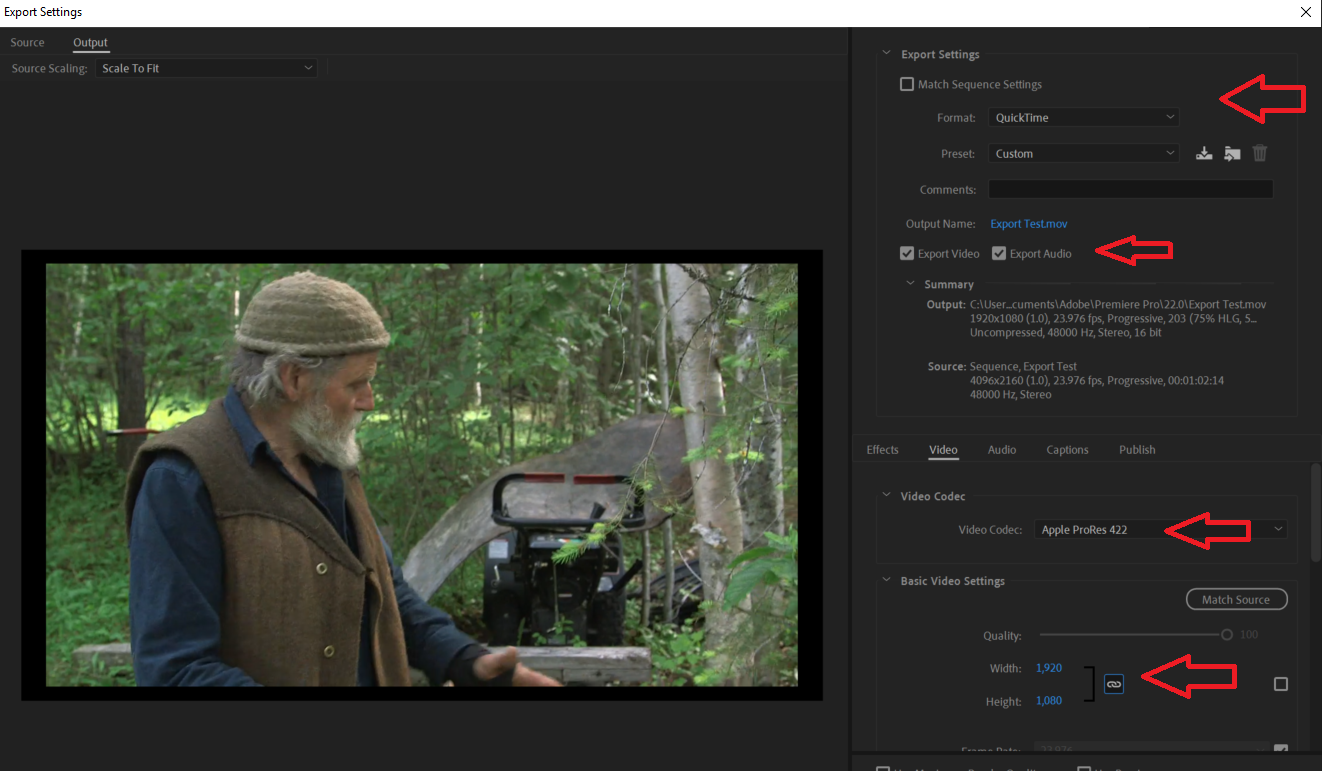
Match the following settings: Format: QuickTime Preset: Apple ProRes 422 (This will change to Custom later. That's alright) Make sure Export Video & Audio are ticked Make sure Video Codec is set to Apple ProRes 422 Width: 1920 Height: 1080 (if your width & height are different, untick the box next to them and you can manually enter) Frame Rate: 23.976 (if your frame rate is different, you can untick the box and manually set it) Make sure your Field Order is set to progressive 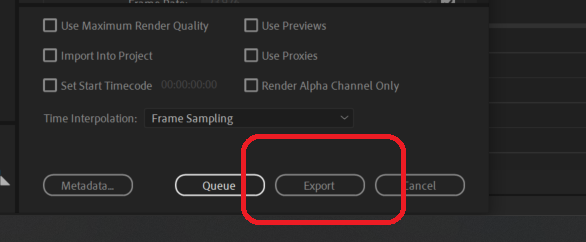 |
 | ||
| Once everything is confirmed, click Export at the bottom |
| ||
A progress bar will appear, showing you the progress and estimated time to finish |
| Take your exported file to any of the Macs in the CMA or CMB computer labs. | Login using your eid and open "Adobe Media Encoder" |
In the right side window, under Queue, click on the "+" button |
| ||
Navigate to your file and click Open. |
|
|
|
| Click on the Play button to begin the encoding job |  | ||
| The Encoding window will show estimated time and processing information |
| ||
| Once Encoder is done, navigate to where your original file is and you should now have an mov version as well |


Overview
Content Tools