
Sections of this Document
Operation
Refer to owner's manual for complete operational instructions. | |
Drilling Holes1. Loosen the Column Clamp and adjust Table height to accommodate the workpiece being drilled. 2. Secure the workpiece (and backup material) to the Table using a vise and/or clamp. 3. Adjust the height and left/right position of the Table. Tighten the Column Clamp. 5. Bring the drill bit down with the Feed Handle to where the hole is to be drilled. Make minor workpiece alignment adjustments. WARNING! Wear an ANSI-approved, full face shield while drilling any type of material. 6. Push the Switch up to turn the Motor ON. 7. Pull down on the Feed Handle and slowly drill the hole into the workpiece. WARNING! If the drill bit grabs and spins the workpiece, do not attempt to stop the spinning with your hands. Step back, and turn the drill press off. Wait for the 8. Push the Switch down to turn the Motor OFF. | |
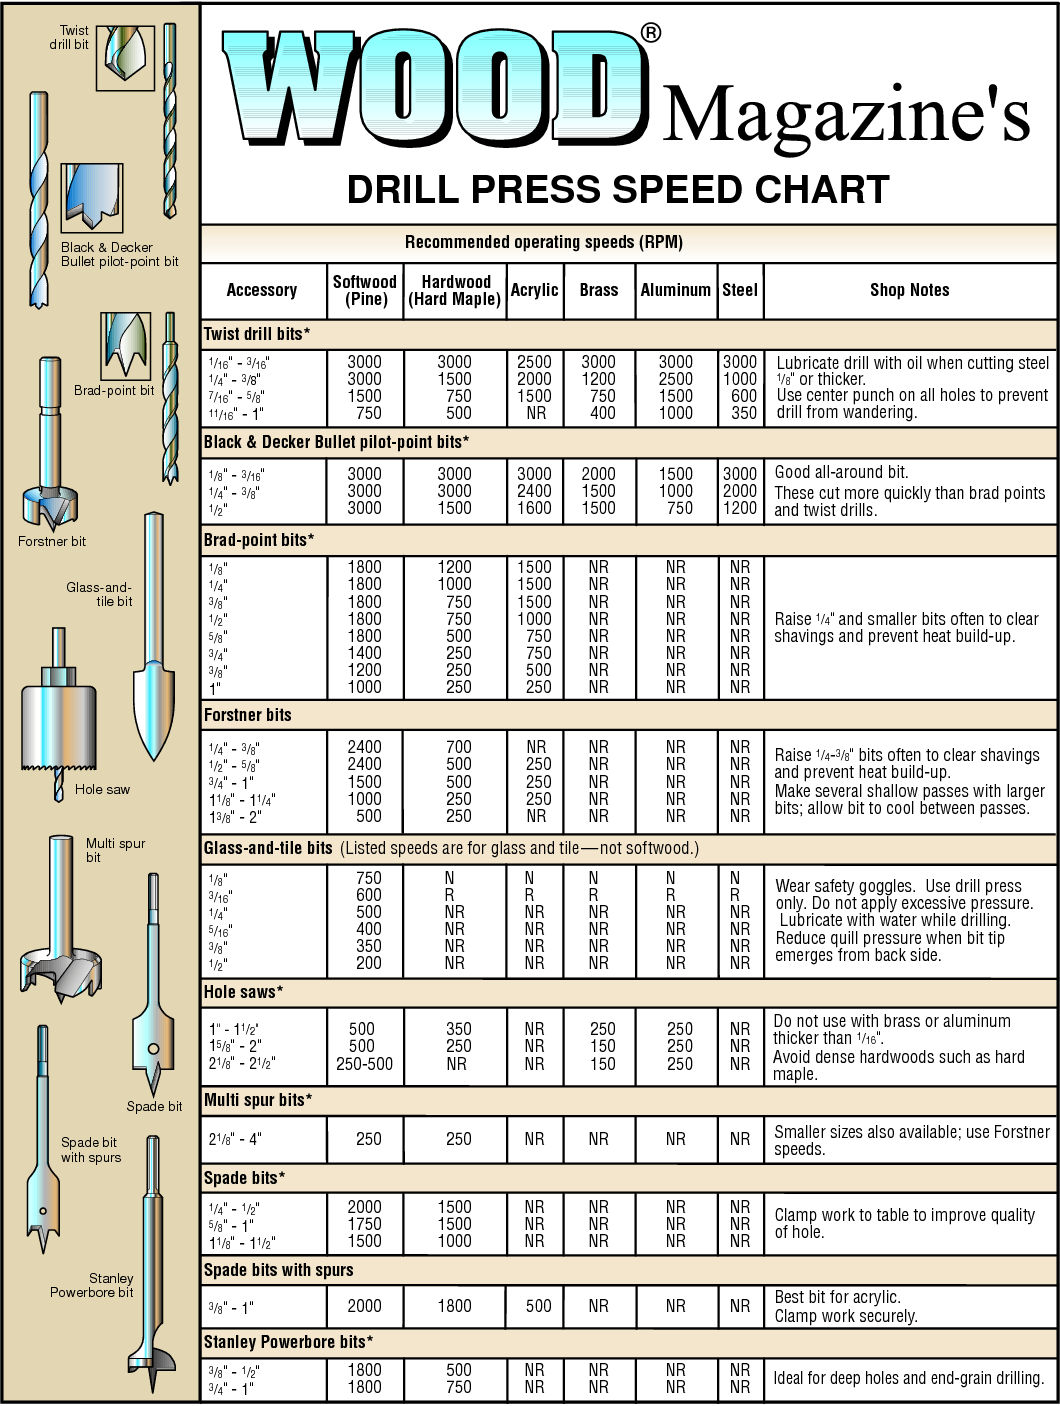
Changing Drill SpeedAlways match the speed of the drill press to the material and type of bit being used. Refer to the chart at right. 1. Turn off and unplug the Drill Press before changing drill speed. 2. Open the Pulley Cover. 3. Loosen the Belt Tension Lock Knobs on both sides of the Head and turn the Belt Tension Lever clockwise. This will bring the Motor Pulley towards the Spindle Pulley, 4. Consult Figure A (or the chart inside the Pulley Cover) and install the Belts on the Pulleys in the positions that correspond to the required spindle/drill speed. 5. When the Belts have been correctly positioned, tighten them by turning the Belt Tension Lever counterclockwise. The tension is correct when the belts deflect by approximately 1/2″ at their centers of run when using reasonable thumb pressure. Lock this position in with the two Belt Tension Lock Knobs. |
|

Frequently Asked Questions
Part #'s, Specs & Operation Manuals
Central Machinery 43389 17" 16-Speed Floor Drill Press - Horsepower (hp) 1 | Central_Machinery_43389_Manual.pdf |
Overview
Content Tools