You are viewing an old version of this page. View the current version.
Compare with Current
View Page History
« Previous
Version 12
Next »
Written by Susanne Kraft, susanne.kraft@austin.utexas.edu, 2008
Open up the file called “template.psd” this can be downloaded from here: Credit Roll Photoshop Template | 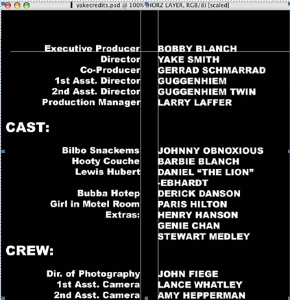
|
Change your view to 100% to see a larger image making typing easier. Click on the % entry at the lower left of the photoshop viewer window | 
|
Click on the “Horizontal Type Tool and select the layer of text to edit/change. | 
|
Click on Layer 1 in the “Photoshop Layers Window” to activate the “Left Column” of text in the “template.psd” file. Modify the credits as needed by selecting the text and typing over it. Make sure to keep template structure so alignments of text on the corresponding credits don’t get misaligned
Then click on Layer 2 in the “Photoshop Layers Window” to activate the “Right Column” of text and do the needed modifications to the text in the template.When credits are typed and aligned turn off the reference guides in the “Photoshop Layers Window” by unchecking the “eye” icons of the reference guides. If these guide lines are not turned off they will be visible in the final credits. | 
|
When credits are typed and aligned turn off the reference guides in the “Photoshop Layers Window” by unchecking the “eye” icons of the reference guides. If these guide lines are not turned off they will be visible in the final credits. | 
|
Go to the Top Tool Bar and select View Fit On Screen. | 
|
Now you are ready to crop your image to cut away the unused portion of your credits. Use the Marquee Tool in the Tool menu to select all of your text by click and dragging making a frame around the credit text. | 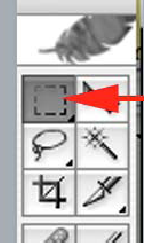
|
Choose >Image >Crop in the Top Tool Bar. | 
|
And now for the big save. Choose File Save As in the Top Tool Bar. Change format to TIFF and choose an appropriate place to save your image. | 
|
Use these options | 
|
Congratulations. Your credits will look something like this.
View & Print pdf | 
|
Open After Effects and create a new
composition by selecting
Composition > New Composition
Use the Preset NTSC DV for DV projects or use D1 settings if you are
using an uncompressed ONLINE system. The menu changes if you click the blue arrows on right. Once you have the correct preset selected click OK. | 
|
For HD Projects choose 1920 x 1080 square pixels at the correct frame rate
23.976 or 29.97 as shown here. | 
|
Check the background color to assure it matches the Photoshop file that will be imported. | 
|
For example if the credits are over black then the AE background color should be black as well. | 
|
Import the photoshop file of the credits to after effects and place the image into after
effects composition by dragging the file down into the composition timeline. | 
|
In After Effects click on the arrow next to the Transform option to reveal the sub
menus including Position.
In the AE timeline click the stopwatch next to Position to turn on keyframing.
To begin the roll the position of the text must be located downward in the
composition in order to appear off screen in the beginning then roll upwards
displaying the text rolling by.
To achieve this change the numerical value of the right most # of the position
indicator in Effect Controls. By holding down the SHIFT key and dragging the
mouse pointer over the # upwards to increase the numerical amount higher.
The text will roll downward in the composition window. Continue to
increase the # until the text until it is barely out of screen. | 
|
To set the last keyframe, click in the composition timeline and then press the END key on the keyboard. | 
|
Change the numerical value of the right most # of the position indicator in Effect
Controls. By holding down the SHIFT key and dragging the mouse pointer over
the # downwards to decrease the numerical amount negatively. The text
will roll upwards in the composition window. Continue to decrease the # until
the text until it is barely out of screen. | 
|
The second keyframe at the end of the timeline should appear after you change
the position value. Scroll through the timeline to see if the roll effect is working. | 
|
Add a Reduce Interlace Flicker and set
softness to 0.5 | 
|
If working in a 23.98 project it is recommended to add this blur effect to
make credits look better.
Add a Fast Blur effect and set the blurriness to .2 | 


|
If all looks good render the project.
Click in the composition timeline that you just created and click
Composition > Make Movie | 
|
The Render Queue opens.
First, click on the words Current Settings to change the
parameters of the Render Settings | 
|
The Render Settings menu will pop open.
1. Change Quality to Best 2. Change Resolution to Full 3. Change Effects to All On 4. Change Field Render to Lower Field First or Upper Field for 1080iHD video if using 23.98p video leave field rendering off. | 
|
5. Change Time Span to Length of Comp6. Check Use storage overflow
7. Click OK to save changes in menu | 
|
Next click on the words Lossless to change the parameters of the Output Module | 
|
The Output Module Settings menu will pop open.
Format should be QuickTime Movie
Click on Format Options which options the Compression Settings menu. | 
|
Compression Settings menu will open
Change the codec to Your Specific Resolution:
Kona Suites use the Apple FCP Uncompressed 4:2:2 codec shown
in frame grab here. The frame rate should match the frame rate of the
project. For example if editing in 1080 23.98p then use the 23.98
frame rate in after effects.
DVLAB use Animation or DVNTSC
AVID use AVID codec
Use 8 or 10bit if you don\'t want to use any compression or use Animation to
apply compression. In tests both look about the same in quality but using
Animation makes the resulting quicktime file smaller.
Change the quality to Best if it is not already set
Change the Frames per second to 29.97 if it is not already set
Click OK to apply changes | 
|
Back in the Render Queue click on the blue text next toOutput To | 
|
Under Save As: Name your clip keeping the .mov extension
Select the Hard Drive to save the file to
Click Save | 
|
All the parameters are changed and the Render Queue should look like this
Click Render to begin Rendering.
Once the quicktime is made import the file into Final Cut Pro or AVID.
View & Print PDF | 
|