| Click on the New Item and choose Sequence |
|
Choose Sequence |
|
Choose Canon XF MPEG2 1080p 23.976 |
|
Choose the Canon XF MPEG2 1080P 23.976
1920 x 1080 settings
DONT' HIT OKAY YETCLICK ON THE TRACKS TAB NEXT |
|
Set Video to 1 track And change Master from Stereo to Multichannel |
|
Click plus to add two more tracks. Change Number of Channels to 6 Change all tracks types to mono pan all odd tracks left pan all even tracks right
DONT' HIT OKAY YET |
|
Now it's time to choose output assignments.
DONT' HIT OKAY YET |
|
Set Audio Track 1 to output assignment 1 - 2 Set Audio Track 2 to output assignment 1 - 2 Set Audio Track 3 to output assignment 3 - 4 Set Audio Track 4 to output assignment 3 - 4 Set Audio Track 5 to output assignment 5 - 6 Set Audio Track 6 to output assignment 5 - 6 (your screen will not look like the screen grab...only one "Track Output Channel Assignments" popup window will appear at a time) |
|
| Title the sequence and click OK |
|
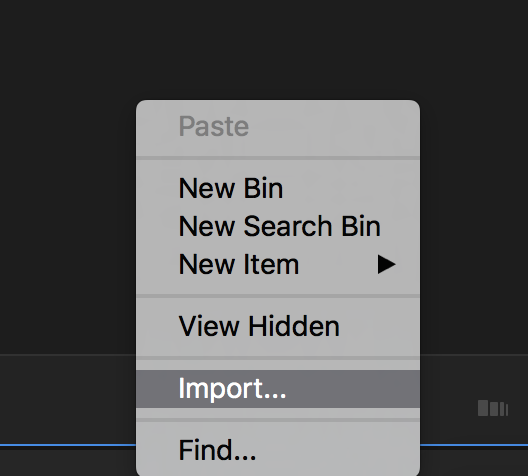
| Import the Audio Files |
|
Select the files and import |
|
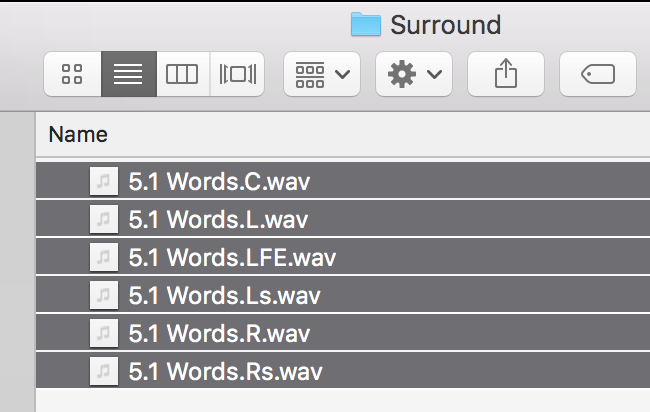
Add audio clips to the sequence. Drag audio clips from the Project window to the 5.1 surround sequence in the Timeline window. You can drag an audio clip only to a track with the same number of channels, so if necessary choose Sequence > Add Tracks to add new tracks containing the number of channels that match the clips you want to import. Add them as follows A1 - Left A2 - Right A3 - Center A4 - LFE A5 - Left Surround A6 - Right Surround |
|
| Make sure your movie is in sync on on video track one |
|
 | Export the QuickTime File>Export>Media |
Click on the Sequence to export and choose >File>Export>Media or click "Command M" |
|
Choose the following: DONT' CLICK EXPORT YET |
|
Click on Audio tab and choose Sample Rate 48 Sample Size 24
|  |
 | Audio Channel Configuration Output Chanels 5.1 L,R,C, LFE, Ls, Rs |
| Choose Export |  |
You may find other ways to do this on the internet. Ways that may seem legit, from legit organizations, like this one: http://blogs.saic.edu/fvnmatech/2016/06/27/creating-a-master-file-for-5-1-surround-sound-dcp/ But if you follow their workflow, your mix will be wrong! Aren't you glad you're attending UT!! |


Overview
Content Tools