IN PROGRESS
Put the Klien on a tripod if necessary |
|
Log into laptop with commpower password | .\commpower to local account on laptop |
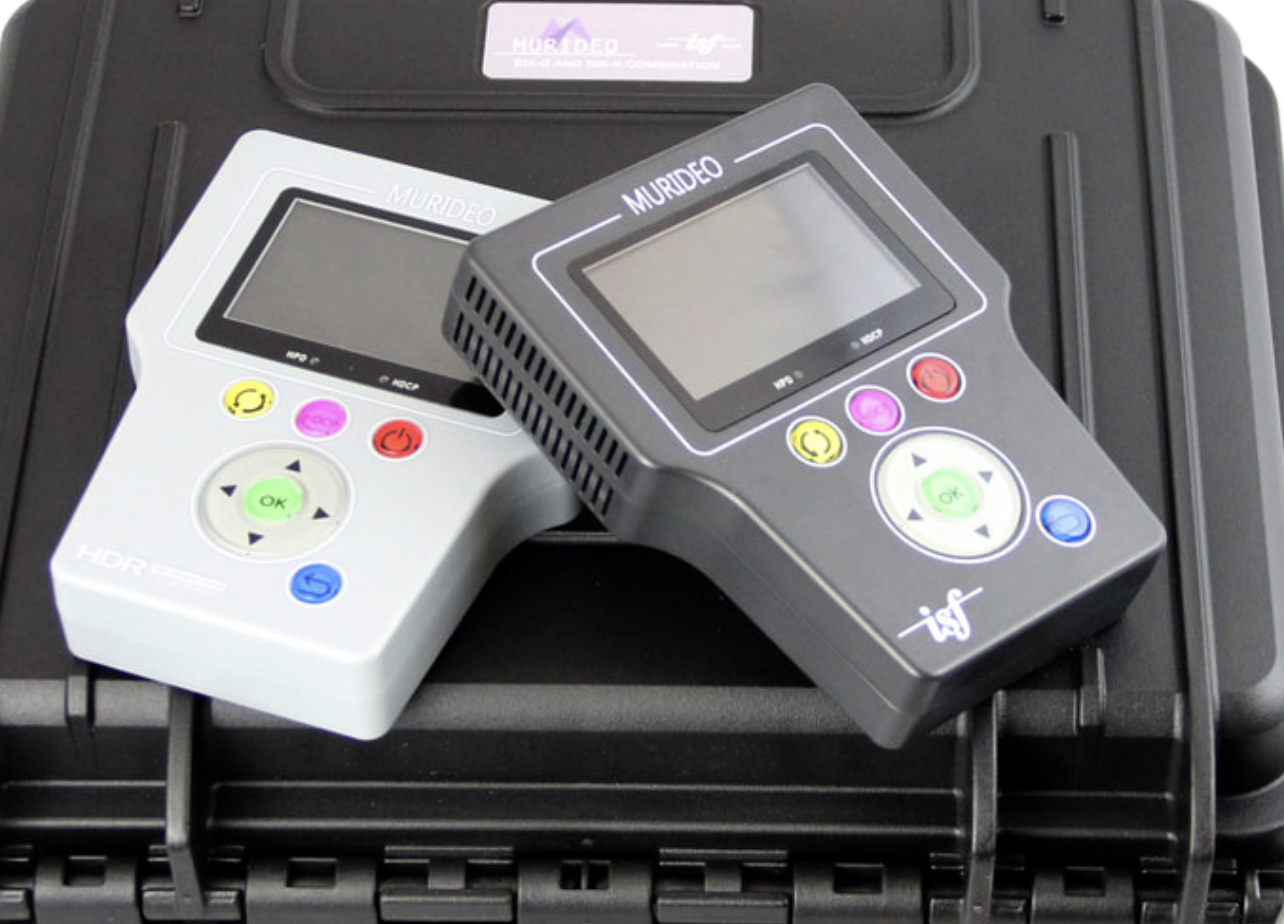
Connect Murido signal generator via USB to laptop. Make sure the Murido drivers are installed |
|
| Klein camera should be plugged into the computer and the Murido Signal Generator connected via USB | |
Plug in the HDMI to the Murido Signal Generator output to the TV you want to calibrate | Picture of that here |
Now you should see the images from the murido on the TV | Picture of that here |
Turn off the lights in the room put in the CC environment | Picture of light switch |
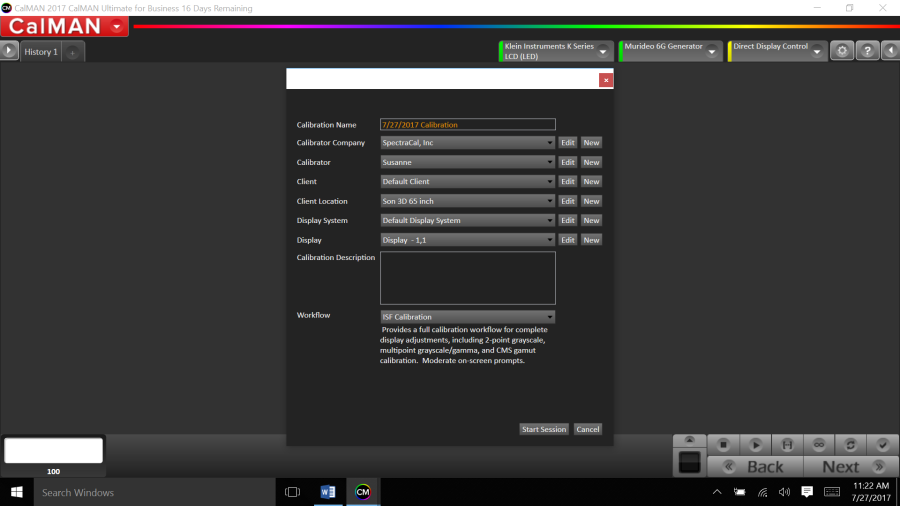
Open Calman software |
|
Enter in the details and click Start Session |
|
Remember under Workflow choose |
|
| |
Click Next Again | |
This Screen you will pick the hard ware for stages 1,2, not necessarily 3 |
|
Step 1 pick the port and put a checkbox on the kind of instrument you are using Klein > Search |
|
Tab one find meter Add the Klien Meter find the Select it from the checklist |
|
Also pick the target display – Choose LCD (LED) |
|
Find your source generator next tab |
|
This is also where you choose the window size 100% |
|
If you want to connect the computer to the TV you can hook up the Ethernet or Serial Port and click "Next" |
|
Murido 6G Genrator | Frame Grab pc01 |
Click on the | |
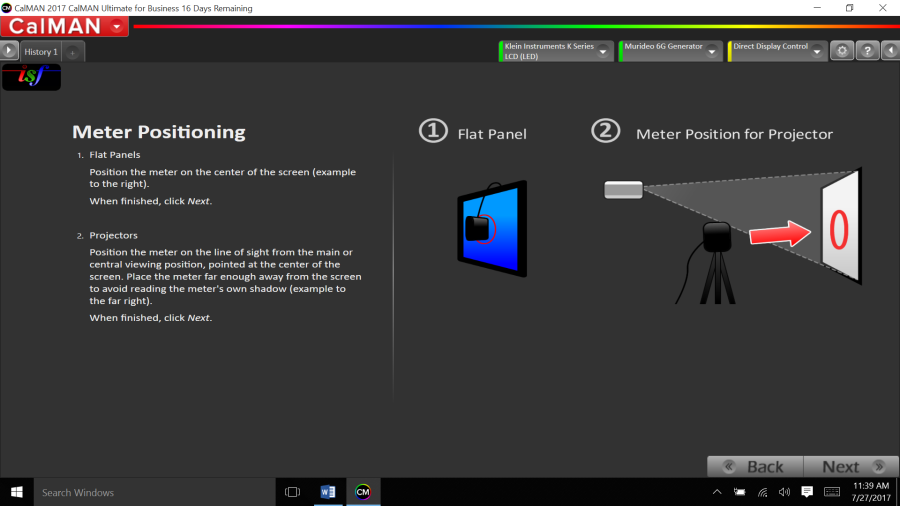
Setup the meter position |
|
Click on the little "Gear" mark in the Upper Right hand corner |
|
Pick the Resolution 3840 x 2160 24P | |
Colorspace target D65HDBT 709 |
|
On the Sony TV in Suite press Menu and put in the following | Picture off phone of Sony Menu off the remote |
Next > Next >Pre-Calibration Settings | Replace this with PC picture 2 |
Right click on HISTORY 1 |
|
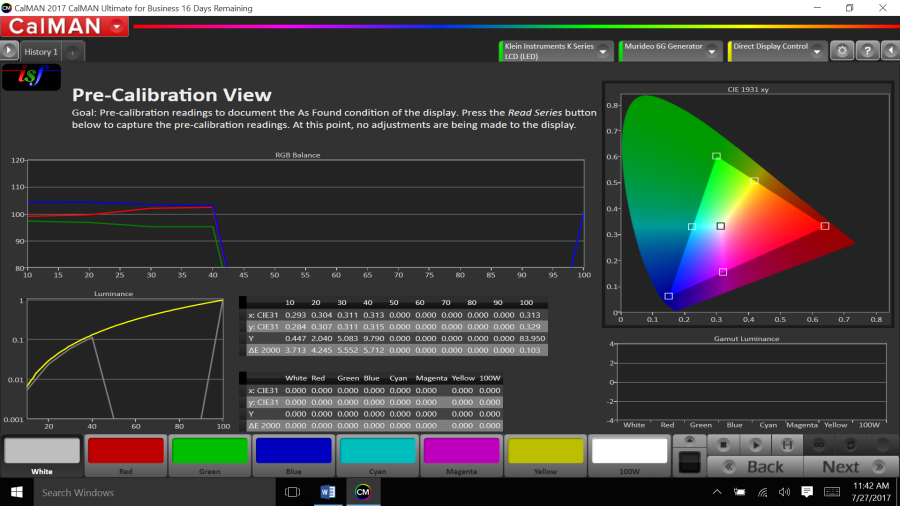
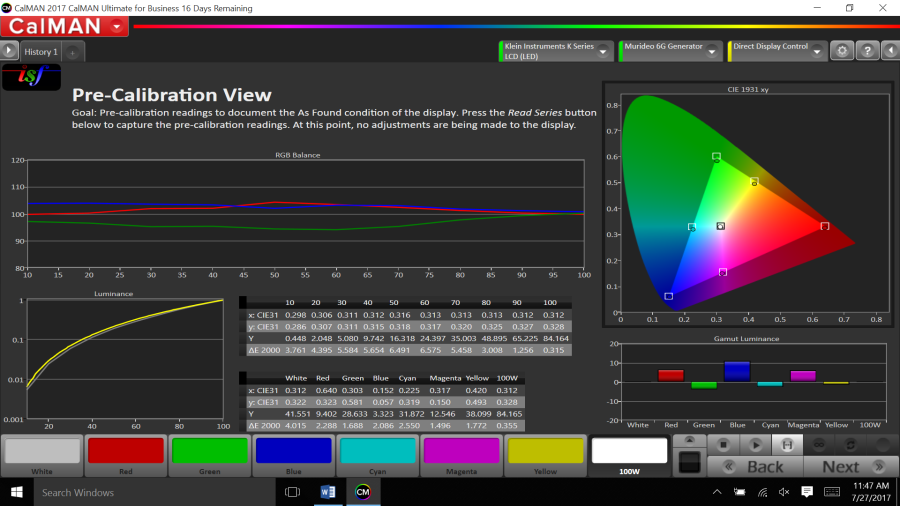
Pre Calibration View to document the as found condition of the display |
|
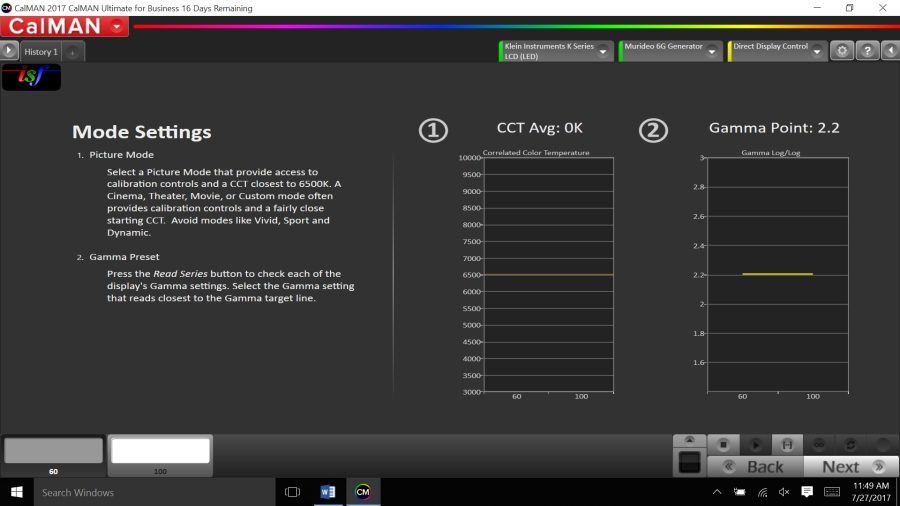
Mode Settings |
|
To get the mode to be read press>Gamma Preset – Press Read Series or "Goal Post" |
|
Now go into each of the Gamma Settings to test each of them to find the right one that reads closest to the target line 6500. |
|
Rename the history tab to put in the Gamma Setting |
|
Here is what the 2 point Gamma reading at should look like |
|
To set the "white point BLOCK" and color space click on the "Infinity button" and while it is running toggle through all the color temp settings that the TV has |
|
SONY PVMX550 |
|
|
|
Adjust Luminance |
|
adjust the Backlight setting |
|
30-40 for a dark room |
|
The max reading is 24.4 |
|
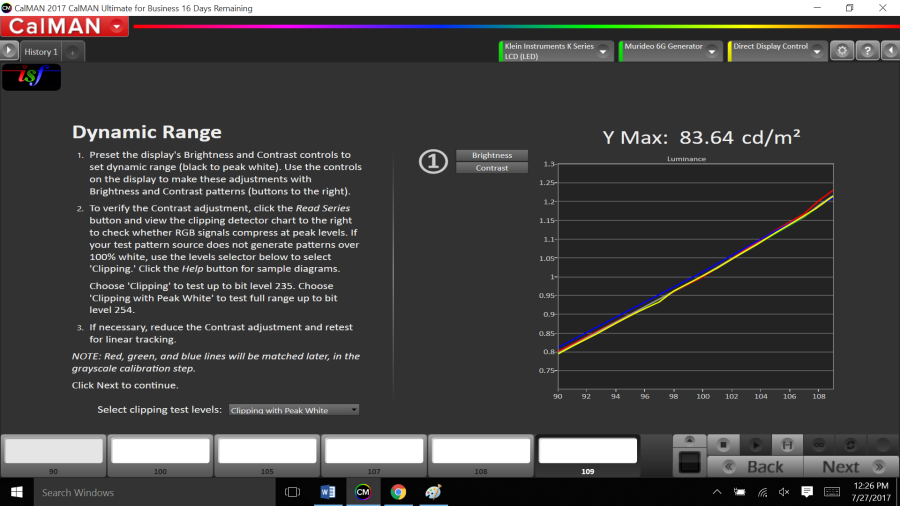
Next click on the Dynamic Range |
|
This is the result of the Read |
|
Not Bad but can adjust |
|


Press Brightness and will get the controls to adjust for the Black PLUGE test pattern – You want to barely see 16 and 17 but should not see any squares below 16 those should be invisible.
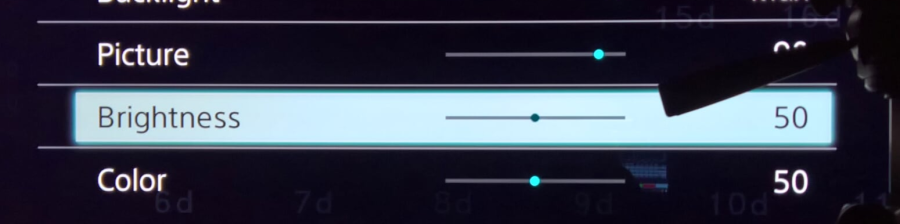

Press Contrast button to put up the White Pludge you want to see up to 254 and don't want to see any pink tones or noise?


On Sony - Press Picture and will get the controls to adjust for the "Contrast" all these terms are different

Gamma Settings control
We went to lower the Gamma to make it work better
Turned on Advanced Contrast Enhancer and LED Dynamic Control
Look at the Moving Stripe pattern you want to see the display look darker.
This turns on Local Area Dimming

We ended up turning on Local Area Dimming by turning on
LED Dynamic Control
Optimizes contrast by adjusting brightness in individual sections of the screen
Gamma also was changed to -2 this is a repeat of Gamma on step 2 but this is a 10 point control instead of a 2point control.
Click On Next

This Sony 65 does not have blue only mode.
But click on Color and Tint to see the Color Bars on the Monitor

Resolution/Bit Accuracy
You can click on the test patterns here


Pull up ISF Geometry to check for OverScan

Greyscale Two Point Adjust
Select 80 Percent White
You will go to your White Balance settings to find your RGB Gain and Bias
CAMERA PICTURE
You will control the RED Green and Blue Gain=High controls

This is what we ended up with
Then we clicked on 30 % and adjust the Red Green Blue low or Bias controls

ooow 
We don't have these options in this TV. Because we only 2 Hi and Low and we don't have a control called RGB balance or alike. . . .
Click Next
On the TV go to the Color Management RED setting Luminance
Click on Infinity button on the calman use the remote to adjust the Luminance, Then Tint, then Saturation.
Try to get the dot in the box.
See pic #7
Red Green Blue get Gamut Luminance to 0 or close by playing with Luminance and Saturation
The Delta controls get them to 0 or close
Delta L = Luminance
Delta C = Chroma
Delta H = Hue
Read the white #'s the Target numbers are what you are trying to get the current readings to match.

OLED New LG – set the backlight for Day Mode
Color Workflow for CMS Primary Colors Red, Green and Blue
Pick Green go to infinity mode
Start adjusting with Luminance
Increase/decrease the luminance
Saturation increase/decrease
Tint increase / decrease
Go back to Luminance
Next Re – Read all 6 Colors again pressing the "Goal Post"
Color Workflow for CMS Secondary Colors Cyan, Magenta, Yellow, White
Pick Cyan go to infinity mode
Start adjusting with Hue or tint
Luminace adjust
Pick Magenta
Start Adjust Tint/hue
Saturation
Then finally Luminance adjust till you get in the hole
Pick Yellow
Start Adjust Tint/hue
Saturation
Then finally Luminance adjust till you get in the hole
Run the "Goal Post" again to see how all the 6 colors are affected
You will usually do two passes

go down to Color Management System
Click on the "Goal Post"
Select the RED Color then Right click on Gamut Luminance area of the image and choose Properties tells us the exact percentage we are off on RED

This shows on the scale how far we are off

If you click on the color of the box as we have clicked on Green then you will get the close up of the offset of the color green dot is out of the box.

Saturation Sweeps to show where the saturation falls

Re check the White Levels

You will get the Black Pluge Slide back up and the White Pluge slide back up set these again and set these by eye
Should
Press Brightness and will get the controls to adjust for the Black PLUGE test pattern – You want to barely see 16 and 17 but should not see any squares below 16 those should be invisible
Press Contrast button to put up the White Pludge you want to see up to 254 and don't want to see any pink tones or noise?
Now go to the Sony OLED and lets compare
Go to ETOF and set it to 2.4
ColorChecker Analysis
.4 not visible .6 is visable then you should try to fix it.
Overview
Content Tools