Live event streaming is available in:
BMC 1.202 Flemming Lecture Hall
BMC 2.106 Auditorium
BMC 5.208 Briefing Room
CMB 4.130 Production Control Room
CMA 5.136 Lady Bird Johnson Room
All of the streaming (as of 2019) uses Black Magic Web Presenter.
The Web Presenter can be seen as a webcam and you can log in to any platform (YouTube, FaceBook, Twitch, Skype, etc) and begin streaming immediately.
If you need to stream to an event you will need to use OBS (Open Broadcast Software), copy the Stream Key from the platform you are using and paste it into the OBS interface.
Create the Event | |
|---|---|
First log in to the Moody College YouTube account Stache entry: Moody College YouTube Channel Once you are logged into the Moody College YouTube Channel, Click on the Camera Icon → |
|
Click on STREAM from the top menu then click on NEW STREAM The COPY AND CREATE button can be used for reoccurring events that would use the same settings. However, most of our events are one time events and would require a new event to be created prior to the event. |
|
Enter the details for the event: Event Title Privacy setting: Public, Unlisted, or Private Description Date and Time Upload Custom Thumbnail (even if it is just a Moody Logo) Lastly, Click the checkbox for → No, it's not made for kids Click Create Stream NOTE: I usually go to moody.utexas.edu and scroll down to the events and copy and paste the information from the event calendar. NOTE: If you want to stream internally for an overflow room make the stream Private. The default is Public. You will then have to go to the overflow room and log in to the Moody YouTube account, click on YouTube Studio (Icon on upper right) → Video (Menu list on left → Live (A tab) - there you will find the live event |
|
Stream the Event | |
Log in to the Moody College YouTube account. Click on the Channel Icon (upper right corner). Go down to YouTube Studio |
|
Click on the Go Live icon to get to the event settings. This is where you will where you find the STREAM KEY to paste it into OBS |
|
Click on MANAGE to show the list of events |
|
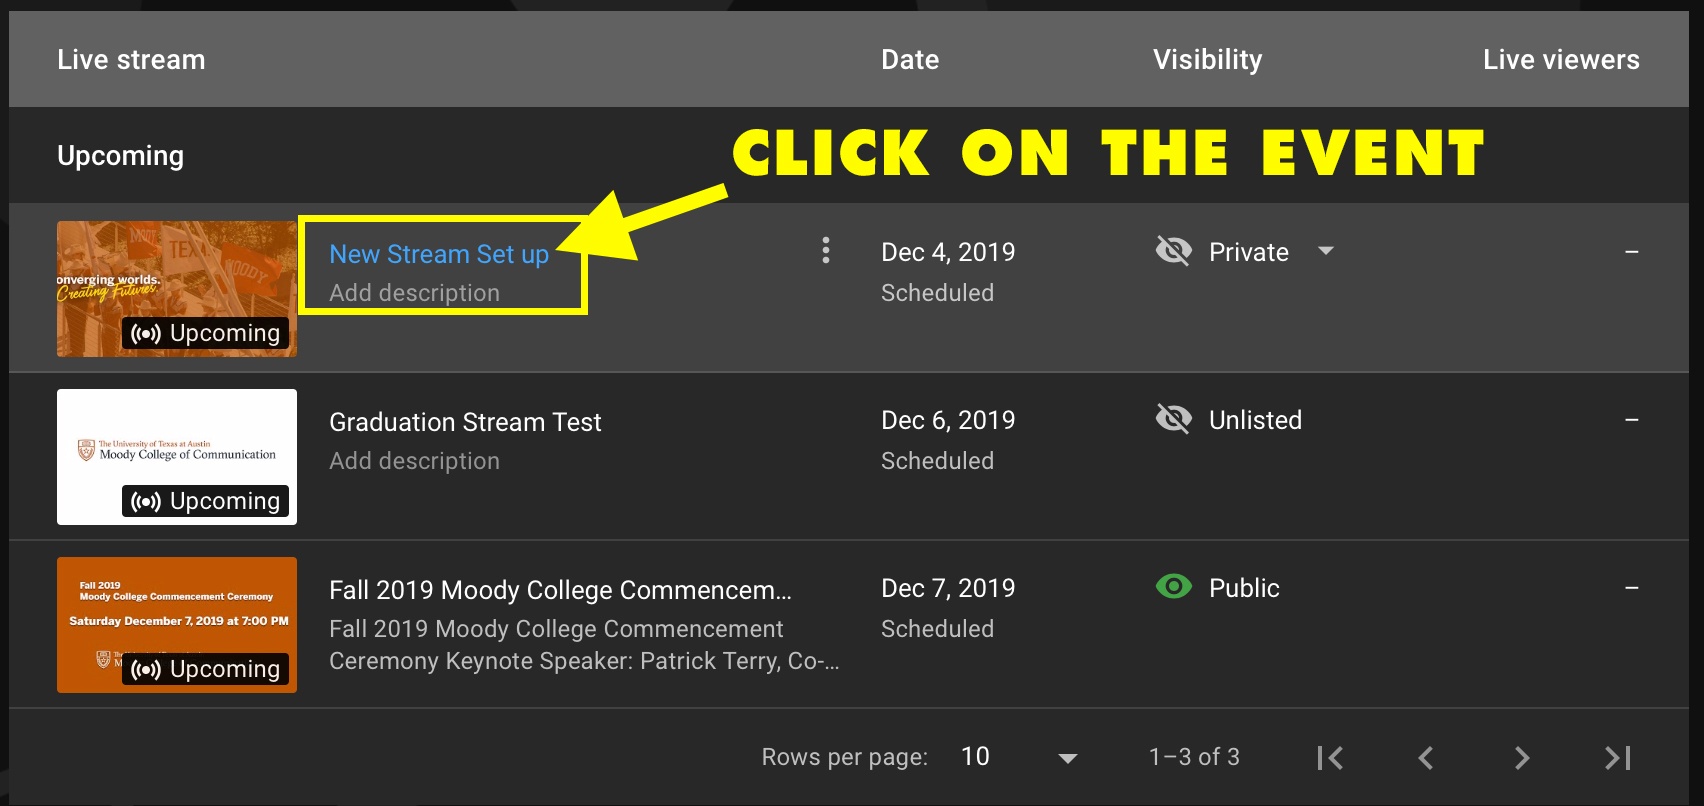
Open the event that has been created from the list of Upcoming Events |
|
Copy the STREAM NAME / KEY |
|
Now launch OBS (Open Broadcast Software) | OBS - Open Broadcast Software
|
Open OBS Preferences |
|
Click on STREAM then paste the STREAM KEY Click OK |
|
OBS should already see the video from the Web Presenter but if it doesn't follow the steps below |
|
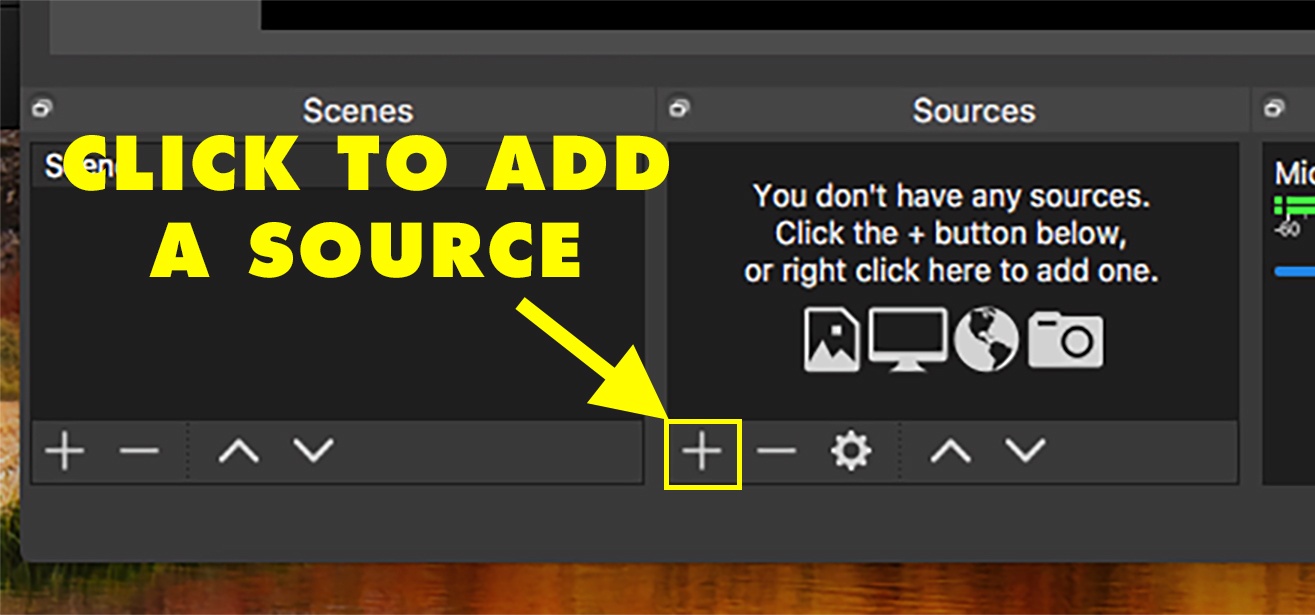
Click the PLUS SIGN to add a video source |
|
From the pop up menu choose VIDEO CAPTURE DEVICE |
|
Click CREATE NEW and name it |
|
Choose the device you just set up |
|
To begin sending the stream to YouTube click START STREAMING Then go back to YouTube |
|
Here you will see the VIDEO PREVIEW and the Connection Strength / Health When you are ready to GO LIVE on YouTube → Click GO LIVE |
|


Now that an event has been created, you need to choose the event you just created (or stream a generic event) and start the stream
Start the Stream
There are two ways to start streaming / recording. From the Vidiu Pro unit or from the webpage interface.
Start Streaming / Recording from the webpage interface | |
|---|---|
Access the Vidiu Pro via the IP address. CMA 4.130 Teradeks IP 10.157.38.213 If it doesn't log in automatically you PW is M00dy$tr3@m From the web interface you can see important data about the unit: Snapshot Video Preview Encoder Ready Recorder Ready Video Signal Media for Recording Which Event it will stream to as well as buttons for starting the stream and recording |
|
To choose a newly created event or to stream to the generic Moody Live Stream click on the SETTINGS button in the top right |
|
Click on BROADCAST settings |
|
Click on PLATFORM |
|
Click on EVENT |
|
From here you can choose: (the generic) Moody College of Communication Live Stream A newly created event that you created on YouTube or you can create a New Live Event |
|
To get back to the Video Preview page and start streaming/recording click the SETTINGS button |
|
To start Streaming click the GO LIVE button To start Recording click the START RECORDING button |
|
Once Streaming the Broadcast icon changes from green to red and the encoder icon changes to LIVE Once recording the recorder changes to RECORDING To stop the recording and the stream click the STOP button |
|


Start Streaming / Recording from the VidiU Pro | |
|---|---|
This is the default interface for the Vidiu Pro From here you can see: the Vidiu Pro is READY the camera is ONLINE (blue light) the encoder is READY (blue light) You can also see which event it is streaming to → EV: (event title) as well as the video resolution and bitrate |
|
To change the event PRESS IN on the MENU button and go to BROADCAST settings. PRESS IN on the MENU button again. Press DOWN on the MENU joystick until EV: is highlighted - PRESS IN |
 |
Make sure EXISTING is highlighted and PRESS IN on the Menu joystick |
|
Using the MENU joystick navigate to the correct Event. PRESS IN on the MENU joystick. |
|
Verify that EV: indicates the correct event. You are now ready to stream / record. |
|
To start a stream / recording PRESS IN on the RED START / STOP button. Make sure YES is highlighted and press the RED START / STOP button again. |
|
Make sure LIVE is highlighted and PRESS IN on the RED START / STOP button |
|
When streaming the READY changes to LIVE and the cloud icon shows a blue flashing light |
|
To STOP streaming PRESS the RED START / STOP button, using the joystick navigate to YES and PRESS IN. |
|


Overview
Content Tools