Launch Media Composer project with the camera footage loaded into project | NOTE - THIS WORKFLOW REQUIRES THAT ALL THE CAMERAS WERE JAM SYNCED TO THE SAME TIMECODE GENERATOR AND ALL CAMERAS HAVE MATCHING TIMECODE |
Change the Media Composer Settings Go to AVID Media Composer>Preferences |
|
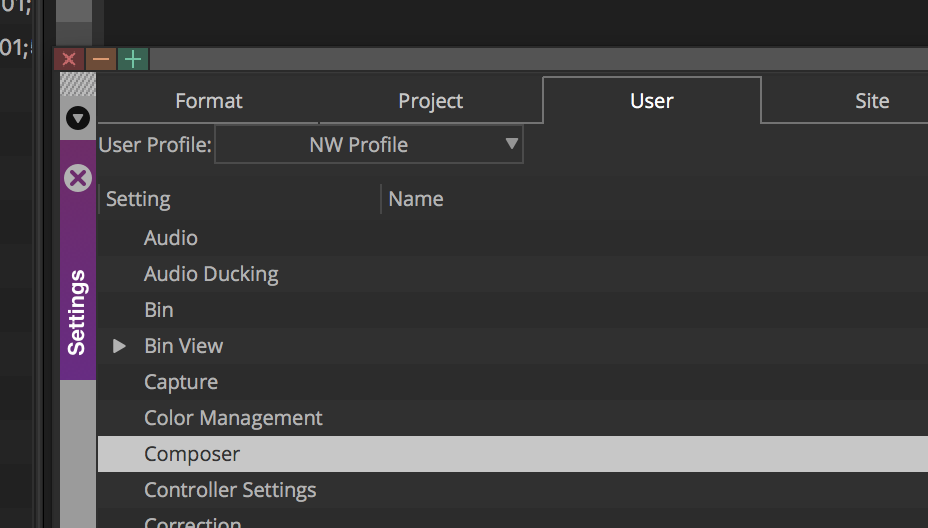
Click on the User Tab and then click on Composer settings |
|
Double click on the Composer Settings and change the Data Display NOTE THIS IS A BUG YOU MIGHT HAVE TO DO THIS TWO TIMES BEFORE YOU SEE TWO ROWS OF BUTTONS AND DATA |
|
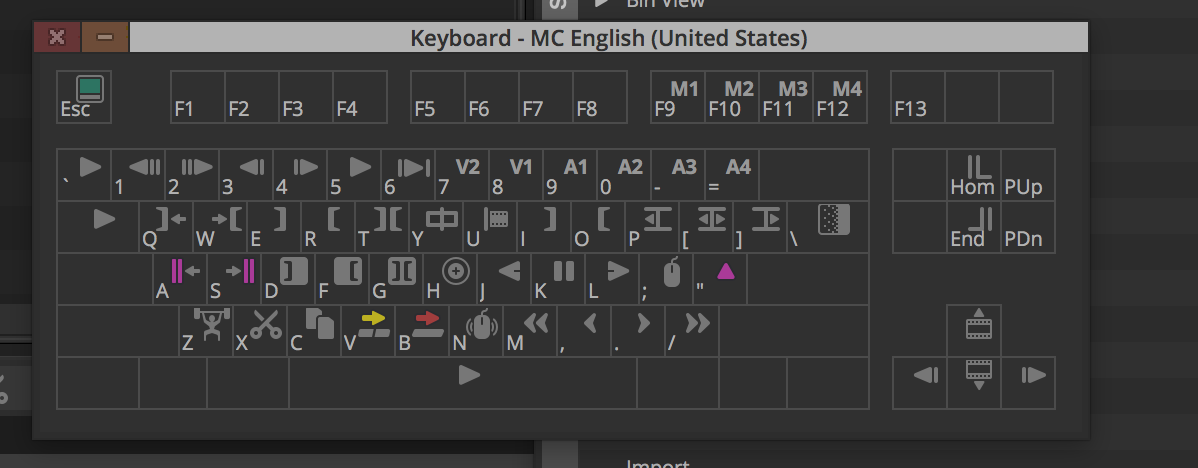
Stay on the User Tab > Go to the Keyboard settings and double click on Keyboard |
|
Keyboard settings will open. We want to map some commands to the keyboard as well as to the Composer Window |
|
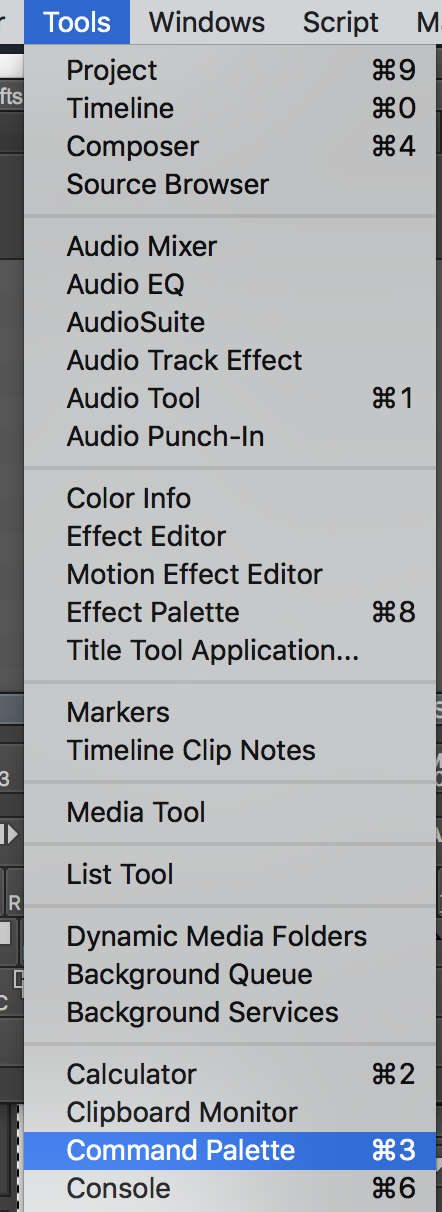
Go to >Tools>Command Palette or click on Command 3 or Control 3 (win) |
|
Command Palette opens |
|
Make sure you have Button to Button Reassignment selected |
|
Then just drag whatever button you want to any open blank key or position on the composer window. |
|
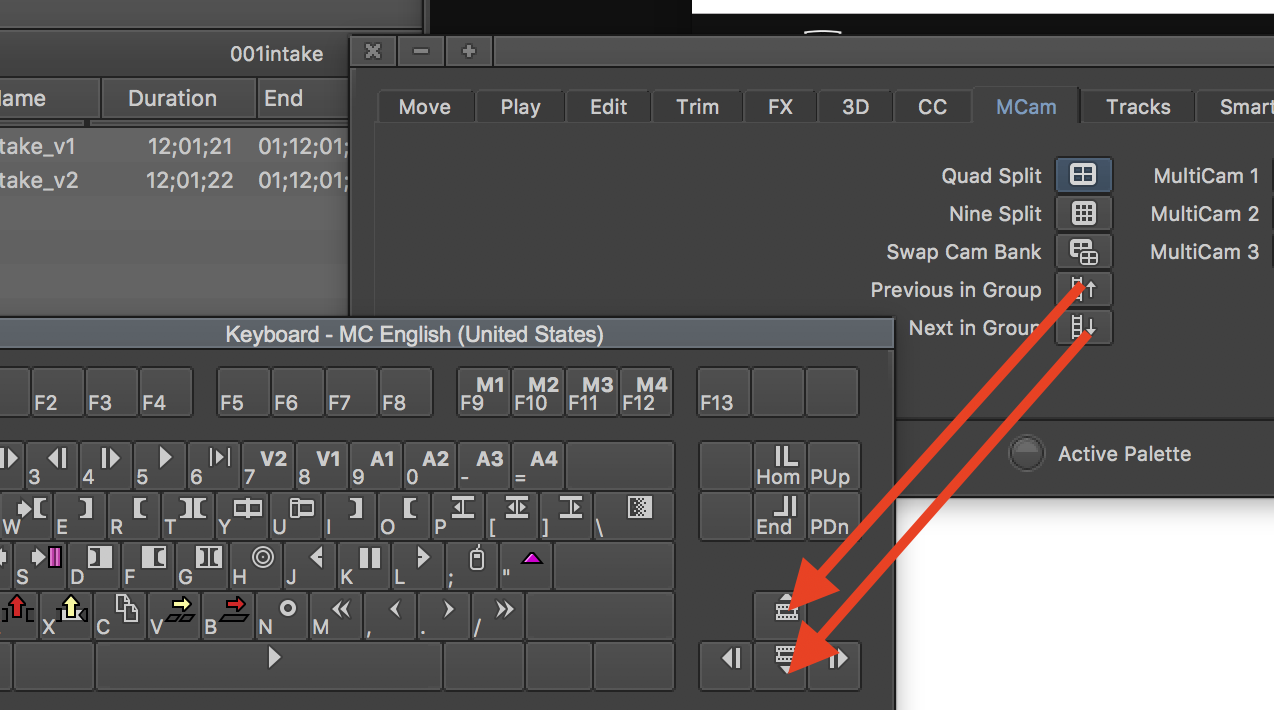
Go to the MCam tab of the composer menu and choose to set the Quad Split function to the source side of the composer window. |
|
The keyboard should still be open and to bring it to the front of the application go to >Windows>Keyboard - MC Then it is easy to drag the icon off the command palate and map it to the keyboard |
|
Example of the keyboard mapping |
|
CLOSE THE COMMAND PALETTE!! OR AVID WON'T WORK CORRECTLY |
|
Open the bin containing the multi cam clips. Select the matching takes from the different cameras that shot the different angles of the scene. |
|
Then go to Clip>Group Clips |
|
Choose Source Timecode since all our clips have matching timecode Click OK |
|
Will make a grouped clip with the following icon that looks like a quad split |
|
Double click the grouped clip to load it into the source monitor |
|
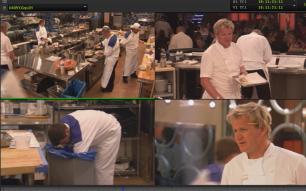
This is the quad display that will display all 4 camera angles |
|
The Quad split display will be grey when audio is not following video. |
|
The green icon will toggle from grey to green when audio follows video is selected so which ever shot is selected for video editing the audio will follow |
|
For our example we are only using audio from the wide shot |
|
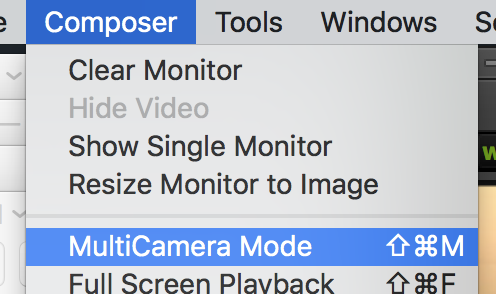
Next go to >Composer>MultiCamera Mode |
|
Click Play or spacebar- on the timeline and in the source window choose what camera to display. The green line underneath the camera angle shows what camera angle is shown in the timeline |
|
When the timeline finishes playing it will show all the edits applied by switching active camera angles in the source window |
|
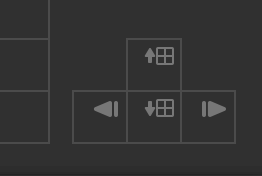
If you want to change a clip in the timeline put the blue cursor on it and click the up and down arrows to change shots |
|


Overview
Content Tools