This is the way the camera is packed in the Case Make Note of where items are located |
|
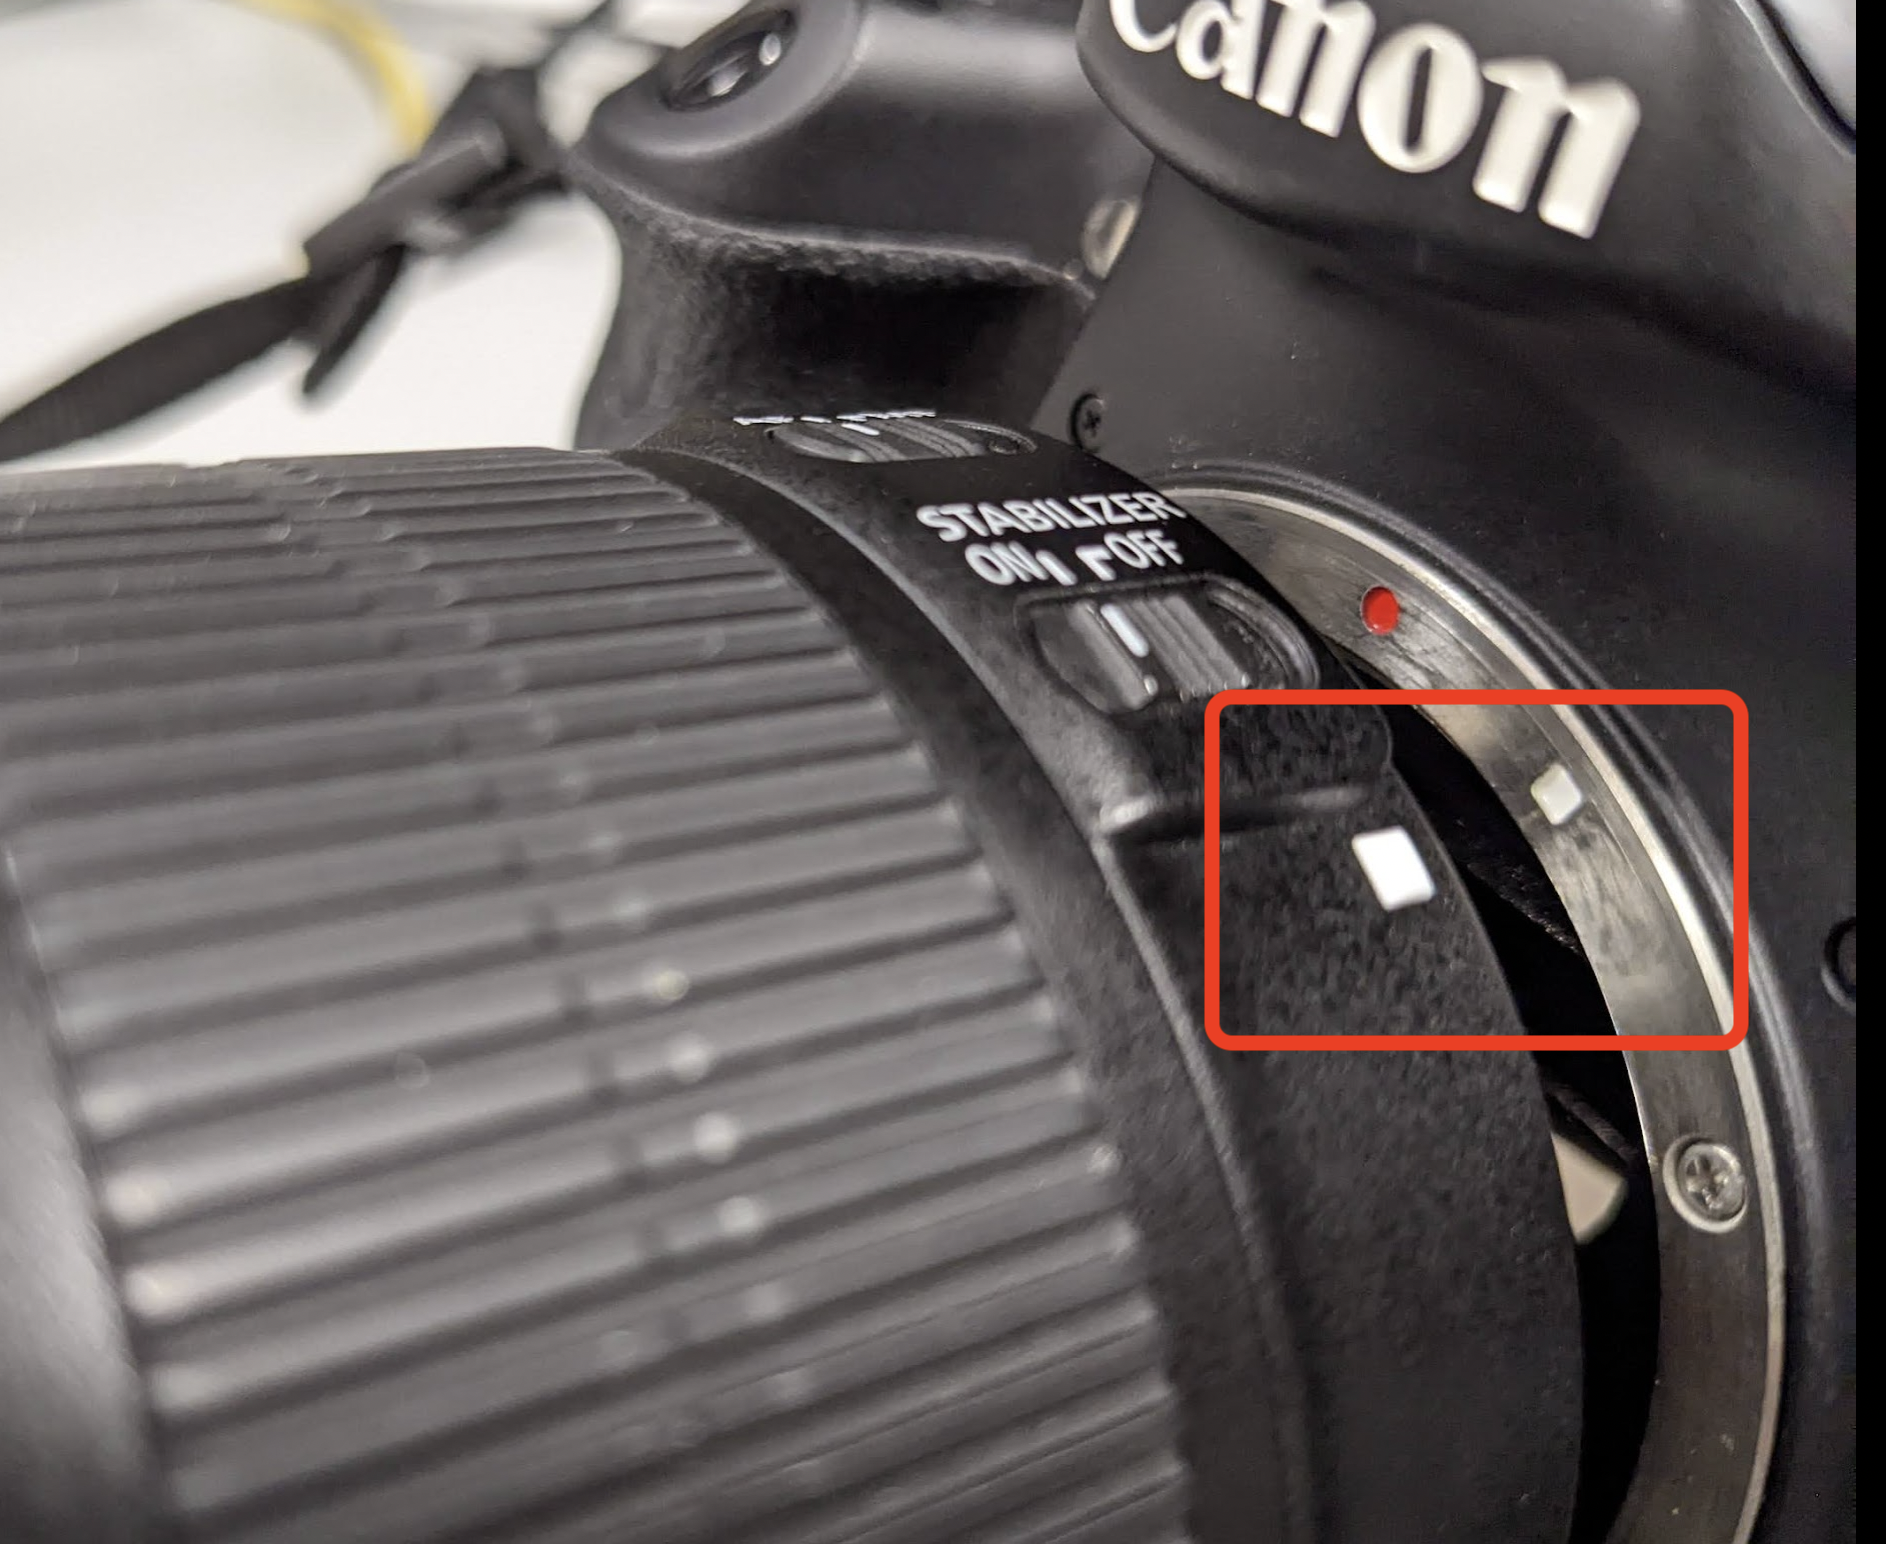
To attach the lens take off the lens caps on the lens Also remove the lens cover on the camera Then line up the lens with the camera matching where the white squares are on the lens and the camera As shown here When lined up the lens will gently attach to the body by twisting counter clockwise. DO NOT FORCE THIS! |
|
This is the button you press to release the camera lens from the camera to remove it when you are finished by Pressing the lens release button on the body and turning the lens about a quarter turn clockwise will remove it. |
|
Turn the camera over and insert the charged battery into the slot in the camera handle Close and make sure the door is latched |
|
Attach the microphone to the hotshoe mount on top of the camera and plug in the mini plug for the mic to the Audio input on the side of the camera |
|
SD Card slot is on the side of the camera Flip the door open and insert the card like the example shown here |
|
| Turn On the camera |
|
Make sure the camera is set to "Video" the RED "film" camera icon |
|
| Press the "Menu" button to start setting up the camera |
|
This is how you navigate the menus Press the sides and top/bottom to navigate and then press SET to apply the setting |
|
First setting is to clear all camera settings to reset to default Click to the 3rd tab from the right and scroll down to Clear all camera settings |  |
Click yes here to Clear all camera settings to set the camera back to the default state |  |
Next Click to the 6th tab from the right and scroll down to >Format Card |  |
Click OK to format the SD card to begin recording to a fresh card |  |
Next Click to the 6th tab from the left and scroll down to >Movie rec. size and select it by pressing set |  |
Choose the setting 1920 x 1080 ALL-I Click Set |  |
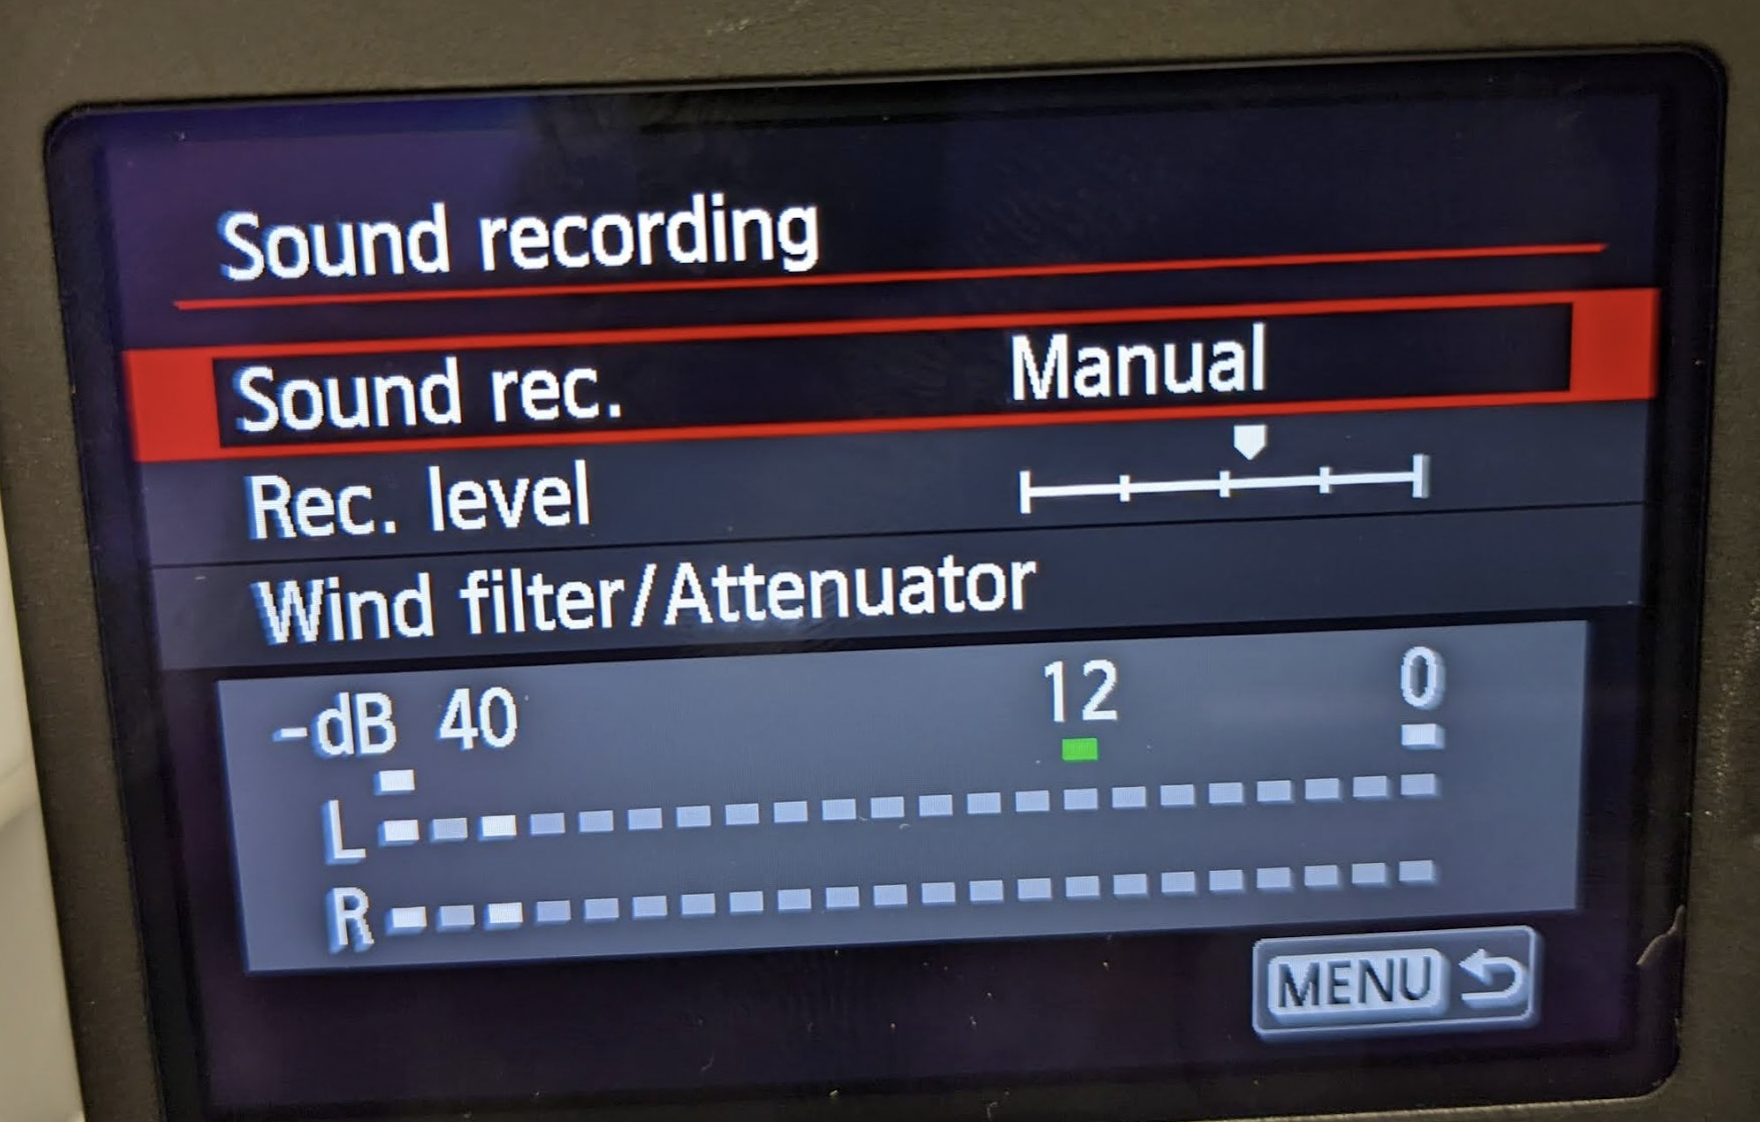
Keeping on the same tab 6th tab from the right and scroll down to Sound recording and press set to select |
|
| Choose Sound rec. set to Manual and press set |
|
Now adjust your sound level here pressing the arrows to turn up and down level input Audio level should be set around 12 db When you have a good input level press SET |
|
| Press the INFO. button |
|
Now you can see your Audio Levels and the Battery Life indicators |
|
This button on the lens sets the focus to Auto Focus = AF or Manual Focus = MF Leave on AF for better results when you are learning |
|
Next adjust the light coming into the camera Turning this dial sets the shutter speed. You always want your shutter speed 2 times your frame rate so 50 is the best setting since our frame rate is set to 23.98 Then adjust your F-Stop or Aperture |
|
Turning this dial sets your Aperture or F-Stop to make the image brighter or darker |
|
Ex: The overlay shows 50 Shutter Speed and the Fstop is 3.5 |
|
To start recording video Press the Start/Stop button to toggle recording on and off To view a recorded clip press the Blue Playback Button |
|
Click the screen to start playing the clip or clips |
|
When finished recording turn the camera OFF Wait a second to make sure the camera powers down and then eject the card and put it into a SD card reader. All our lab seats have them in the IMacs Look at the data on the card and copy the entire file structure to a folder on your hard drive to archive. Do not just take the .mov files take the entire card folder structure. Read more about how to on this wiki How to Backup your Audio & Video Storage Card Media (MAC/WINDOWS) |
|


Overview
Content Tools