Page History
...
NOTE - IF YOU HAVE LtRt or Stereo Mix Audio TracksYOU MUST MAKE SURE YOUR AUDIO IS IMPORTED INTO AVID CORRECTLY FOR A STEREO MIX OUTPUT | see this link for workflow: Or please check Pans on tracks and make sure they are panned Left and Right for a stereo output | |
| Next Turn on the Full Green or 10 bit setting on the timeline |  | |
| Mark an Inpoint and and Outpoint in the timeline. Example of how timeline should look before exporting |  | |
Next go to >File>Output>Export to File |
| |
Click on Options |
| |
a. Choose Export As QuickTime MovieMOV, Use Marks, Use Enabled Tracks
e. Display Aspect Ratio leave on Native Dimensions |
|
|
Click on Format Options |
|
|
Select the Apple ProRes Codec Compression Frame Rate Current |
| |
Click on Sound Settings |
| |
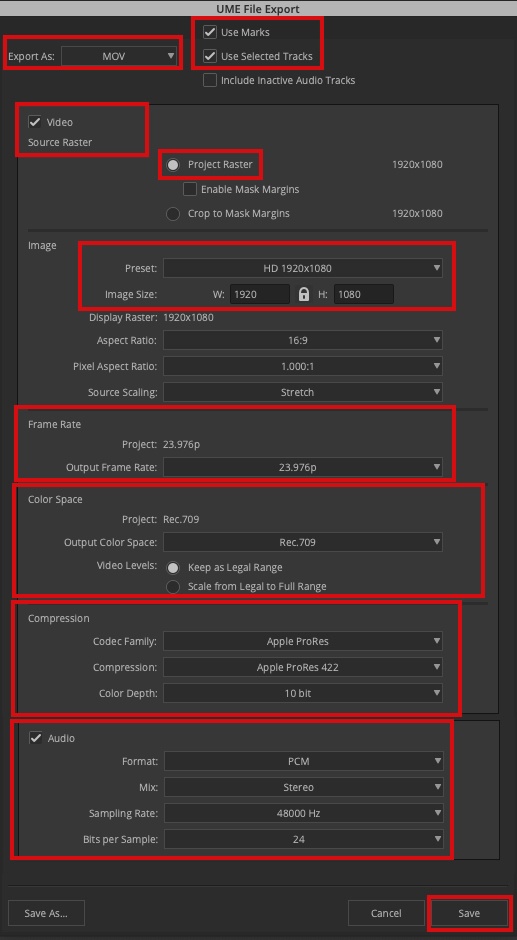
Check the Video box, Source Raster should match Project Raster
e. Output Color Space should be in Rec.709 for our screening deliverables. Keep Video Levels set to Legal Range (see below for more info)
Codec Family = Apple ProRes Compression = Apple ProRes 422 Color Depth = 10 bit g. Check the Audio box, Format should be PCM, Stereo, 48 kHz, 24bit Click Save to save the settings |
|
| This is how the QuickTime Movie Settings should look
|
Uncheck Prepare for Internet Streaming |
| |
This is how the AVID export window should be set Display Aspect Ratio leave on Native Dimensions >Keep at Legal Range
| ||
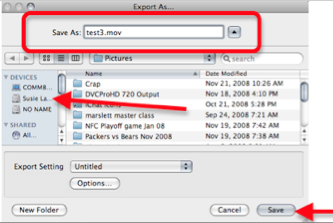
Click on Save and will be prompted to select a place to save the quicktime. |
|


...
Overview
Content Tools