Page History
Use this workflow to transcode or convert Blackmagic Cinema DMG, XAVC, XAVC s, and XAVC HD footage shot with the Alexa MINI, Sony A7s, and A7r, Sony FDR-AX100 and other prosumer cameras
Launch Resolve Application |
|
Click the "New Project" button in the lower left corner to create a new project |
|
Title the project – click Create |
|
Double click the project to load it |
|
Set your Video I/O |
|
| Choose the Video I/O and GPU Choose Intensity Shuttle Thunderbolt if available. | 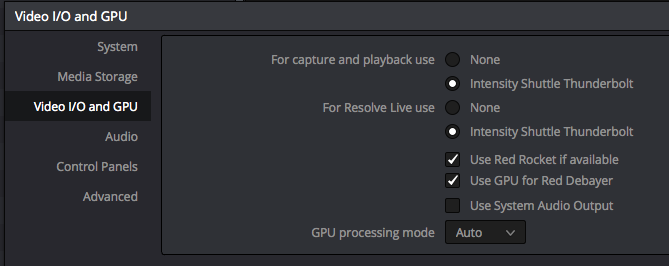 |
| Or Choose Intensity Extreme depending what suite or lab you are using |  |
Note these features are only available in CMB 4.112 Graduate Hallway, CMB 4.120 Undergraduate Edit Suite and CMB 1st floor suites. If you are not in these rooms you will not see the Intensity devices as a choice for input and output to the exturnal monitor. Your preferences will look like this. |  |
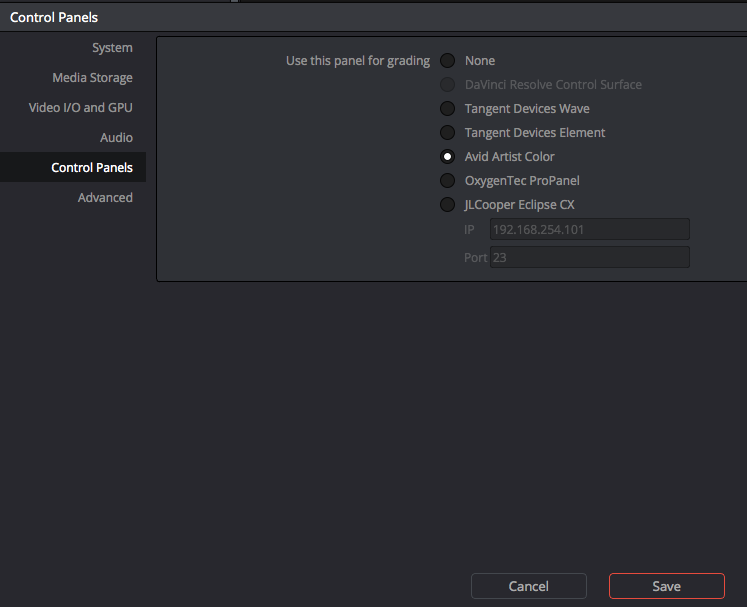
Change the Control Panels to the Tangent Devices Wave or AVID Artist Color if one is connected. If not then choose None. Click Save to apply changes |
|
| Unfortunately you have to restart Davinci to load the preferences. |  |
Quit the program and choose to save then reopen using the steps above.
|  |
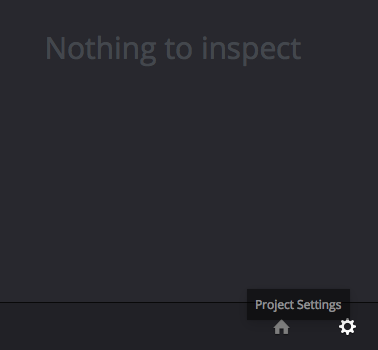
Set up some Project Settings. Click on the Project Settings Icon in the lower right corner of the screen |
|
Go to "Autosave" and turn it on saving every 10 min |
|
Click on Capture and Playback and choose> Video Capture and Playback HD 1080PsF 23.976 |
|
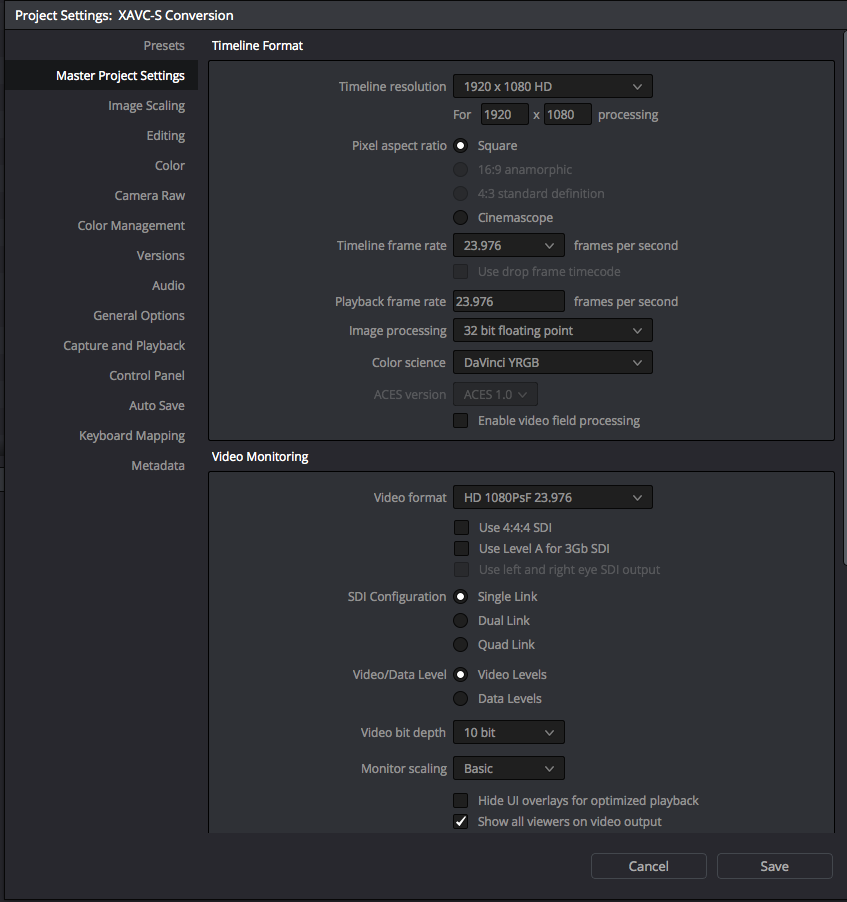
Click on Master Project Settings > Change the Timeline Resolution>playback frame rate to 23.976 Change Playback frame rate to 23.976
Video Monitoring choose HD 1080PsF 23.976
Choose Save to apply these preferences |
|
Now load your media into the media pool> |
|
Create a Timeline |
|
Go to >File>New Timeline |
|
Name it |
|
Select all the files in the Media Pool that you want to use |
|
Add a LUT to them or not. To add a LUT right click on the clip or clips. |
|
| Note if you are transcoding A7s footage and want it to have that film look the best LUT to use is the 3D LUT > Arri > Arri Alexa LogC to Rec709 |  |
|
|
The go to the Deliver tab |
|
| Choose to Render the Entire Timeline |  |
Click on Render Settings> and use the slider to navigate to the AVID AAF tab |  |
Click on Browse to select the hard drive and folder you want to render to |  |
| Navigate to the hard drive and you can choose to Add a new folder if needed |  |
| Name your new folder and click OK | 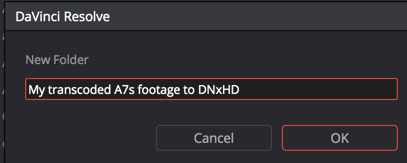 |
| Make sure you select the newly created folder and click OK |  |
Choose Video Format MXF OP-Atom
Codec DNxHD 1080p 36 8-bit if you are doing a offline or proxy version of the media. |  |
If you don't want to return to resolve and do an "Online and or Conform" then choose a codec that you can deliver for screening and distribution. Choose Video Format MXF OP-Atom
Codec DNxHD 1080p 220/185/175 10-bit
|  |
Click on the Audio tab Check the box for "Export Audio" if you want to export Audio Do NOT choose "Same As Source" for the Channels drop down. (your audio will come out as static)
Make sure to choose 2 for the Channels drop down.
Codec = Linear PCM Channels = 2 Bit Depth = 16 Tracks = One per channel (if your audio still comes out as static, try changing the bit depth to 24) |
|
| Click on Add to Render Queue | 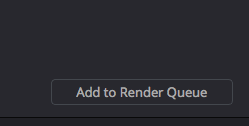 |
| Choose to Start Render once the Job has been added to the Render Queue |  |
Job has completed. The files need to be added to AVID MediFiles Folder
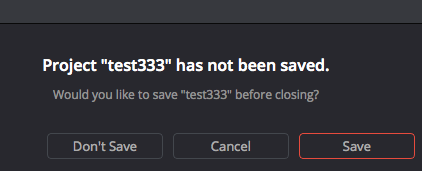
Quit Resolve>Save the project. Make a backup of the project and save it for the final color correction and conform. See this workflow for making a backup. |


 | |
 |  |
In Finder on the Mac
Copy or Move the .mxf files to the AVID MediaFiles>MXF>1 folder
This is so AVID can see the files when the .aaf file is imported. |  |
| TO COPY FILES OVER TO SHARED STORAGE LIKE EditShare or AVID ISIS Servers use this workflow | AVID - ISIS 5500 Server - Media Management |
Once the files are copied over Launch AVID
|  |
| Make a new AVID Project or use an Existing one |  |
Make a New Bin | |
Title the new bin "My XAVC Transcoded Footage" | |
Go to >File>Import | |
Navigate to the .aaf file in the Resolve exported media folder and select it. | |
The clips and the timeline will import into AVID. They should be linked to the transcoded media.
Edit the files in AVID developing a picture locked sequence that you can then export out of AVID back into Resolve.
See this wiki for AVID .AAF export to Resolve. Option #1 AVID - How to Export an AAF and QuickTime To Davinci Resolve 1080 HD workflow Option #2 AVID – Relinking to Native files for .aaf and QuickTime export to Davinci Resolve
|  |

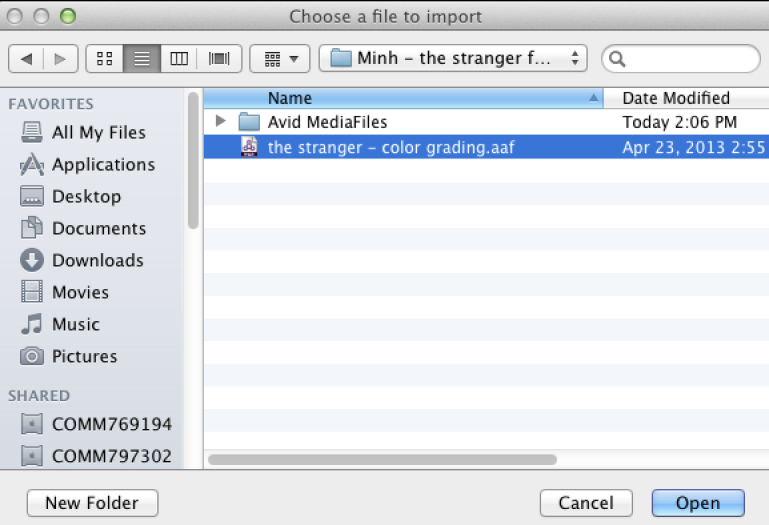
Bring the .aaf from AVID back into Resolve |
|
Select the .aaf to import |
|
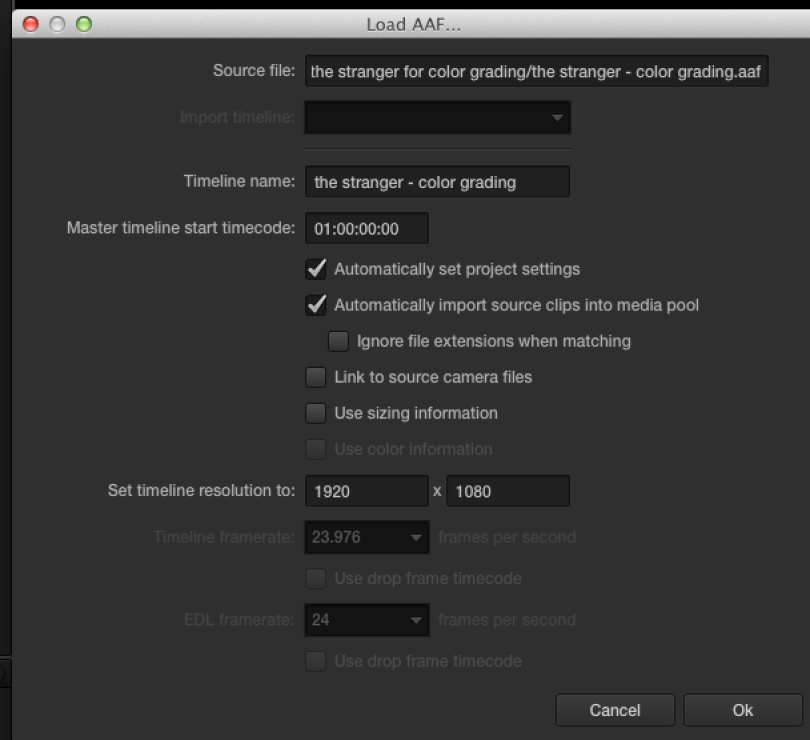
Keep the default settings if you would like to guide Resolve to the files to bring into the media pool. See later in this document for adding media prior to importing into Resolve. |
|
Select Yes |
|
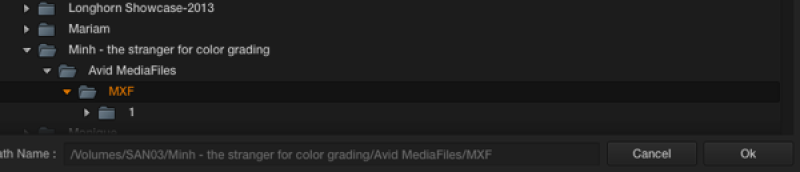
Navigate to the folder and click OK |
|
Second option is to add the media to the resolve project first |
|
Load your media into the media pool> |
|
>File>Import AAF, EDL, XML |
|
Select the .aaf to import |
|
If you already added your files to the Media Pool then choose to deselect |
|
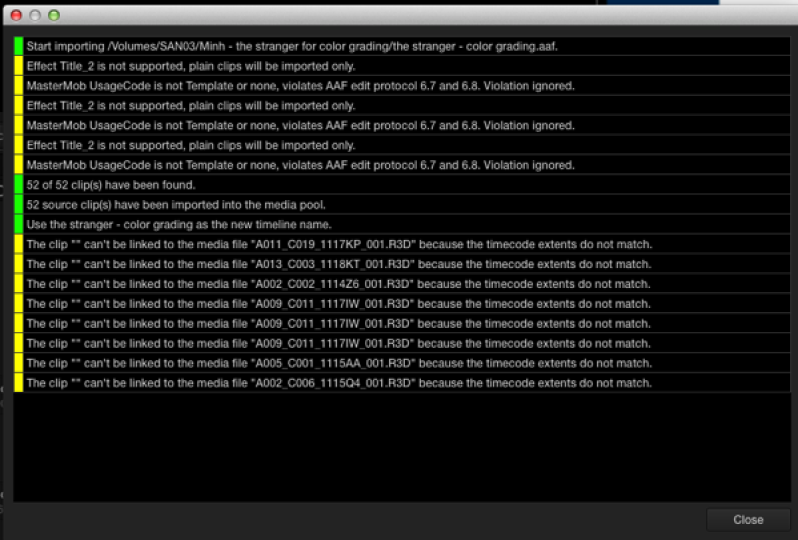
Example here of problems with some of the clips |
|
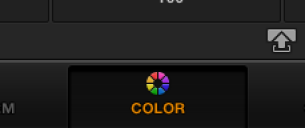
To view what is missing easier click on the "Color" tab |
|
Then click on the "Light Box View" |
|
Here we can see what is missing easier. |
|
You can right click to see clip info |
|
Clip info |
|


The Next Steps will Explain how to QuickTime into the Resolve Project
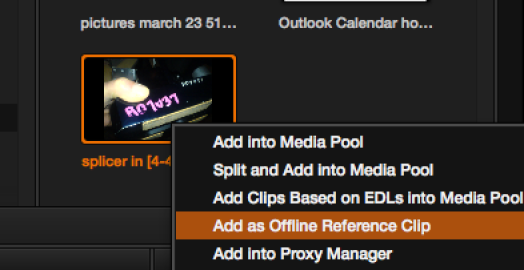
Click on the Media Tab > Go the the Library navigate to the folder containing the quicktime and right click it 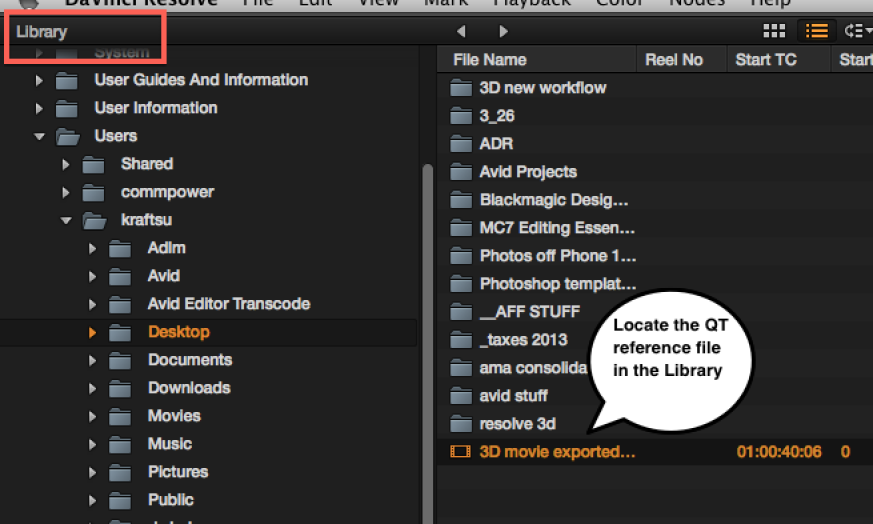
Right click and choose "Add as Offline Reference Clip"
Go to the Edit tab and

Go to the Resolve timeline that was created from the .aaf
>Right click on the timeline and
>Choose Link Offline Reference Clip
>Choose the QuickTime that you exported

Go to the Timelines bin and choose the timeline > right click it > choose to link offline video and choose the name of the quicktime you just added as the offline clip
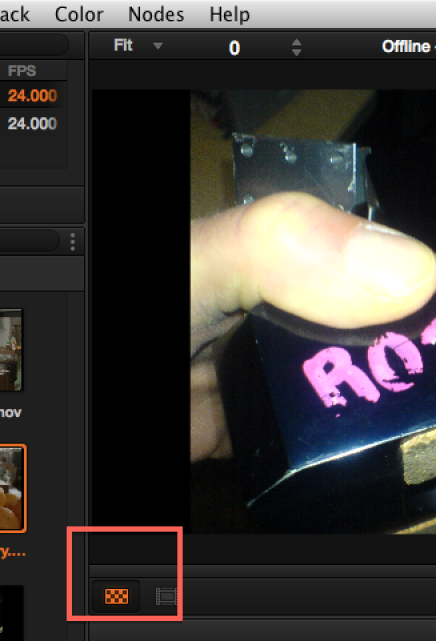
Go to the source window in conform view and choose to display the "Offline" by selecting the checkerboard icon.
This should show the reference "ganged" up with the timeline. If you click the Up and Down arrows you will navigate the timeline and the reference clip will follow exact picture match.
Overview
Content Tools