Page History
...
Disclaimer: You will need to utilize several sets of tools to achieve this workflow. The Moody College of Communication has already pre-installed these in many of our digital media labs. However, if working elsewhere, you will need to have administrative access in order to complete the steps in this wiki.
We will need the following software:
- Avid Media Composer Application (version 7 and up)
- Avid Media Composer - a locked, completed Master Sequence with all rendered VIDEO and EFFECTS on Track V1 and all TITLE MEDIA (created with either the TITLE TOOL or the AUTO TITLER TOOL) on Track V2. AUDIO is typically a Dolby Stereo LtRt Downmix on Tracks A1 and A2. Don't forget to PAN those MONO audio tracks to LR!!
- Adobe After Effects (version 5.0 and up) - Click here to sign-up for a limited free trial version of Adobe Creative Cloud which includes After Effects CC
- A copy of the Text Generating AE Script - Click here to download the script file (.jsx)
- The latest version of the VideoLAN VLC Media Player for your operating system
| PART ONE: AVID MEDIA COMPOSER - PREPARING SEQUENCES AND TITLES TO EXPORT |
| 1.) In Avid Media Composer, OPEN the BIN containing your fully rendered MASTER SEQUENCE we need to export as the screening deliverable. |  |
2.) Notice how I have everything fully rendered and organized, especially in regards to my Title Media Tracks. In this instance, I have two language tracks - one for English and one for Italian. The Festival has asked me for three deliverables: 1. a textless master Quicktime movie 2. a separate English SubRip (.srt) subtitle file 3. a separate Italian SubRip (.srt) subtitle file I'm going to start by DUPLICATING this MASTER SEQUENCE for each deliverable |  |
| 3.) I have 4 sequences now. I will rename each one to make sense of each one of my deliverables. I'll also include numbers to chronicle the order in which I export them. |  |
| 3.) Now that I have my logic, I need to remove content from Sequences 1-3. I'll delete unnecessary tracks per the parameter of each deliverable. See below: |
|  |
| 2. MY ENGLISH SUBTITLES |  |
| 3. MY ITALIAN SUBTITLES | 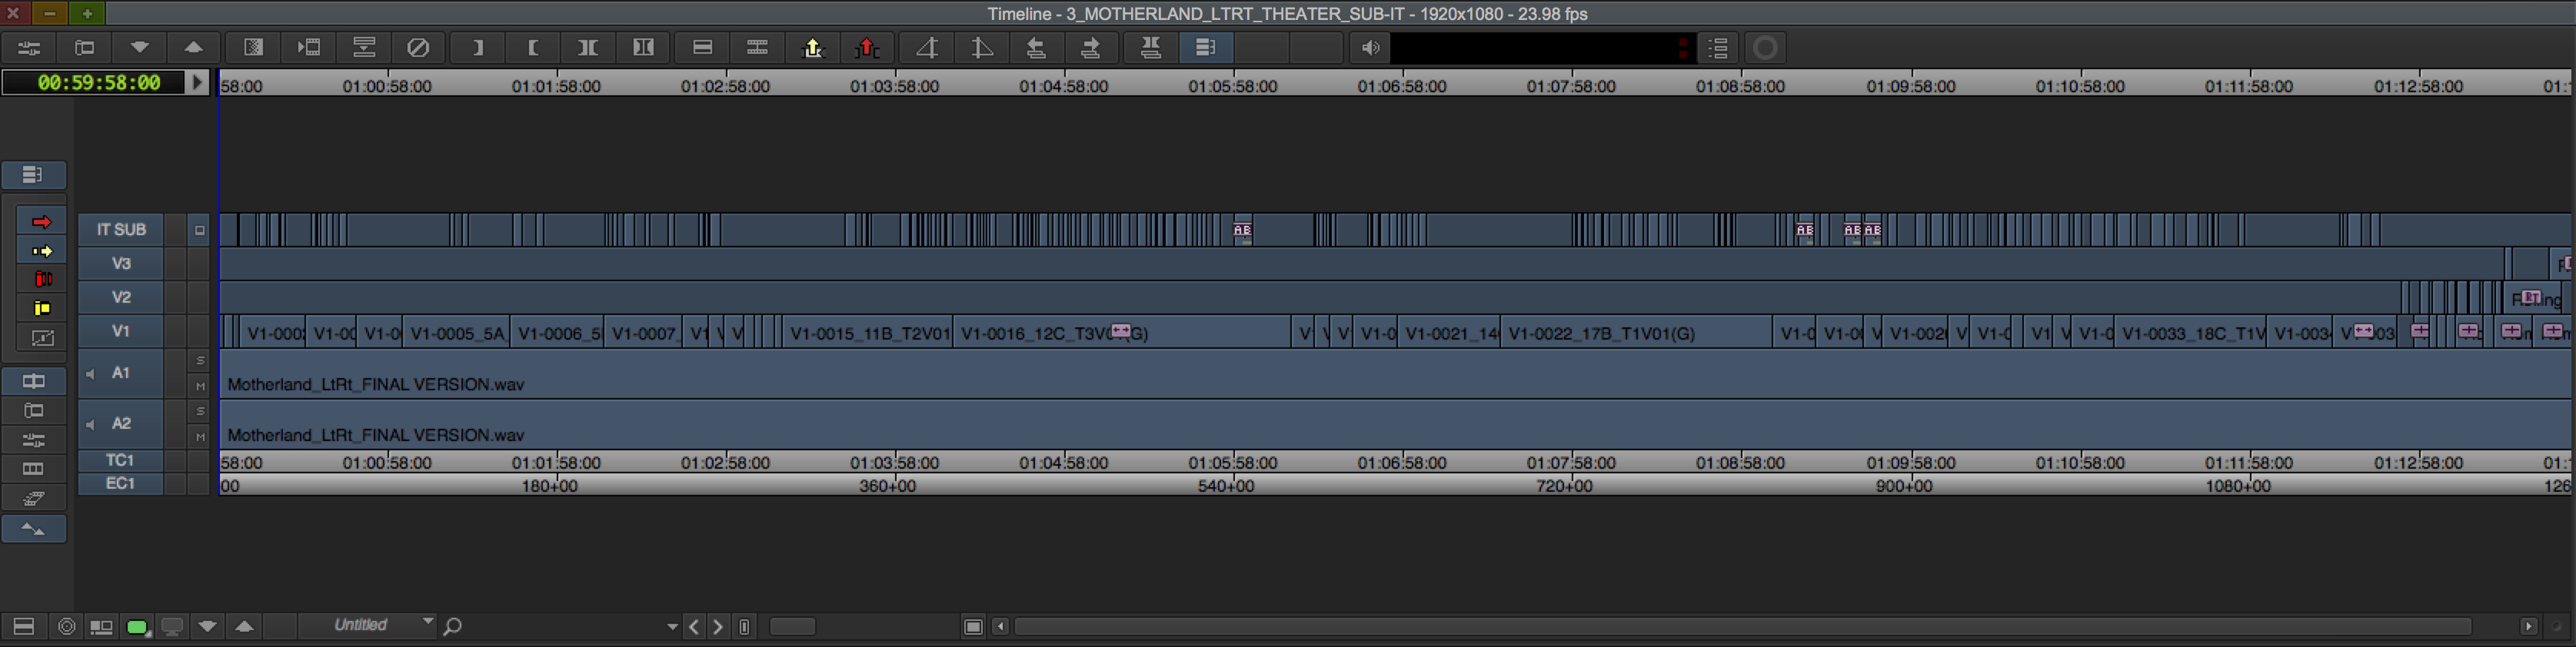 |
4.) Firstly, let's export a Master Intermediate Quicktime Movie (if you don't already have one!) Most MASTERS should be TEXTLESS. Click here to review documentation on how to export a DNxHD Quicktme Movie. *Regarding Colorspace ranges (709-Legal vs RGB-Full) contact either the Festival or the entity requesting the deliverable so they may provide you with the correct technical specifications of what they want/need! Never assume!! |  |
| 5.) Now that we have video to work with let's concentrate on EXPORTING our ENGLISH subtitle media. DUPLICATE the MASTER SEQUENCE with the ENGLISH subtitles. CREATE a NEW BIN and MOVE the DUPLICATE into the new bin. |  |
| 6.) I'll PREP the DUPLICATE SEQUENCE to only contain my ENGLISH SUBTITLE MEDIA. I'll DELETE TRACKS V1-V3 and A1-A3. |
| BEFORE: |  |
| AFTER: | 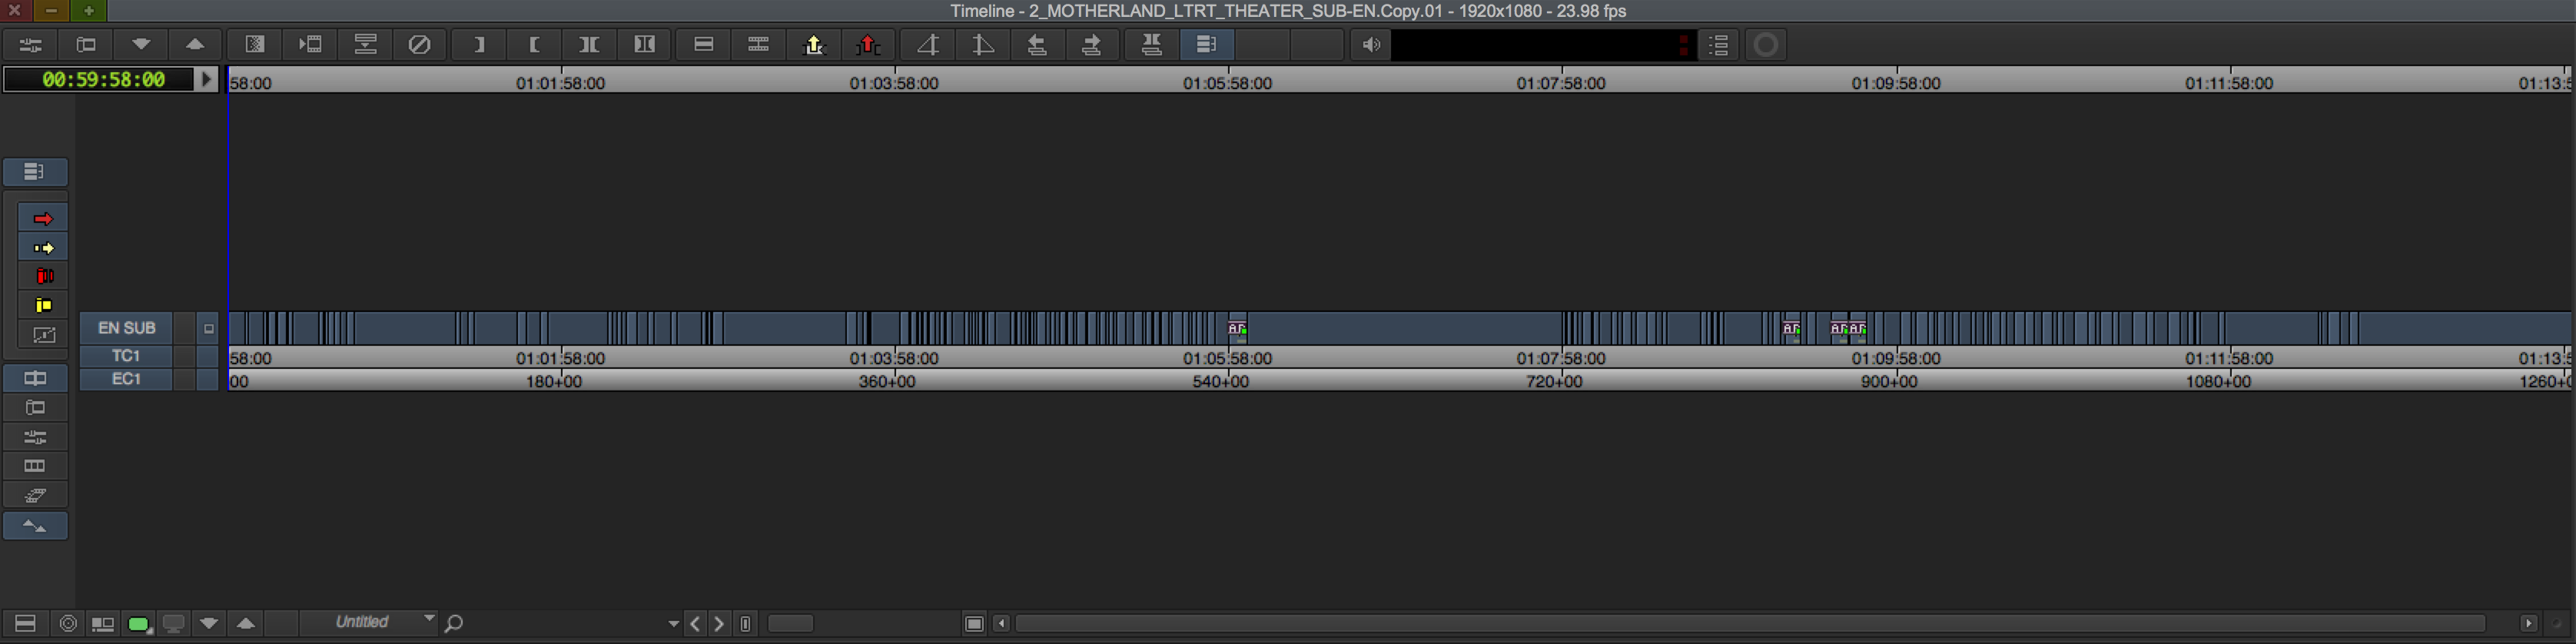 |
| 7.) Now it's time to EXPORT the AAF (Advanced Authoring Format) we'll be bringing into After Effects. Making sure I have an INPOINT and an OUTPOINT at the beginning and end of my sequence, I'll SELECT ALL MY TRACKS in my Timeline Window (CMD + A) and go to FILE->EXPORT |  |
| 8.) In the Export As window select UNTITLED from the EXPORT SETTINGS dropdown menu |  |
| 9.) Click the Export Settings OPTION BUTTON |  |
10.) The Export Settings As Dialogue Box will pop up. Make your settings look like those in the screen shot → Export As: AAF
Video/Data Details
Media Destinations
|  |
| If you receive an AAF export involving ProRes media error after Step 12 you'll need to TRANSCODE your title media to a codec native to Avid. I recommend transcoding to DNxHD 36 in the AAF Export Setting As Dialogue Box |
|
| 11.) Press the SAVE AS... BUTTON and name the new Export Setting as AAF SUBTITLE TO AEand press the OK BUTTON. Close the Export Settings As Dialogue Box by pressing the SAVE BUTTON |    |
| 12.) Choose a Destination path with sufficient hard drive space and name the export accordingly. Create a New Folder to store the AAF file. In this instance, I am saving the AAF export to my DESKTOP in a folder called AAF_TO_AE |  |
| 13.) I'll repeat Steps 5-12 to EXPORT an AAF for our ITALIAN subtitle media |  |
| PART TWO: ADOBE AFTER AFFECTS - IMPORTING AAF TO GENERATE SUBTITLE TEXT |


| 14.) We are now have our AAF subtitle media assets; I am finished with Avid Media Composer and I can SAVE my project and QUIT the application. Now we'll LAUNCH/OPEN the Adobe After Effects CC application to complete the last few steps |  |
| 15.) Once After Effects opens, I'm ready to import my AAF subtitle media file. To do this, click FILE->IMPORT->PRO IMPORT AFTER AFFECTS. This will utilize a special plugin designed by Automatic Duck to import and translate project sequences and media from other applications such as Avid Media Composer, Final Cut Pro, etc. This plugin should already be included in After Effects (version 5.0 and up) - no installation is necessary |  |
16.) Navigate to the location you saved your AAF subtitle media exported from Avid Media Composer. In this instance, I have saved my subtitle media to a folder on my Desktop called AAF_TO_AE. I'll select my MOTHERLAND_SUB-EN_ONLY.aaf file and will then click on the Modify Settings button in the lower left-hand corner of the window |  |
| 17.) A new pop-up window will appear. Select the Comp and Layers tab. Under the Layer Organization section be sure to select Layers step down in comp. Click OK and then click OPEN to import the selected AAF file into After Effects |  |
| 18.) Depending on the number of titles you created in your editing project, the import and translation of the sequence may take several minutes to complete. Once import has completed, you'll see a new Composition has been created as well as a Folder containing the associated title media. OPEN the Composition by DOUBLE-CLICKING on the Composition icon | 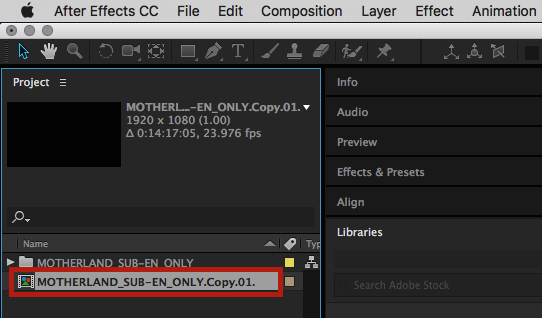 |
19.) We can now see that our sequence appears in our Timeline window. Each title has been converted to it's own separate layer and represents the exact timecode and duration values from the Avid Media Composer project. We can review the individual titles in the Timeline window by scrolling the playhead forward in time over the layers and reading the title(s) in the Composition window. It is import to note the font type and size displayed in the Composition window are not relevant to our final SubRip text file. It is NOT NECESSARY to adjust any scale, position, or any other layer properties! |
Select ALL layers by either clicking EDIT->SELECT ALL or by using the shortcut COMMAND + A |  |
| 20.) Now that we have selected all of the layers we'd like to export out of After Effects, it's time to run our script which will compile all of the layers and their timecode values to a single text file. If you haven't downloaded the script file yet you may do so here. SAVE the JSX script file somewhere easy to find like the DESKTOP. To RUN the SCRIPT FILE, click FILE->SCRIPTS->RUN SCRIPT FILE |  |
| 21.) A new pop-up window will appear. Navigate to the location you saved the SUBTITLE_EXPORT.JSX script files. SELECT the SUBTITLE_EXPORT.JSX script file and click OPEN | 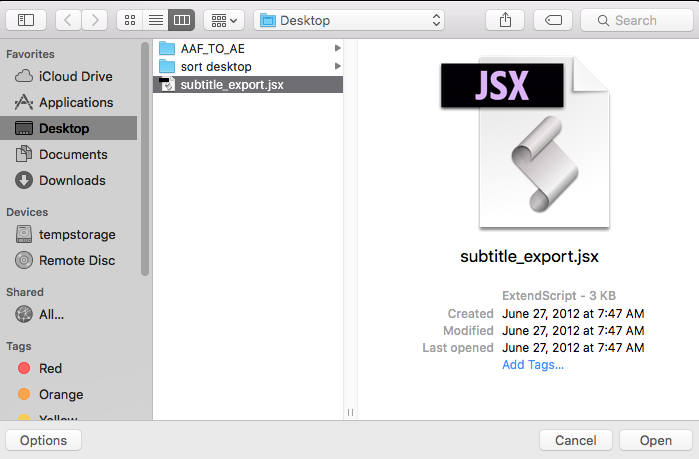 |
| 22.) A new pop-up window will appear. Choose a Location to SAVE the outputted text file and NAME the file. In this instance, I have named my text file MOTHERLAND-SUB-EN and am saving it to a subfolder named 99_DELIVER. Click SAVE to run the script and begin exporting process |  |
| 23.) Once finished, a TextEdit window will pop-up with all of your subtitle character and timecode values |  |
| Repeat Steps 15-22 for additional AAF subtitle media. In my scenario, I will need to repeat these steps for my Italian subtitle media (MOTHERLAND_SUB-IT_ONLY.aaf) |
| 24.) If you encounter a AFTER EFFECTS ERROR (LINE 80) in Step 22, this is a result of default permission preferences being turned off. Hit OK to clear the error. | 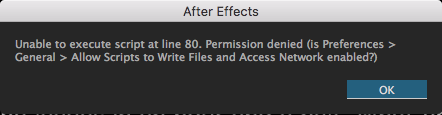 |
25.) Click After Effects CC -> Preferences -> General
|
Note: If you are an After Effects Power User and worried about malicious scripts, you can always enable this preference for just this task and then disable again upon completion |
|
26.) Once this script has generated your your text files, we need to add a SubRip extension modifier to our text file name. Navigate and locate where you saved the output from Step 22. |


|

| I'll add/type .SRT to the end of my MOTHERLAND_SUB-EN file and press the ENTER/RETURN key. |  |
You will receive a pop-up window warning. Hit ADD. |  |
We need to also CHANGE the NAME of our textless MASTER QUICKTIME MOVIE to MATCH the SRT (SubRip text) FILE. It is CRUCIAL that the MOVIE NAME of the deliverable and the After Effects generated SubRip text file (.SRT) NAMES MATCH! AS LONG AS THE NAMES MATCH AND BOTH ARE LOCATED IN THE SAME FOLDER, EVERYTHING SHOULD WORK PROPERLY!! |  |
| 27.) Lastly, we should test our files to ensure they are playing correctly. To test the SRT (SubRip text) file, RIGHT-CLICK on your movie file and choose to OPEN WITH VLC |  |
| Playback should begin, and our subtitles should play automatically. Watch the movie in its entirety to ensure the subtitles sync properly with our Quicktime movie deliverable. |  |
...
Overview
Content Tools