Page History
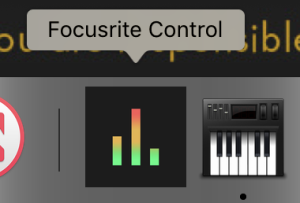
| Open Focusrite Control in the Applications folder |
|
Click on >File Load Snapshot We have a snapshot for both A and B suites because they are different |
|
Go to >Tempstorage> Templates>Focusrite CMB4122 Studio C surround setup NOTE THIS IS ONE
Click Open |
|
Click on Device Settings Red 4Pre Clock Source make sure it is internal Make sure that the FocusRite is synced to Internal If you don't have it synced correctly no sound will come out. |
|
Turn on the Touch Panel monitoring and projection system: Click on Computer to Start the system |
|
| Then click on Advanced |  |
| Then click on Surround Sound |
|
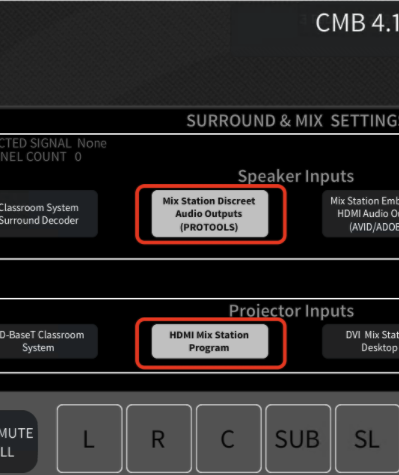
For ProTools audio output choose Mix Station Discreet Audio Output (PROTOOLS) Projector input choose HDMI Mix Station Program
|
|
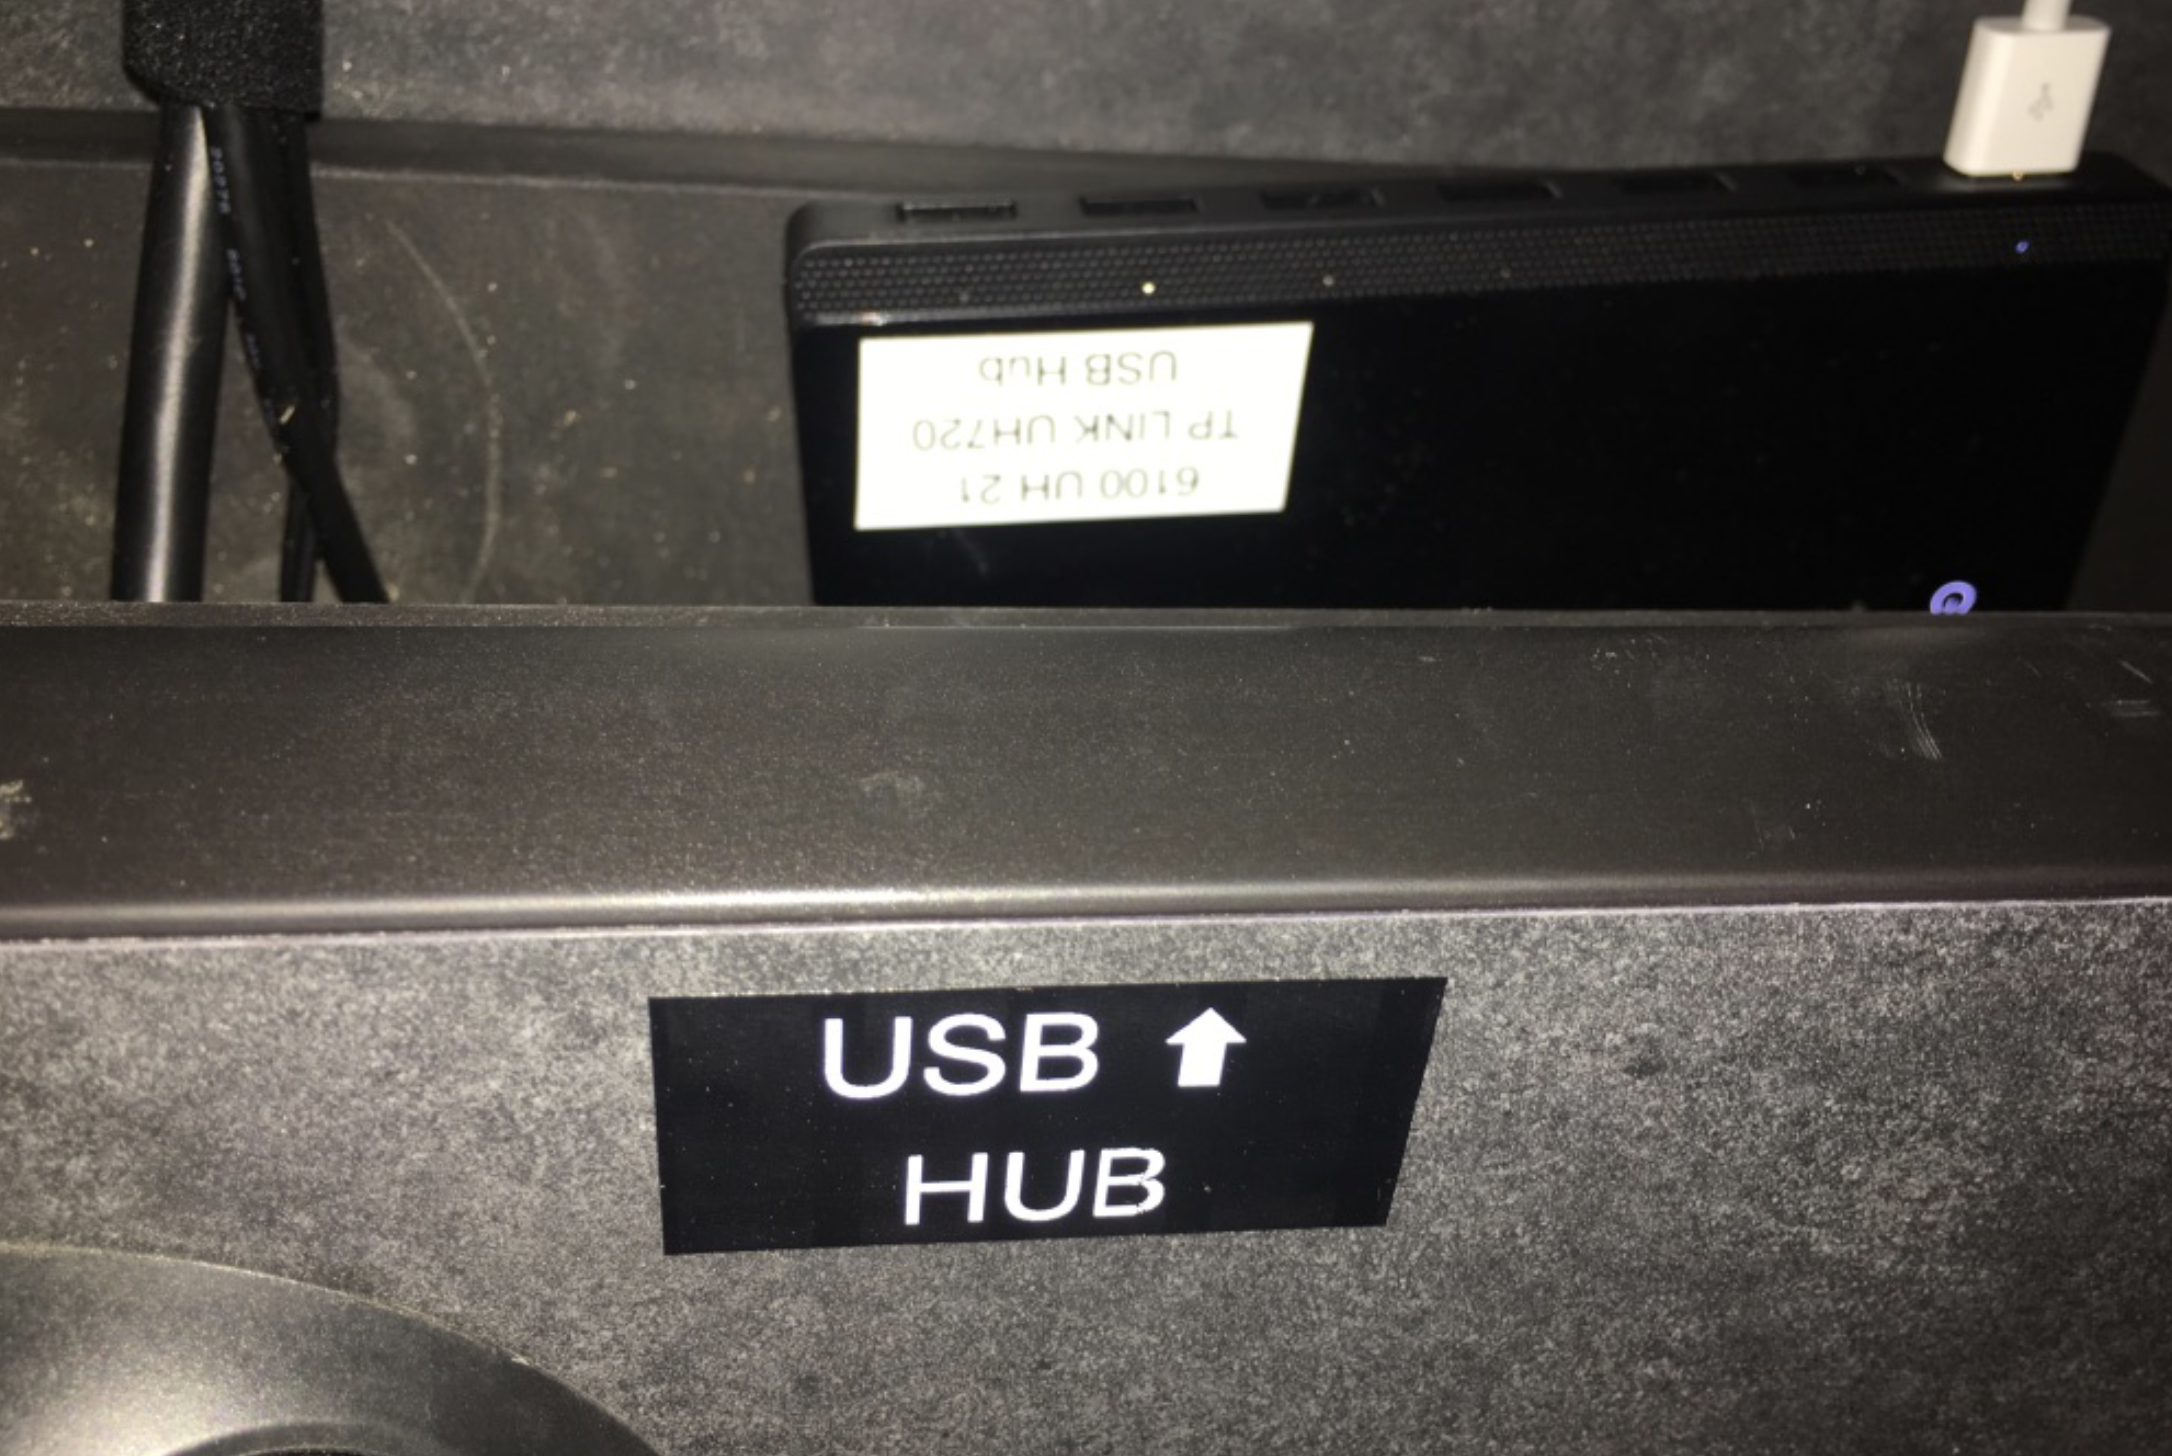
If you need to plug in a USB external hard drive you can find the USB hub on the desk Located towards the back of the desk you will see a label USB HUB |
|
| Note - If you would like to use the ProTools Control Surfaces please see this wiki | ProTools - How to Connect the IPAD and the S3 Console to your ProTools Computer |
Open ProTools > Create Session or Open existing session |
|
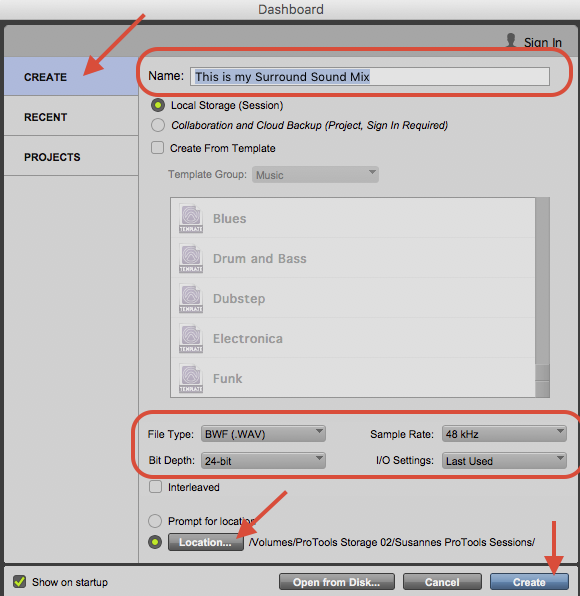
Choose Create Blank Session and or Open an existing session If creating a blank session, Choose - Create Name the session - Local Storage BWF (.WAV) Audio File Type 24 Bit Depth 48kHz Sample Rate Last Used I/O Settings LOCATION (press the location button) CHOOSE one of the ProToolsHARD DRIVEs VERY IMPORTANT - you know where you saved your session !!!click Create to create your session | |
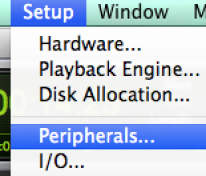
Note only need to do this if you are using the ProTools Control Surfaces!!Otherwise skip this step Go to > Setup > Peripherals |
|
Navigate to the Ethernet Controllers Tab Enable the Ethernet Port > Ethernet #2
Choose to Enable EUCON |
|
| Then go to >Setup>Playback Engine |
|
| Set to Focusrite Thunderbolt |
|
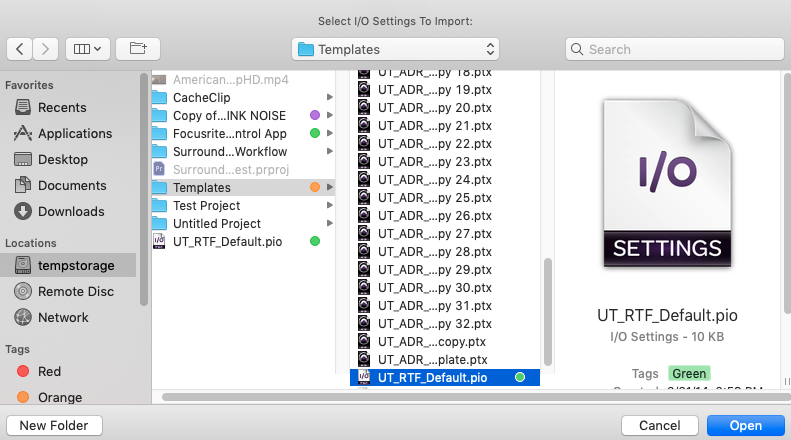
| Then Import the surround sound template for the input and the output |
|
Choose Import Settings |
|
| Choose >tempstorage>Templates> UT RTF Default .pio |
|
| Choose NO here |
|
Choose to REMAP to the new Monitor Paths |
|
| Then Click OK Here |
|
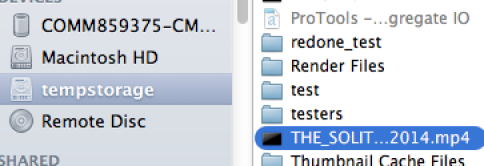
Next Import the video into the project |
|
Navigate to the video file that you want to view in the ProTools session |
|
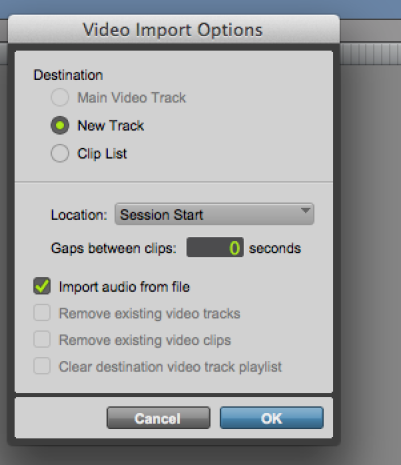
Choose New Track |
|
Choose to import at Session Start |
|
Choose to enable the Video Engine |
|
If you would like to use the audio of the video file choose to save it to the default Audio Drive folder |
|
Video Engine will launch and you should be able to see the image on the projector automatically |
|
|
|
Once the track is imported into the ProTools session change the format of the clip to 720p/23.976 or 1080p/23.976 depending on what kind of file you have so it plays out to the projector. |
|
Next make sure the Video Track is Online and that the menu states that Video Hardware is Enabled. If Disable Video Hardware is showing it is okay Go to Options > Video Track Online |
|
Next Go to the Output and set all the tracks to "Main (5.1) > Main" You should hear surround audio now and see image on projector |
|


...
Overview
Content Tools