Page History
Click on Windows on the top navigation bar > Workspaces > Color Correction Use the Automatic HSL (Hue Saturation and Luminance) fix on all the clips in the timeline for a quick one-time pass color correction session. |
|
Select the HSL Tab (Hue, Saturation, Luminance) Make sure that “Hue Offsets” is selected. |
|
These buttons are the “Auto Color Correction Tools” |
|
Auto Balance – Removes Color Casts |
|
Auto Black – Adjusts the black to the richest levels of black – removes milky look |
|
Auto Contrast – Adjusts for the best possible contrast between black and white |
|
To apply place cursor on the clip to apply color correction and click: |
|
Apply and change in this order: Auto Black Auto Contrast Auto Balance |
|
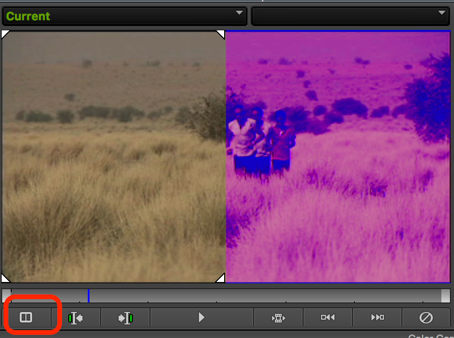
Click the – Dual Split Icon will show the before and after color correction Before is on the left and after on the right |
|
To move to the previous or next uncorrected shot, press these buttons |
|
To apply an auto color fix on all the clips in the the timeline click on the “Color Correction Mode Setting” |
|
Click on the AutoCorrect tab On each pulldown menu, select the action that each pulldown will apply. Set these to the same auto workflow as the previous steps in this helpsheet. Auto Black Auto Contrast Auto Balance In that order – then click OK |
|
To apply these Correction Mode Settings to multiple ciips… Change the Windows > Workspaces > Effects Editing |
|
Select the “Segment” tool and select all the clips in the timeline |
|
In the project window, select the effects tab > Image > Double click “Color Correction” option. This will apply onto all selected clips. |
|
Then you can go into the color correction tool to compare the before and after and tweak the settings if needed. |
|
Make sure the video quality menu is set to full green and then render all effects before export. |
|


Overview
Content Tools