Make sure your timeline is set to full Green or even Full Green 10 bit if you are connected to a Kona card or AVID Nitris |  Image Removed Image Removed  Image Added Image Added
|
Go to your project window and click on the Settings tab.
Then choose the Render Settings by double clicking on it |  Image Removed Image Removed 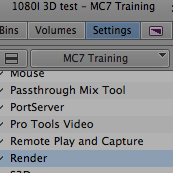 Image Added Image Added
|
For high quality broadcast rendering make sure you are set to Advanced (Polyphase)
Choose the other renders as either "Both Fields"
"Interpolated Field" or "VTR Style"
See explanation below. You might want to do a test on a couple of different settings to see which looks best. They may look about the same. Do not use "Duplicated Fields" | 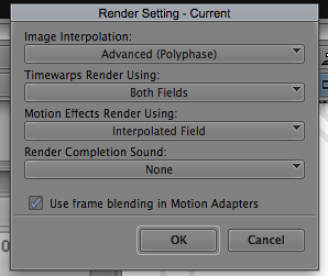 Image Removed Image Removed  Image Added Image Added
|
Duplicated Field –
- default - throws one field away –
- low quality –
- Offline – not for broadcast
- does not need rendering
Both Fields –
- duplicated fields
- good for progressive 24fps
- good for video w/o interfiled motion
- good for stills
Interpolated field
- Fields are combined in field line pairs
- Smoothes Motion
- Good for 24 or film
- Combines fields to make new fields
- Effect may be slightly soft
VTR-Style
- Combines fields to make new fields
- Shifts field line info by one scan line
- Smooth effect w/o detail loss
- Slow speeds slight vertical Jitter
|  Image Removed Image Removed
| |  Image Added Image Added
|
Make sure Renders are set to
ProRes HQ MXF
Go to Settings>Media Creation | 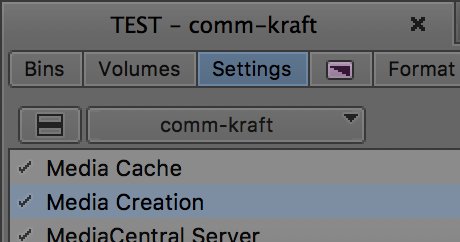 Image Added Image Added
|
Set to Apple ProRes 422 HQ
>Apply to All
>Storage Drive make sure
It is the right one
Effects Processing
Automatic |  Image Added Image Added
|
 Image Added
 Image Removed
Mark the timeline in to out
Go to >Clip>Render In/Out |  Image Removed Image Removed 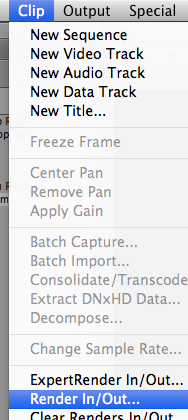 Image Added Image Added
|
Choose the storage drive and click OK |  Image Removed Image Removed  Image Added Image Added
|