AVID new relinking ProRes 422 or 2K or higher AMA workflow – This is for projects edited using ProRes .mxf files relinking to footage that was recorded on a PIX or Ninja or on the Arri internal SXS cards using the ProRes codec.
- Duplicate the sequence and put in a new bin.
- On the duplicate delete any titles you made in AVID. Try to get all your video clips down to the V1 track and or V2 track. If you can get the video track down to one that is easiest.
- Export Only a DnxHD Quicktime for "Resolve" as reference.
See this wikidoc
https://wikis.utexas.edu/download/attachments/32934966/AVID-+Export+a+AVID+DNxHD+Quicktime.pdf?version=1&modificationDate=1330040316000
Close project and hide the AVID media files so that AVID doesn't relink to the old transcoded media. Change the name to the AVID MediaFiles folder.
Change from this

To This

Relink to the AMA volume that the raw .r3d files are on. Go to >File>Link to AMA Volume

Locate the original Native Pro Res .movs QuickTimes
Click Open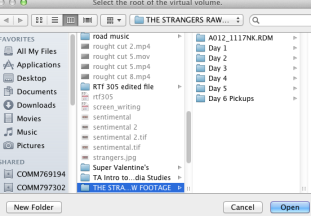
Use the settings "Bins Based on Current AMA Setting"
Click OK
All the AMA files will load up in a new folder when you choose the default settings.When ready to online reconnect to the native ProRes files.
Select all AMA FILES in the AMA folder
Right click the sequence to relink and choose Relink
Right click the sequence to relink and choose Relink

Use the standard relinking options after the AMA media has been mounted
Choose Selected Items in All open bins
Choose to relink by Tape Name or Source file Name
If that doesn't work choose
Choose to relink by Tape Name or Source file ID
Change the timeline Clip Color to show AMA clips as a different color so you can make sure you are linked to the "Native" ProRes .mov QuickTimes
Go to the Timeline "fast menu"
Choose Clip Color
Choose a color for the AMA clips and make sure the "checkbox" is checked for AMA
Notice in this timeline only part of the clips turned purple. You should have the entire timeline show purple clips so that you know all the clips are relinked.

On AVID timeline, you can -Match Frame>Find Bin>Reveal File to double check the files are relinking back to the original ProRes files
Once the media in the timeline is relinked to the ProRes .mov files the timeline should look purple (or whatever color you chose for AMA in clip color) showing that the files are relinked to AMA media.
The next step is to export the .aaf Go to >File > Export
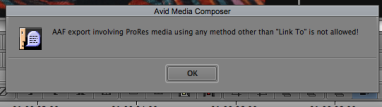
Note when exporting a .aaf for a "ProRes" AMA linked timeline you can only use the "Link To" method
To create the .AAF file from a ProRes.mov AMA linked timeline
Choose LINK TO on both Audio and Video
Must have Link To selected as the "Export Method" for both the Video/Data Details and the Audio Details tabs shown here

The .aaf for the color correction. Example shown here.

You will have to bring all the original "Native" Quicktimes that you relinked the timeline to and this .aaf to the Resolve color correction session. Ex: bring the hard drive with the quicktimes on it and this .aaf fileThe deliverable for the "Resolve" session will be the folder or folders that contain the ProRes .mov files and the .aaf file
See this link for instruction on how to import the .aaf and media into Resolve.
Resolve - Final Conform and Color Correction Project Setup - Import .aaf and Quicktime
Overview
Content Tools