This workflow is based on menu settings that can be seen either through the eyepiece or a monitor connected via SDI You will not see these menu settings on the LCD on the side of the camera |  |
| Connect the Monitor to SDI out #3 on the camera |  |
Turn on the Sony F5 using the on switch |
|
| Click on Menu Button | 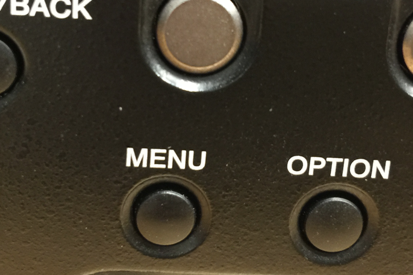 |
Use the knob to Navigate through the menus and press the knob to select the menu item |
|
Go to System Menu |
|
Reset the camera to defaults |
|
|
|
| Reset>Execute |  |
| Yep Execute again |  |
| Turn the camera off and on |  |
| Power off the camera wait about 30 seconds and power on the camera | 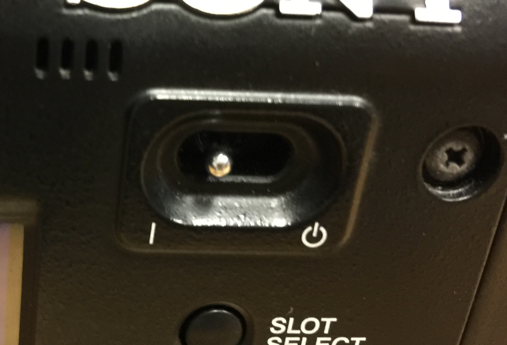 |
If this menu comes up: It's a maintenance self check that the camera does every 5 days or so. It's best to let the camera do APR whenever it reminds you. |  |
Press Menu to set up some more settings |  |
| Go back to System > System Setting and make sure the Frequency is set to 23.98 |  |
Go to System > Record Format> HD |
|
Select the Record Format |
|
class 480 is the 480Mb/s version of 4K XAVC. This gives a bit rate of…… drum roll……. 480Mb/s at 24/25/30fps. At 50 and 60fps it runs at a whopping 960Mb/s, this is the top limit for XAVC in it’s current form. Sony’s PMW-F5/F55 and the FS7 currently record XAVC using Class 300 which is up to 300Mb/s at 24/25/30fps or 600Mb/s at 50/60p. So as you can see Class 480 has the potential to improve the compressed image quality from these cameras still further should it ever make it into a camera. | |
Change to the 4K settings |
|
| User Menu | |
| Base Settings | |
| shooting mode - change to Cine EI | |
| Execute | |
Go to Color Space and choose which slog to use SLog3 extends dynamic range about 1.5 stops. So it might be best for very high contrast (high dynamic range) scenes, and SLog2 might be best for low contrast "flat" scenes. | |
S-Gamut3:
1) SLog3SG3toSG3Cine.cube (provided below) + 2) Either Sony provided Look Profile or 3DLUT
S-Gamut3.Cine:
| |
Use these Sony SXS Pro + |
|
Choose the basic HD XAVC 1920 x 1080P setting |
|
Now set to record press record on the Sony F5 camera and it will begin recording |
|
Now we need to load the files into a computer for editing |
|
Open Adobe Media Encoder |
|
Go to File>Add Source |
|
Make sure the Cineon/DPX File Sequence is checked and then navigate to the firs file of the folder with the lowest number |
|
Change the Format to QuickTime |
|
Click on the "Yellow" Preset to set the quicktime settings |
|
Choose the following: |
|
Click on Output File |
|
|
|
Click the green arrow to start the encode |
|
Open AVID and create a AVID 1920 x 1080 Color Space - RGB |
|
File>Import |
|
Click on Options |
|
Choose Image sized for current format |
|
Choose the file and the resolution as Apple ProRes 4444 MXF and select the Storage drive as the destination for the AVID file |
|
The import will fast import the video. You should see the term Fast Import or else the image is not coming in at 10 bit 4444 |
|


Overview
Content Tools