Confirm that you have your microphone and webcam properly installed and setup. Check your System Requirements for compatibility with Zoom. Check if you already have the Zoom application installed on your computer: Zoom provides an integration with Canvas that makes it very easy to set up class sessions, whether they be lectures, discussion sections, or any other meeting. These sessions are then automatically placed on participants' calendars within Canvas. To begin using Zoom through Canvas, you'll first have to authorize it. This will only need to be done the first time you use Zoom. To authorize Zoom to be used in Canvas:Verify Your Hardware
Installing Zoom
![]() > Scroll Start Menu to Zoom folder > Click "Start Zoom".
> Scroll Start Menu to Zoom folder > Click "Start Zoom".![]() > navigate to your Applications Folder > Zoom application will be listed.If you have a University-owned laptop, you might need Admin permission on your computer to install Zoom applications, plugins, and extensions.
> navigate to your Applications Folder > Zoom application will be listed.If you have a University-owned laptop, you might need Admin permission on your computer to install Zoom applications, plugins, and extensions.
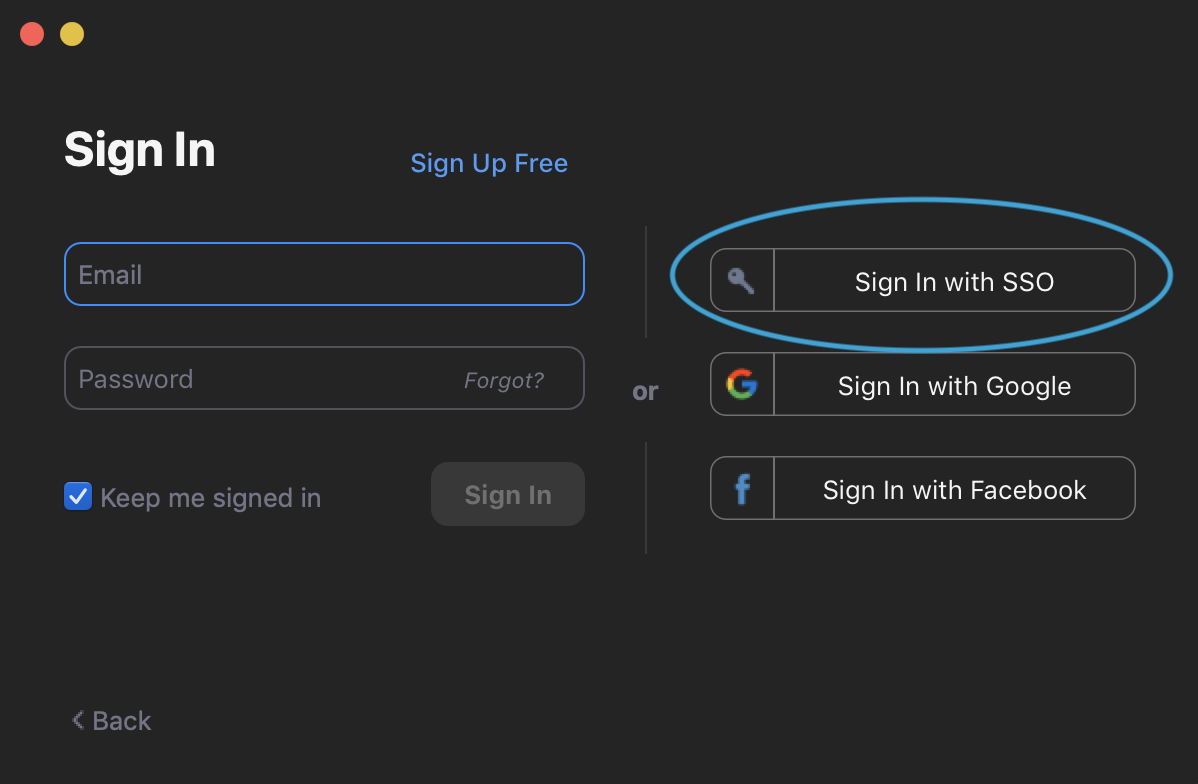
Download Zoom directly from any of the following links:Sign into the Zoom Desktop Client


Install the Zoom App for Mobile (iOS or Android)
Authorizing Zoom in Canvas


Overview
Content Tools