To Start the Self Contained QuickTime export of the Final Resolve Project click on the Deliver Tab | |
In the upper left corner click on Render Settings Choose >ProRes>ProRes Master | |
Make Sure Single Clip is selected and Title the Filenmae and choose a location to save the file | |
Click Browse to navigate to the folder you want to save the QuickTime | |
Pick a Storage Drive and folder to save the file Click OK | |
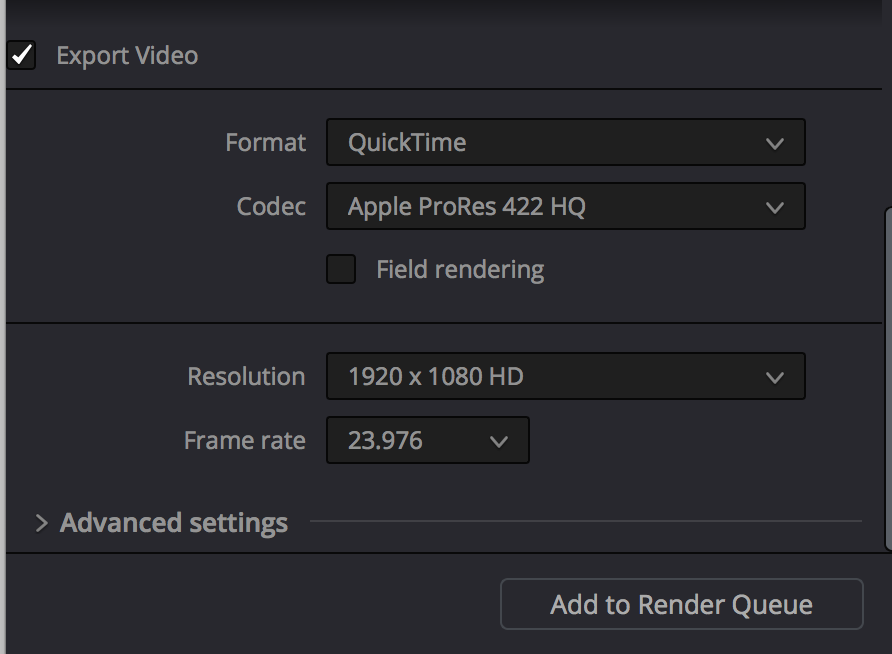
Make sure the Export Video is checked | |
Or if you would like to export a UHD 3840 x 2160 version choose that setting FPS 23.976 (or 24 or whatever frame rate your footage is) | |
Choose Advanced Settings Make sure Retain Sub-black and Super White Data is checked | |
Scroll back up in the tool and choose the Audio Tab Check the Export Audio box and set to Linear PCM, 24 Bit and Stereo | |
Choose to Start Render to create the QuickTIme |


