Note you need to use Davinci Resolve Studio - the "Free" version does not support this workflow
Open DaVinci Resolve |
|
Create a New Project or Open an existing project |
|
Click on the Media Tab at the bottom of the interface |
|
If you have a self contained QT export to caption |
|
If prompted to Change Frame Rate click Change so the project has the same frame rate as the media file |
|
Click on the Edit Tab |
|
Drag the clip to a new timeline Or if using an existing project open the timeline you would like to caption DUPLICATE your final version to make a copy as backup. Once you've made a duplicate of the timelineChange the timeline timecode starting at 1 hour to start at zero hour |
|
Go to Timeline |
|
If you are using the non Studio version of Resolve then you will get this message CMB 4.112 and CMB 4.120A has Resolve Studio and or call "Tech Staff" ask lab proctor |
|
Then make sure your settings are like the ones in the screen shot. >Press Create |
|
Then allow the captions to generate. This can take awhile. |
|
Then you should see a new track on your timeline with the completed subtitles. Double check them all for errors and revise. You may also add music cues and sound effects cues. |
|
Finally, if you are trying to playout via VLC you will need to change the timeline Start Timecode setting to start playback at 0 hour. Go to DaVinci Resolve locate the sequence you want to change in the Bin |  |
Right click it and >Timelines>Starting Timecode |  |
Set TimeCode to 00:00:00:00 |
|
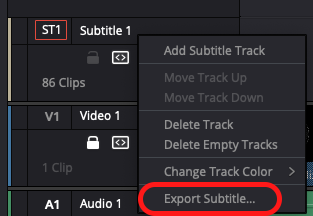
To export the generated subtitles as a .srt file, navigate to the subtitle track and right click Click on Export Subtitle... |
|
This menu should be called up Name your file and make sure you're saving it to the right destination Click Save |
|


Overview
Content Tools