Screen Recording with Screenface Cam
Screen Face Cam is a free screen recording application for computers running Microsoft Windows 7 and 8.
It can be download here: http://screenfacecam.com
An instructional video can be viewed here: https://www.youtube.com/watch?v=Dw6LHdPONrk
and another video for getting the best results can be viewed here: https://www.youtube.com/watch?v=Zfn1khtF8VU
(HEADING 1) STEP #:
<Insert Horizontal Rule under +Insert Tab>
Screen Face Cam is designed to use your webcam to display a Picture-in-Picture style video. Your webcam image will be placed in the lower righthand corner of the screen. This feature can be turned on or off. Audio from the computer's integrated microphone will also be recorded.
Screen Face Cam | Follow the steps below to get started |
|---|---|
After launching the Screen Face Cam application: Click on Cam and Mic
You must check Microphone (High Definition Audio) | 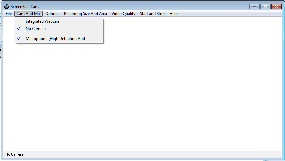 |
Next choose your Recording Size and Area To record the the entire screen choose: Select Full Screen
To record a certain size reduce or enlarge the Screen Face Cam window to the size you want to record and choose: Select Current Window Size and Position then make the window of what you want to record the same size and position it in the same area as the Screen Face Cam window. |  |
Choose your Quality
|  |
<Insert Table 2 Columns X 1 Row Under Table Tab>
Links to Outside Pages
How-to's and FAQs <Click the Link Tab, Search and find additional Wiki Doc Pages, Select Desired Page, Click Insert>
Meaning in Life <Click the Link Tab, Copy & Paste Web Page link in "Address" Field, Rename Link Title in "Link Text" Field, Click Insert>
Overview
Content Tools