Design | Stock Material
- Must be in the Design workspace

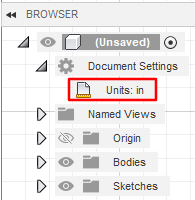
- Verify units for your scale
Create or Import your stock material to Fusion360
- Click create sketch

- Select your Work Coordinate System (WCS) between the X, Y plane with the Z going up

- Click create rectangle

- Select the 0,0 reference and pull the rectangle up and to the right of the WCS
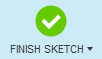
- Click finish sketch
- Click extrude sketch

- Measure your stock material and extrude your sketch to the same thickness
- Click create sketch
- Create your stock material within Rhino or another modeling program
- Export that stock model to a .stl file
- In Fusion360 select insert mesh

- Select your stock model .stl file
- Click OK
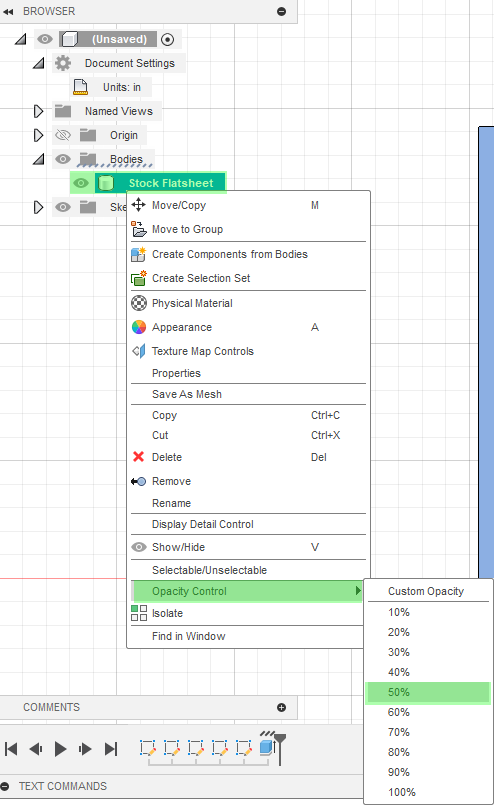
- Rename your stock material (body) to keep your workspace clean
- Change the opacity of your stock material by right clicking the item on the navigation tree>>opacity control>>50%
Design | Model
- Must be in the Design workspace
- On the top navigation bar, select Insert>>Insert Mesh
- Select your mesh model .stl file
- Click plane/sketch and select the plane between the X, Y
- Check your work coordinates orientation in the top right for clarity of X, Y positioning
- If having trouble selecting the correct plane, hide your stock material by checking the eyeball in your navigation tree. This makes the stock material invisible and allows you to click through it.

- Click OK to insert your file
Manufacture | Setups
- Must be in the Manufacture workspace

- On the top navigation bar, select new setup

- Setup tab
- Configure Work Coordinate System (WCS)
- Select the 0,0 ref point on the bottom of your stock material
- WCS should be on the X, Y plane
- Model
- Use the navigation tree to select your mesh model (best method)
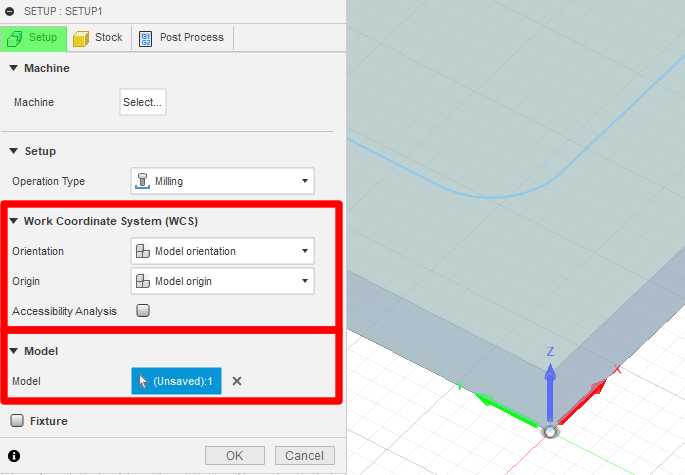
- Configure Work Coordinate System (WCS)
- Stock tab
- Stock
- Use the navigation tree to select your stock (best method)

- Stock
- Click OK
Manufacture | Create From Template
- Must be in the Manufacture workspace
- Right click the setup you just created and select 'create from template'
Setup will default name to 'setup 2' in your navigation tree - Select the template titled 2.5D Contours
- You should see new operation(s) load in from the template
- Select the edit icon (highlighted in red) to open template configuration
- Starting from left to right, we need to configure settings for this operation
 Tool tab
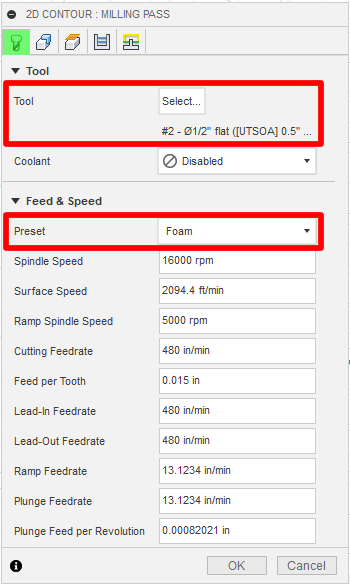
- Select the tool required for your job as referenced on Templates for Fusion360 wiki page
Tool = the bit used for this operation - Select a material preset
Preset = feeds & speed variables are baked into preset profiles
- Select the tool required for your job as referenced on Templates for Fusion360 wiki page
 Geometry
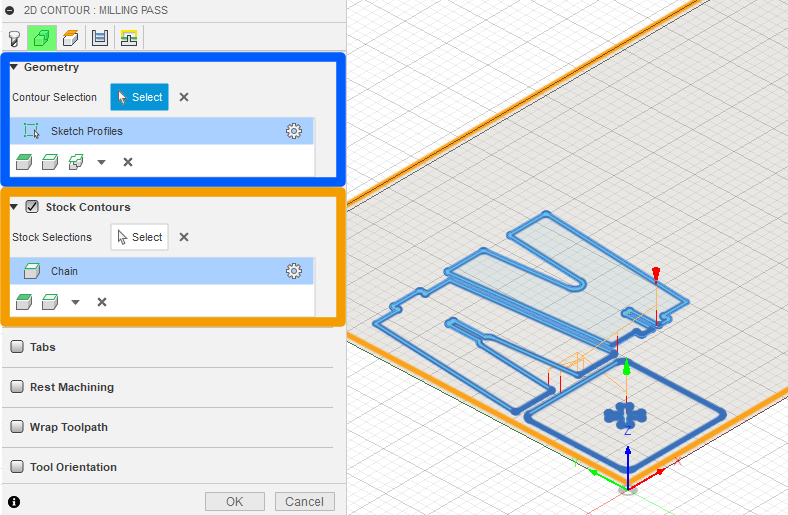
- Select Geometry
- Geometry = Line work for tool path
- Use the navigation tree to select your line work (best method)
- Geometry settings cog will display a window to select cutting on the inside or outside of a specified line
- Select Stock Contours
- Stock Contours = Creates a boundary box, keeping the tool within a certain perimeters
- Select the boundary stock contour
- Select Geometry
 Heights
- Is configured for the School of Architectures ShopBot CNC machines and should not be changed.
 Passes
- Is configured for the School of Architectures ShopBot CNC machines and should not be changed.
 Linking
- Is configured for the School of Architectures ShopBot CNC machines and should not be changed.


Manufacture | Simulate
- Must be in the Manufacture workspace
- Right click your setup template and select Simulate

- Watch the tool path simulation
- Take notes on the order of operations, making sure inner cuts are done before outer cuts
- Remember the simulation to help you out when you bring it to the ShopBot CNC as all the tool path and cuts will be exactly the same as in the operation
- Once the simulation looks good, proceed with post-processing
Manufacture | Post-Processing
- Must be in the Manufacture workspace
- Right click your setup template and select Post-Process

- Fill in the fields for
- Post = What type of machine?
- Use ShopBot OpenSBP found on Templates for Fusion360
- Name/number = Operation name within the ShopBot software
- May be left default
- File name = File name
- Recommended naming syntax 'EID - Operation type - Project'
- Comment = Displays during job
- Recommended to time and date the comment as multiple iterations may be needed to have a successful cut
- Output folder = location to save the file
- Will save as *file_name.sbp*
- Post = What type of machine?
