This page is currently being updated to bring it inline with other CNC applications
https://www.pensalabs.com/diwire-v1-support
Material Pricing: Due to the nature of the machine and how each type of material must be calibrated precisely, bendable material must be purchased from the UTSOA available stock.
Please see Items for Sale for more information on available materials.
Limitations:
- The CNC wire bender can only accept 2D bending projects. This means that if you plan to create a final project that is 3-dimensional, it must be composed of separate bends/pieces that are 2-dimensional and will be connected together at the end of your fabrication process. This can be accomplished through purchased pre-made connectors or soldering after bending.
- If the total length of one continuous piece of your project is more than approximately 63", it will need to be separated into two different bends. The machine must never feed the wire farther than the first feeding wheel, or your bend will not process. This means you should always leave the an extra 9" of wire unbent and attached to the back of your model piece; never trim the wire to exact size of your piece until after bending is complete!
File Prep: The CNC wire bender accepts .svg file extension types.
- Export your file as a .dxf extension from either Rhino or AutoCAD
- Open your file in Adobe Illustrator.
- If making multiple different bends (i.e. more than one bend that is non-identical to the first), separately save each piece of your project from Adobe Illustrator as a .svg. Do this by choosing "Save As..." from the File menu for each separate piece of your overall project and creating the .svg for it.

- Move the .svg file(s) to your flash drive.
Material Prep:
- Purchase your material from the IT staff members in Sutton Hall basement.
- Clean the grease off the wire by using the provided rubbing alcohol and paper towels. This prevents the wire slipping in the CNC machine.

- When your material and file are prepped proceed to fabrication in the Laser Cutter room and turn on the CNC wire bender. A blue light should come on.
- Load your material into the CNC wire bender as shown below. The wire end must be flush with the CNC's head, and not protrude past the front notch (shown in second picture).


Fabrication:
- Open "DIWire" from the desktop.
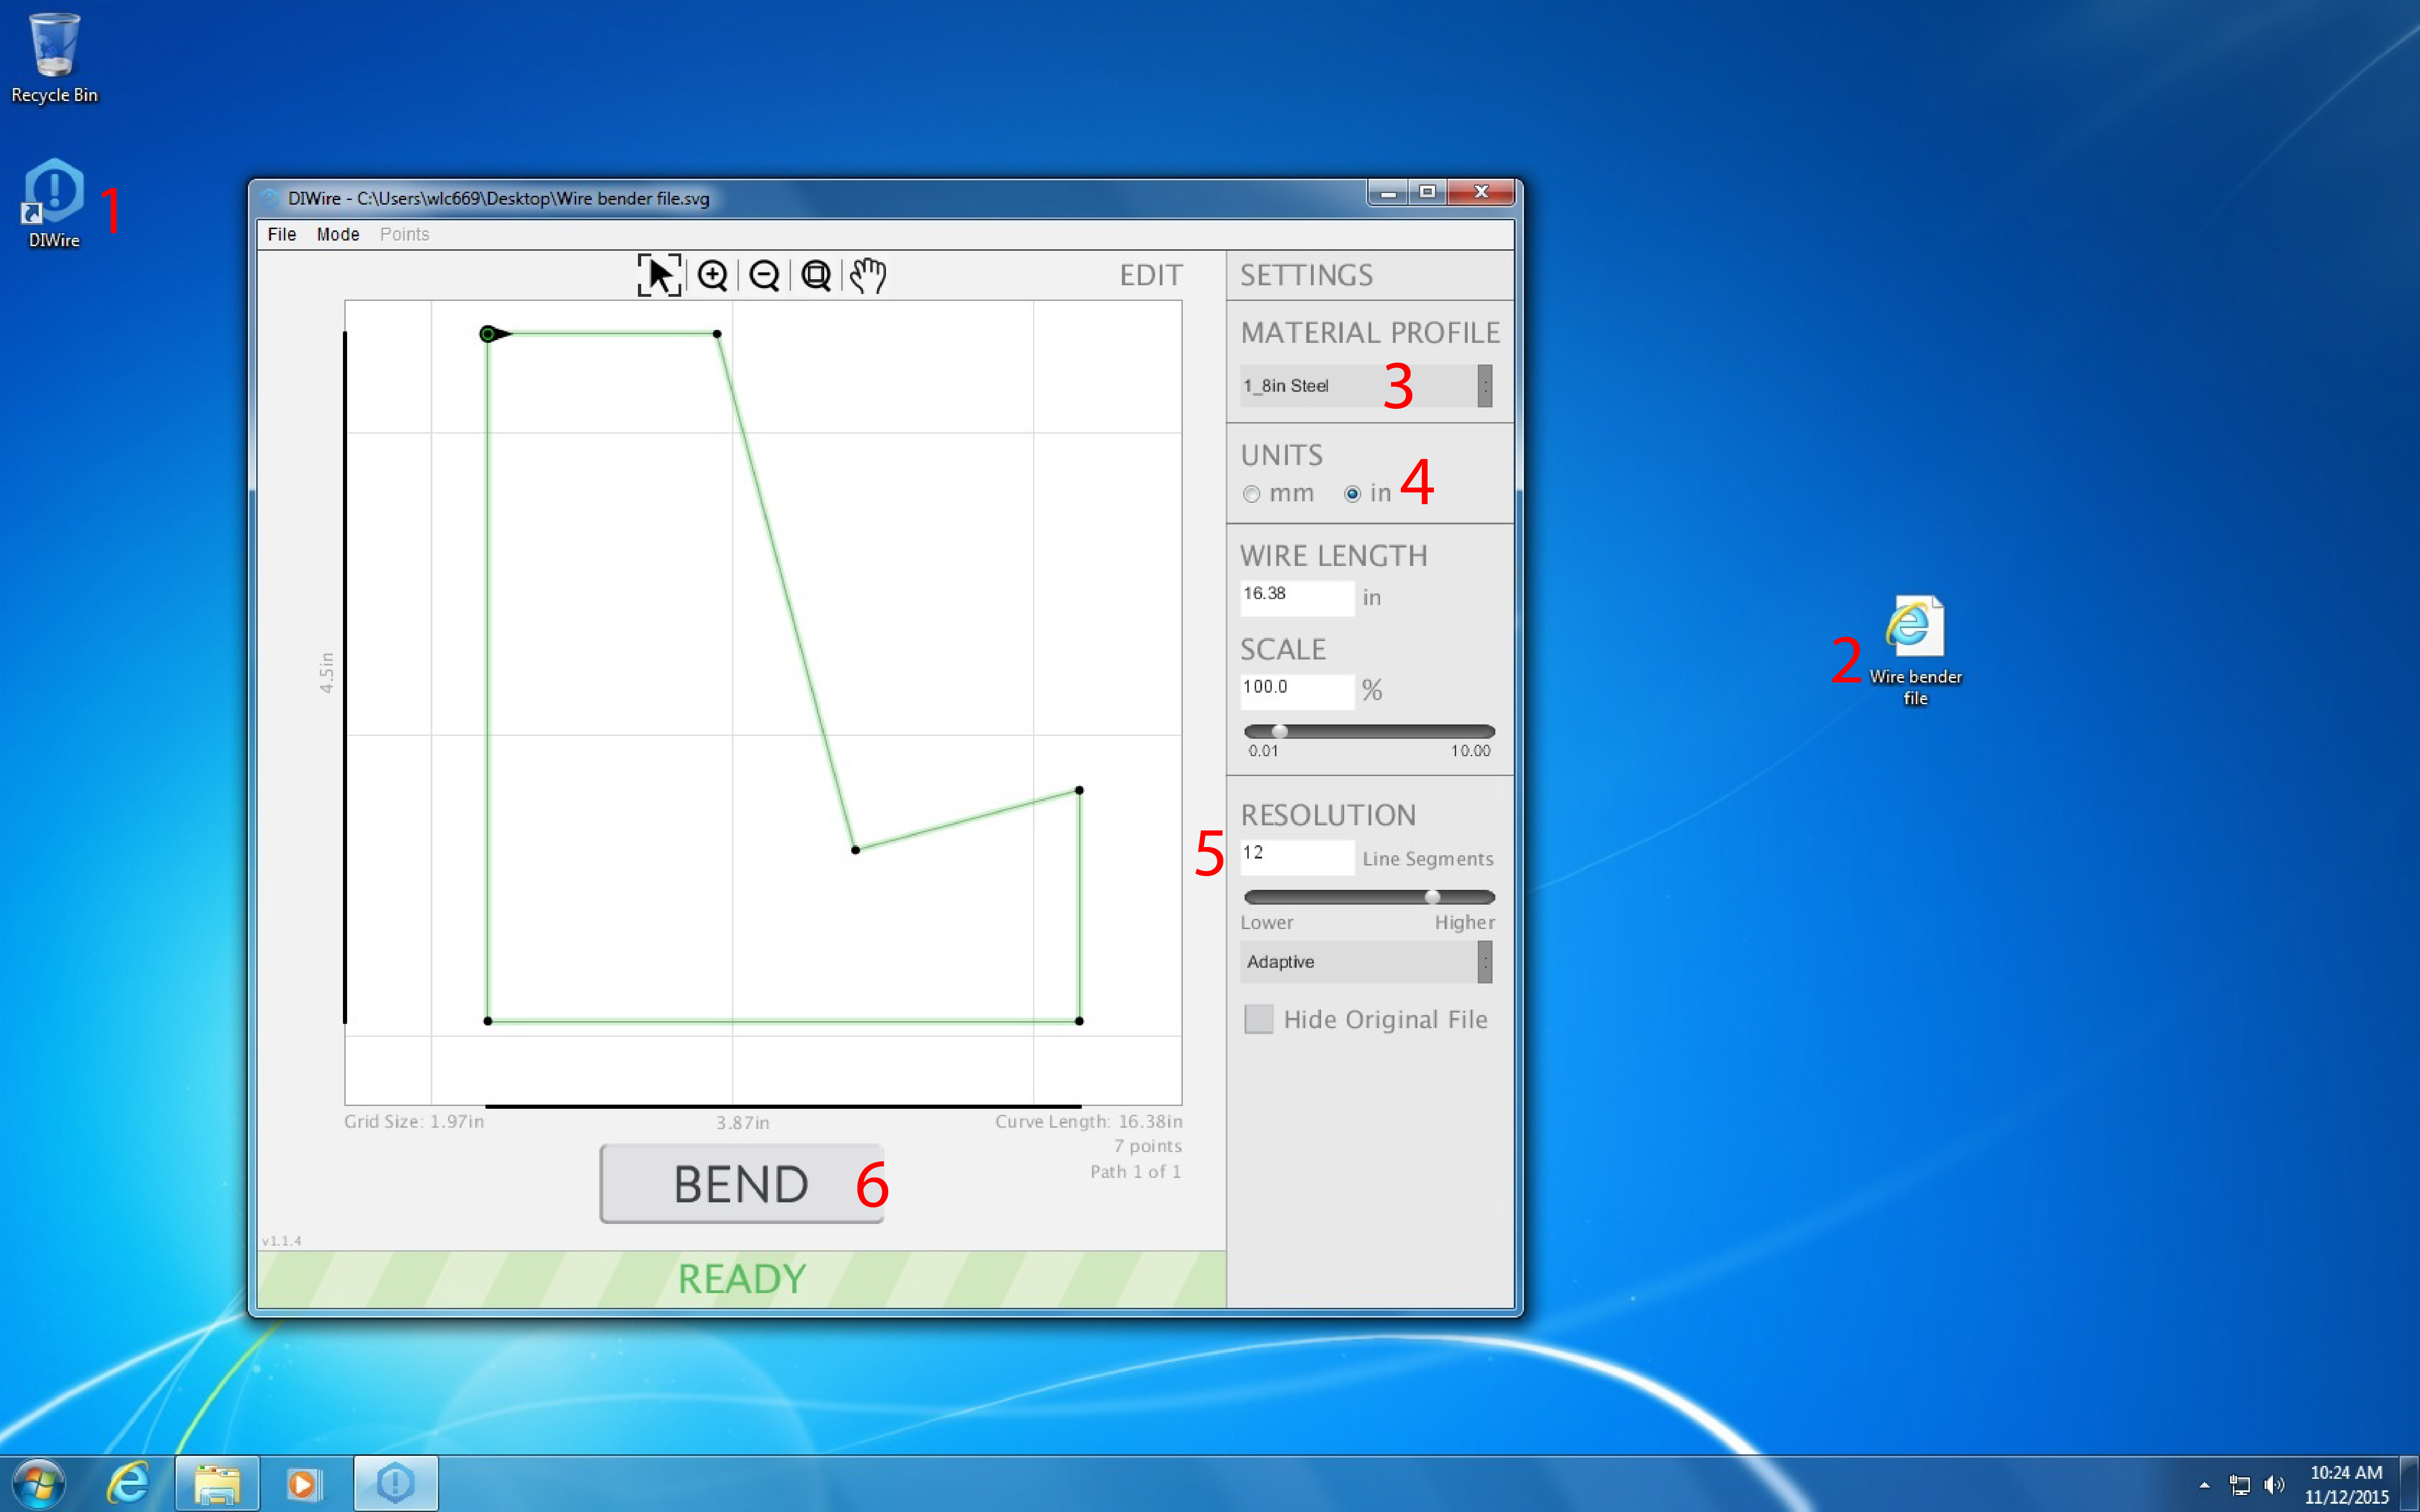
- Drag your first file into the DIWire program window.
- Select your material type (e.g., 1/8" steel).
- Change the units to inches or millimeters depending on your model.
- If bending arcs and smooth curves, increase the resolution to have higher number of line segments than the default 12. This will give you a smoother curve; you may need to test this setting to determine what is appropriate for your model.
- When you have your settings ready, the machine on, and your material properly loaded, press "BEND."
- The machine should now feed through on it's own and bend your project. You may need to lightly guide the wire into the feeding wheels if that machine gets caught.
- When the CNC wire bender is finished, use a pencil or marker to mark the wire right at the end of the notch (where you lined it up to start the process). This is the end of your piece.
- Cut the wire where you marked.

- If you have more files, continue bending by repeating fabrication steps 2-9.
- Turn off the CNC wire bender when you are finished by flipping the power switch. Log off & shut down the computer.