Download/Installation:
- Check to see if you already have "Code42" or "CrashPlan" installed (if your computer was set up by CNS IT, you should!) If you do – skip to CrashPlan Agent Sign In
- log in to https://utbackup.utexas.edu
- If you receive this error, please email help@cns.utexas.edu your EID to request access
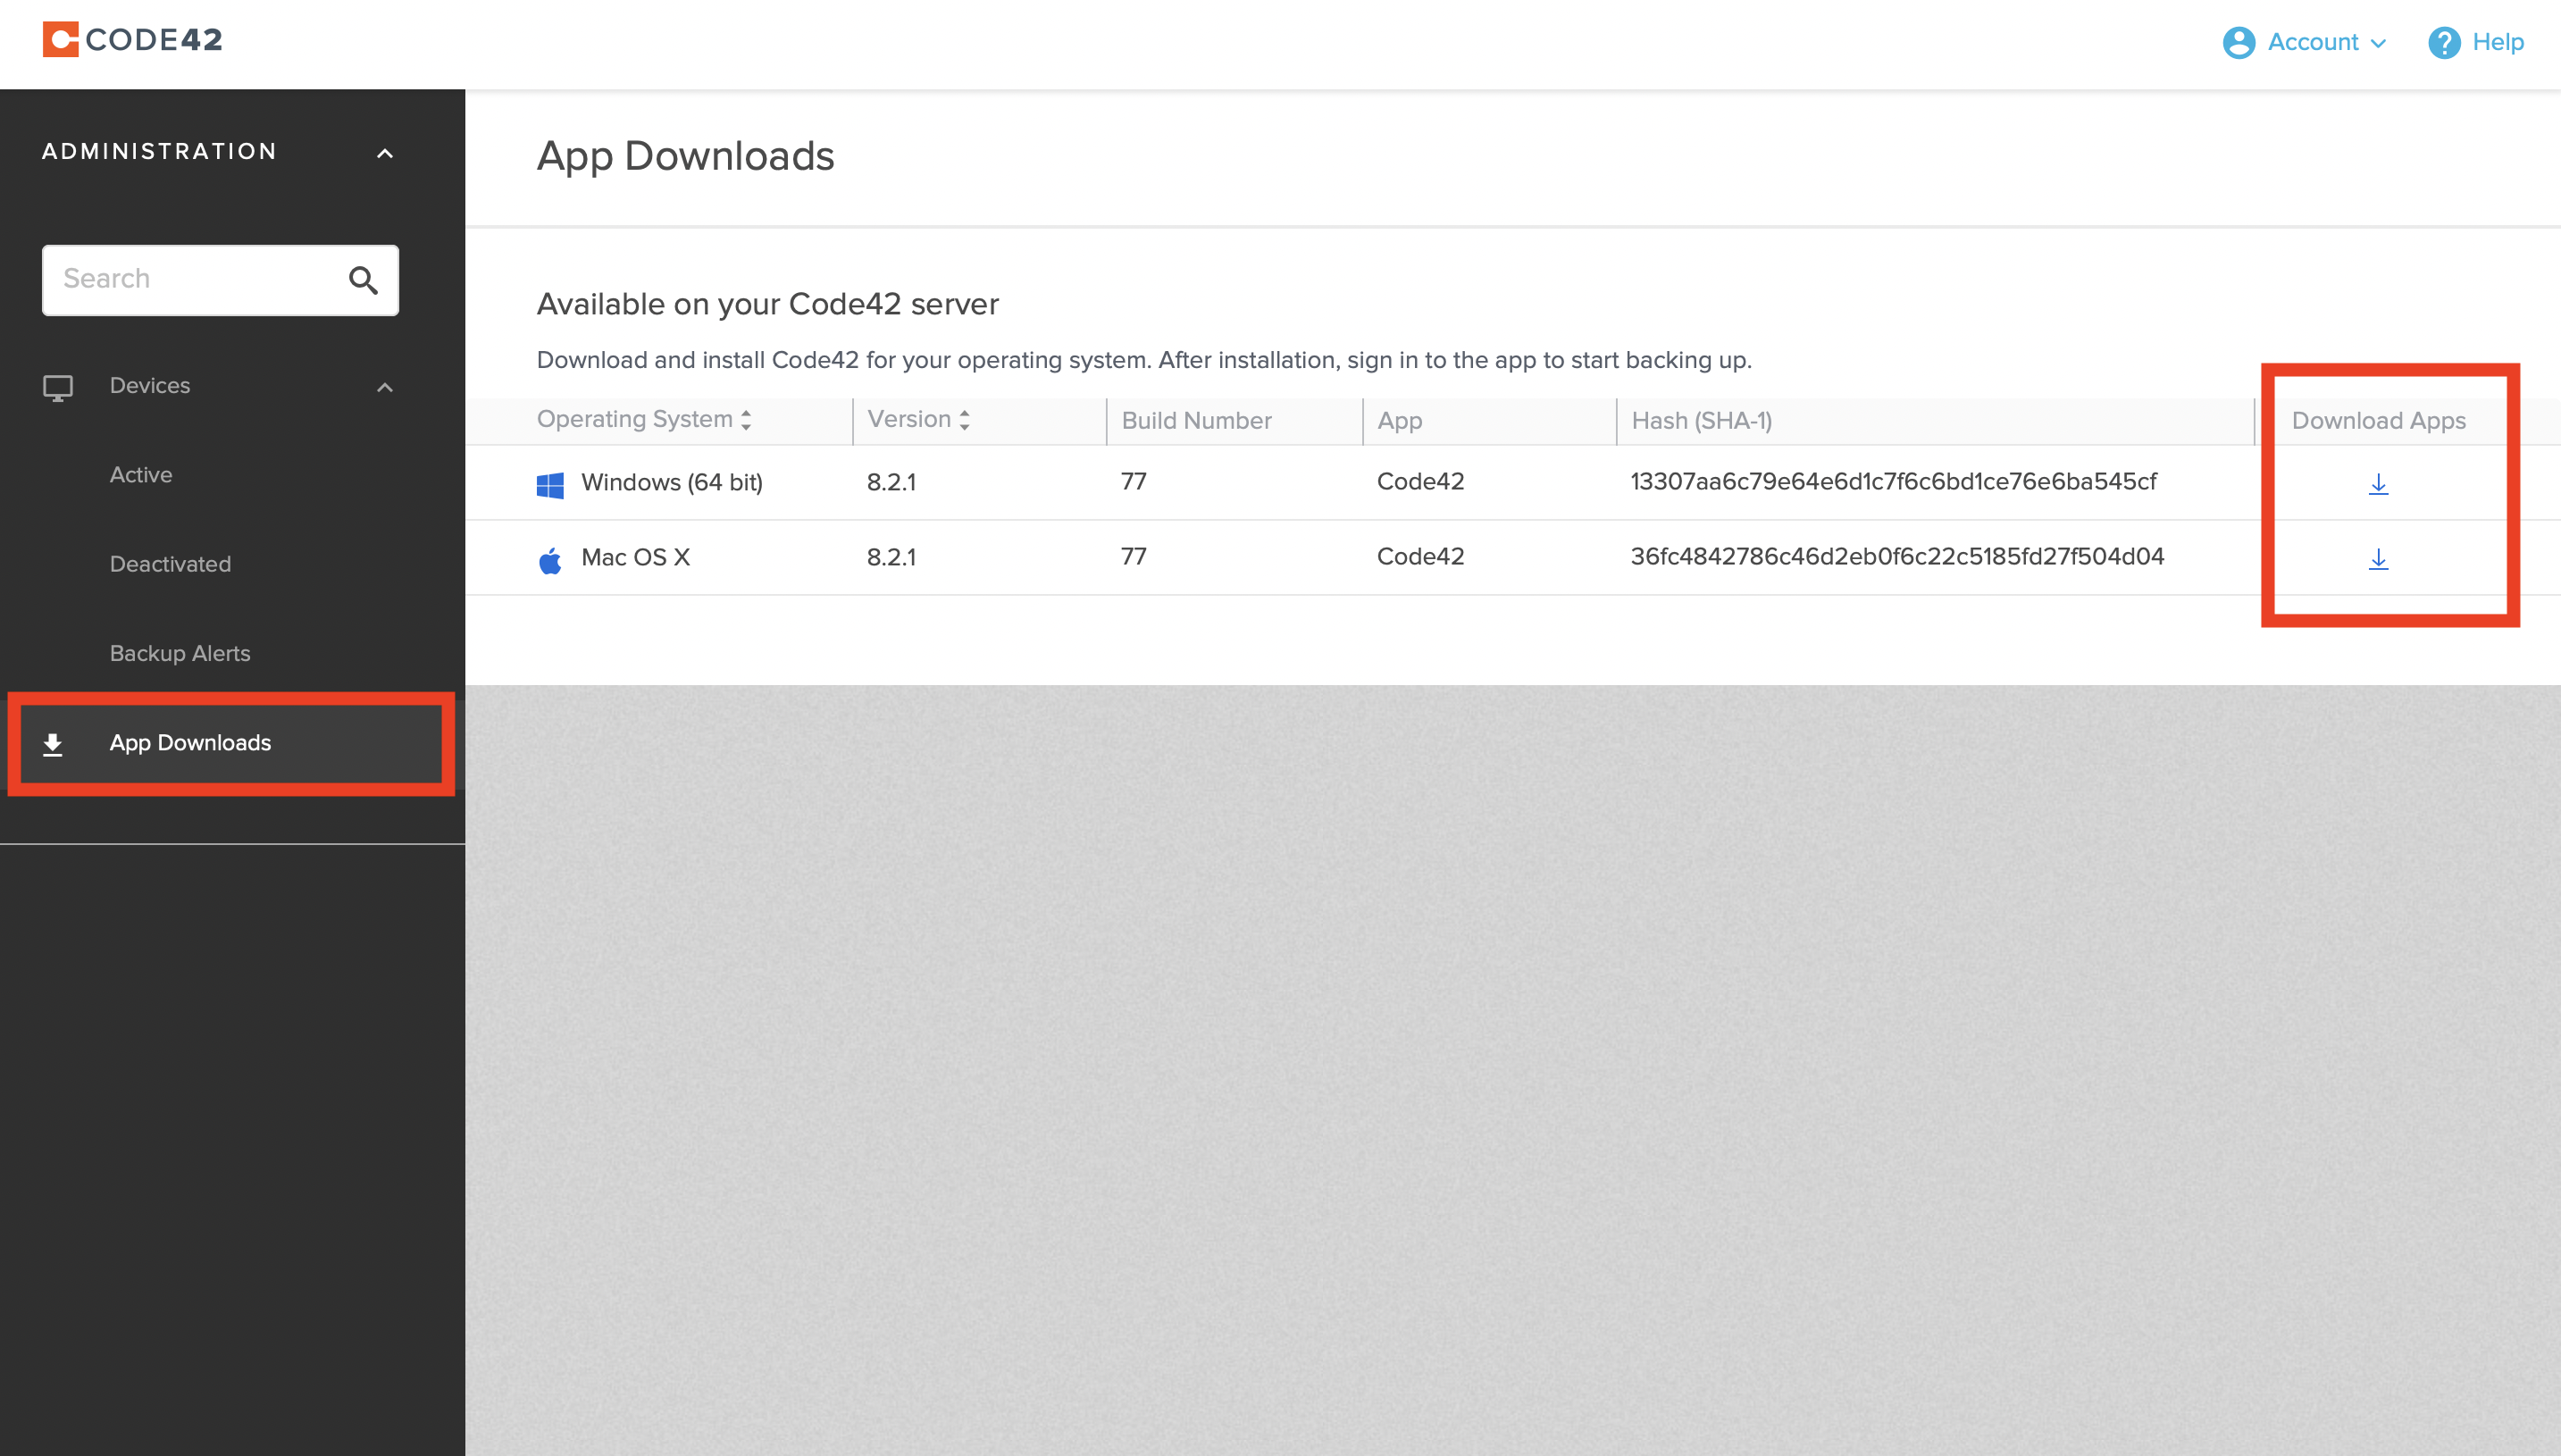
Click "App Downloads" in the left menu
Choose the appropriate installer for your OS.
- Run the installer from the downloads directory, or wherever the installer was saved.
- On Mac systems, open the .dmg file.
- It appears as a drive on the desktop.
- Open it.
- Run the installer.
- Follow the install prompts, providing administrator account credentials as necessary.

CrashPlan Agent Sign in:
- Open Code42 (aka CrashPlan) either by searching in the start menu (for Windows) or in your Applications folder (for Mac).
- Use your EID credentials in the username and password fields
- The Server Address is: cpmaster.its.utexas.edu
- If you receive an error at any point, please send a screenshot or the error text and your EID help@cns.utexas.edu
Configuration
- Click the "Manage Files" button.
- Select the user profile for backup by placing a check in the box next to it.
- We recommend selecting the whole user folder then unchecking folders you don't want to backup
- Click "Save".
Restore
Small restores can be done via the crashplan website at https://utbackup.utexas.edu
Large restores can be done via the client at the time of deployment.
It is highly recommended that large restores be done while the system is connected via ethernet.
Client
- Launch CrashPlan, and provide EID credentials.
- Click 'Get Files'
- Select the date you'd like to restore from using the 'As Of Today' date picker.
- Place checks in the boxes next to the desired folders and files.
- Click the 'Get Files' button at the bottom right corner of the window.
- Use the default options.
- Click the 'go' button.
The restore can take a while depending on a number of factors: the size of the files to be restored, the network connection type and quality, if the system sleeps/hibernates while the restore is running, etc.,.
If it is interrupted for any reason, the restore can be resumed, and it will continue where it left off.
Web
- It is recommended to use Chrome, Safari, or Internet Explore/Edge.
- Login to https://utbackup.utexas.edu.
- Find the device by click on devices on the left.
- Click the restore button
- Place checks in the boxes next to the desired folders.
- Click the "Restore" button.
- A progress bar will appear in the bottom left corner of the screen, this is CrashPlan compressing the selected files (it will be a single .ZIP file).
- IMPORTANT: Don't close the browser window
- Click on the "Click here to download" button.

Known Issues and Bugs
Restores over 1-2gb are cumbersome, unpredictable, and often fail via the web interface. Using the client to perform large restores is recommended.
For mac web restores (or if you did not select 'current permissions' on a client restore) --- you MUST apply permissions after the restore completes to the files via chown/chmod or using the finder GUI (as always - contact help@cns.utexas.edu if you need assistance.
Related articles
Overview
Content Tools